


8
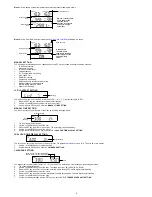
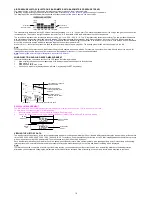
Alarm-On icon
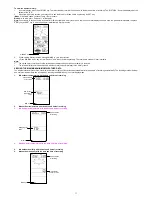
TO EXIT THE MANUAL SETTING MODE
To exit the manual setting anytime during the manual setting modes, press the
ALARM
key (or
HISTORY
key) or wait for the automatic timeout. The mode will return to
the normal time display.
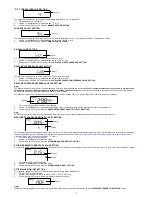
TIME ALARM SETTING
The alarm time can be set by the use of the
ALARM
and
SET
key.
1. Press
the
ALARM
key once. The “ALARM” icon and time digits are shown at the top right of the LCD.
2.
Press and hold the
SET
key for about 2 seconds. The hour digit of the alarm time will start flashing. Press the
+
or
MIN/MAX
key to set the hour of the alarm time.
3. Press
the
SET
key to confirm and advance to the minute setting. The minute digit will be flashing.
4. Press
the
+
or
MIN/MAX
key to set the minute of the alarm time. Press the
ALARM
key to confirm. Wait for about 30 seconds and the display will return to normal
display mode automatically.
5.
In the normal display mode, press the
ALARM
once key to go to the time
alarm-setting
mode again. Then press shortly the
SET
key to switch on or off the time
alarm. (The showing of the icon (((
y
))) means that the time alarm is switched on.)
6. Press
the
HISTORY
key or wait for about 30 seconds and the display will return to normal display mode automatically.
Note:
The alarm ringing duration is 2 minutes. To stop the alarm, press any key during the alarm ringing.
WEATHER ALARM OPERATIONS
The Weather alarms can be set when certain weather conditions are met according to your requirements. For example, you can set the thresholds for the outdoor
temperature to +104°F (high) and 14°F (low), while only enabling the high alarm and disabling the low alarm (i.e. temperatures <14°F won’t trigger alarm, but temperatures
>+104°F will).
The Weather Center can be set to alert when a specific weather condition is reached.
The following Weather Alarm settings can be adjusted in the ALARM setting mode.
•
High outdoor temperature alarm
•
Low outdoor temperature alarm
•
High outdoor humidity alarm
•
Low outdoor humidity alarm
•
High wind speed alarm
Default alarm values:
Low
32
°
F
Temperature
High
104
°
F
Low 45%
Relative
Humidity
High 70%
Wind speed
High
62.0mph
HIGH AND LOW OUTDOOR TEMPERATURE ALARM SETTING
Note:
The High and Low outdoor temperature alarm can be set On/Off independently, according to your needs.
Set the Outdoor temperature alarm value (High or Low alarm value) :
1.
In the normal display mode, press the
ALARM
key twice. The High Outdoor Temperature alarm display will be shown.
2.
Press and hold the
SET
key for about 2 seconds. The temperature digit will start flashing. Press the
+
or
MIN/MAX
key to set the high outdoor temp alarm value.
(Keep holding the key will allow the value to increase faster.)
3. Press
the
ALARM
key to confirm the setting. The digit will stop flashing. Press the
SET
key to switch on or off the alarm. (The showing of the icon (((
y
))) means that
the alarm is switched on.)
4. Press
the
ALARM
key once. The Low Outdoor Temperature alarm display will be shown.
5.
Press and hold the
SET
key for about 2 seconds. The temperature digit will start flashing. Press the
+
or
MIN/MAX
key to set the low outdoor temp alarm value.
(Keep holding the key will allow the value to increase faster.)
6. Press
the
ALARM
key to confirm the setting. The digit will stop flashing. Press the
SET
key to switch on or off the alarm. (The showing of the icon (((
y
))) means that
the alarm is switched on.)
7. Press
the
HISTORY
key or wait for about 30 seconds and the display will return to normal display mode automatically.
In case the temperature value meets the condition for high alarm or low alarm, the value will be blinking, along with the corresponding icon ("HI AL"/ "LO AL").
And the buzzer will ring for 2 minutes. User then may press any key to stop the ring.
User may quit the alarm setting and return to the normal display mode by pressing the
HISTORY
key.
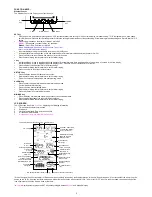
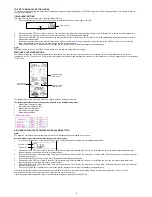
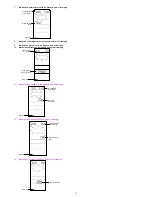
Alarm time digit
High wind speed
Alarm-On icon
Outdoor humidity
Alarm-On icon
Outdoor temp
Alarm-On icon
High alarm icon
Alarm-On icon