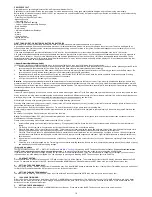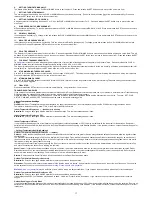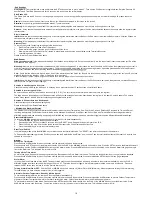
16
FAQ WS-1510-IT
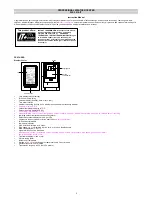
Congratulations on purchasing this state-of-the-art Professional Weather Center.
Remember, for your Weather Station to work properly, it must be started correctly, using good quality alkaline batteries, and the time must be set manually.
Before calling for technical support (1-888-211-1923), you may be able to correct the problem by first performing a Proper Restart, an Initial Set-up, and problem-solving
with the trouble-shooting guide.
-Proper Restart (Quick Set-up Guide)
-Mounting Sensors
– Program Set Up
--Indoor Temperature Readings
– Outdoor Temperature/Humidity Readings
--Wind Readings
--Rain reading
– Minimum and Maximum Readings
--Alarms
--History
– Forecast Icons
-Display information
– Power Source
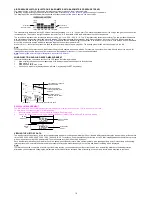
FIRST THINGS FIRST, OR BATTERIES, BATTERIES, BATTERIES
Batteries are the number one warranty issue that we have. We recommend new, plain alkaline batteries for our products.
A good alkaline battery will have an expiration date printed on it. Alkaline batteries are dated six to seven years beyond the current year. Therefore a battery with an
expiration date three years beyond the current year has already been sitting on a shelf for three to four years. Consider what happens to your car battery if you let it sit
unused for three to four years.
If you have a voltmeter and your older batteries test to 1.48 or better, they should power our products. New plain alkaline batteries often test to 1.6 or better.
Use good quality alkaline batteries with an expiration date of at least six years into the future or newer. If you are using questionable batteries, be sure they measure at
least 1.48 on a voltmeter. Generic or store brand batteries, and batteries labeled super, ultra, max, heavy duty, lithium and rechargeable should be avoided. These
batteries provide their power at different rates than plain alkaline batteries. This may cause problems, especially with the display unit. It is not always a low battery that
causes problems. It may be an overpowered battery.
– Proper Restart (Quick Set-up Guide)
In the event of installing or changing batteries in any of the units, all units need to be reset by following the setup procedures.
1.
Remove batteries from the Thermo-hygro (outdoor) sensor, Rain sensor and the Base station. With the batteries out of the Base station, press any button 20 times.
Let everything sit without batteries for 10 minutes. Verify that the Base station is completely blank before proceeding.
2.
Then disconnect and reconnect the Wind sensor cable (be sure it clicks into place). Reinsert the batteries into the Thermo-hygro sensor and the Rain sensor. Be
sure to use a new, quality alkaline battery (heavy duty and rechargeable types should be avoided)
3.
Reinstall batteries in the Base station and do not press any other buttons for AT LEAST 10 minutes while the station completes its startup sequence. Pressing
buttons before that time may prevent a good connection to the sensors.
4.
All of your sensors should be reading on your display.
Batteries:
Use good quality alkaline batteries with an expiration date of at least six years into the future or newer. If you are using questionable batteries, be sure they
measure at least 1.48 on a voltmeter. Generic or store brand batteries, and batteries labeled super, ultra, max, heavy duty, lithium and rechargeable should be avoided.
These batteries provide their power at a different rate than plain alkaline batteries. This may cause problems, especially with the display unit. It is not always a low battery
that causes problems. It may be an overpowered battery.
Mounting Sensors
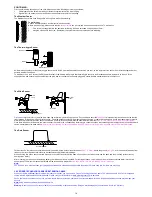
It is best to set everything up in the house to be sure it works before mounting the sensors. Tip the Rain gauge and spin the Wind sensor, to be sure they read to the base.
We do not have a complete sensor installation guide as each Home Installation is different and covering all of the variables would result in a guide far longer than anyone
would be willing to read. Our website http://www.lacrossetechnology.com/support/setup.php has some tips.
With that said, here are a few general guidelines to remember when installing your sensors:
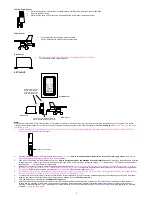
Place the Wind sensor as high as you can install it. In most cases 4-6 ft above the peak of your roof (or more) is required for accurate readings. (Avoid tall trees or other
obstructions that may block or reflect the wind).
Be sure to observe the Directions listed on the sensor. The point of the vane will tell you where the wind is coming from.
Please carefully thread the Wind cord through the mast and be sure the cord fits in the
slot or hole designed to prevent pinching
. Please note the proper Direction when
mounting.
Be sure not to overtighten U bolts to mast, as they can crack the mast.
Avoid:
Transmitting antennas. PVC pipe (unless electrical grade) as a mast, improper extension cords (phone cord is much more resistant than our sensor cord) and
modifications of the cords in any way.
Please note most recording stations have sensors mounted 33 ft up or higher.
5.
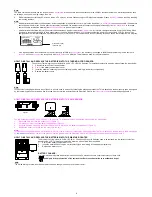
Install the Rain gauge on a level platform that is stationary. If the gauge isn't level it will read low, and it it isn't stationary wind will cause it to read rain that isn't
falling.
Tip: Be sure not to screw the rain sensor down too tightly as that will result in a low or inaccurate reading.
6.
Place the Rain gauge 2-3ft (or more) above the ground. This will prevent dirt from clogging the gauge and will place it higher than most insects are willing to climb.
Placing the gauge extremely high is generally not a good idea as you may need to periodically clear debris such as leaves, spider nests etc.
7. Place the Thermo-hygro sensor in a well-shaded area that is protected from direct rainfall and sun, as it will read high if exposed to the sun. If the sensor gets too
wet it will never read accurate humidity again, so take care to ensure that it will not be exposed to a downpour. Light incidental exposure to water typically will not
harm the sensor.
8-
A good location is under the eaves on the north side of the house. You can also build a small roof or box for it if you do not have an overhang. Please be sure it is
well vented.
9-
Your Wind cord, must be plugged into the Thermo-hygro sensor
before
installing batteries. Be sure the cord is secured from blowing around (do not staple or pinch),
and occasionally check for animals chewing through.
–Program Set Up Menu
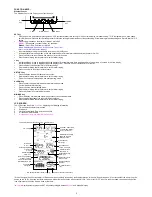
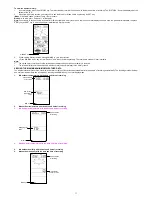
There are five function keys: SET, +, HISTORY, ALARM, and
MIN/MAX. You begin
by pressing the SET button until the display flashes. When you press and release
the SET button after each step, you will be moved to the next step. You may exit the programming mode at any time by pressing the ALARM button.
If you take more than 5 seconds to change a setting, the unit will return to normal display mode. If you are not finished with changing your settings, you do not need to
repeat the steps you have already completed. You can skip steps by pressing and releasing the SET button until you get to the next step.
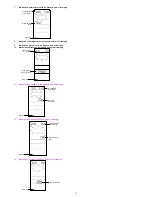
1.
CONTRAST SETTING:
Press and hold the SET button for five seconds. LCD and a number from 1-8 will be flashing. To increase the contrast of the LCD display, press and release the PLUS
button. To decrease the contrast of the LCD, press and release the MIN/MAX button. Press and release the SET button once to move to the next menu item.
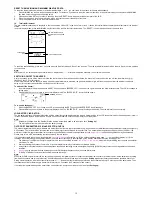
2.
SETTING THE HOUR MANUALLY:
The Hour will be flashing. Use the PLUS button to increase the hour. Use the MIN/MAX button to decrease the hour. If using 12-hour Time Mode, be sure to set the hour
for AM or PM. Press and release the SET button once to move to the next menu item.
3.
SETTING THE MINUTES MANUALLY:
The Minutes will be flashing. Use the PLUS button to set the minutes. Press and release the SET Button once to move to the next menu item.
4.
12/24-HOUR TIME MODE:
Either 12h or 24h will be flashing on the display. Use PLUS or MIN/MAX button to change from 12 to 24 hour format time (12h for AM/PM, 24h for world time). Note:
When in the 12h mode, there is only a "PM" display, which appears under the word TIME. During the "AM" hours, this area will be blank. Press and release the SET
button once to move to the next menu item.
5.
SETTING THE YEAR MANUALLY:
The Year will be flashing. Use the PLUS or MIN/MAX button to set the year. Press and release the SET button once to move to the next menu item.

