

II.
THE REMOTE WIND SPEED SENSOR
The remote wind speed sensor can be mounted several ways:
•
bold
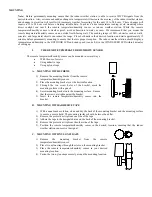
A. MOUNTING
WITH
SCREWS
1) Unlock the mounting bracket from the remote wind speed sensor leaving the wire going through the
2)
mounting bracket over the desired location.
ounting surface with a pencil.
t against the
5)
remote wind speed sensor onto the bracket making sure to lock it in place.
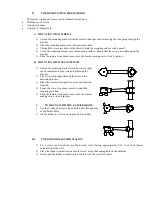
B. MOUNTING WITH NYLON STRAPS
1) Unlock the mounting bracket from the remote wind
2)
nylon straps through the slots on the
3)
nd speed sensor in your desired
4)
wo nylon straps securely around the
5)
d speed sensor onto the bracket
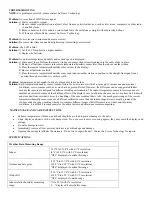
C. TO
MOUNT
WITH
THE U-SHAPED BOLT:
ach
2.
ast by using the nuts provided
III.
THE INDOOR WEATHER STATION
1) Fix a screw (not included) into the desired wall, leaving approximately 3/16 of an inch (5mm)
2)
station onto the screw using the hanging hole on the backside.
With the use of screws
•
Using nylon straps
•
Using the U-shaped
bracket.
Place the
3) Through the two screw holes of the bracket, mark the m
4) Screw the mounting bracket onto the mounting surface. Ensure that the screws are tigh
bracket.
Slide the
speed sensor leaving the wire going through the
bracket.
Place two
mounting bracket.
Place the remote wi
location.
Fasten the t
mounting location.
Slide the remote win
making sure to lock it in place.
1. Use the U-shaped bolt provided and thread it through e
of the holder holes.
Fix the holder to a m
extended from the wall.
Place the indoor weather
3) Gently pull the indoor weather station down to lock the screw into place.


