background image


12 OR 24 HOUR TIME FORMAT: 

The Time may be displayed in 12-hour or 24-hour format. Default is 12-hour time. 

Note

: When in 12-hour format AM or PM will show in front of the hour.   


1.  1

2H

 will flash. 

2.  Press and release the 

+ or -

 button to select 24-hour time. 

3.  Confirm with the °F/°C button and move to 

Set Time


SET TIME: 

To set the time manually: 


1.  The 

hour

 digit will flash. 

2.  Press and release the 

+ or -

 button to select the hour. 

3.  Press and release the °F/°C button


to set the 

minutes

.  

4.  The 

minute

’s

 digit will flash.   

5.  Press and release the 

+ or -

 button to select the minutes. 

6.  Confirm with the °F/°C button


and move to 

Set


Calendar

.  


SET CALENDAR: 

The date default of the Digital Atomic Clock is 1. 1. 2010.  
To set the calendar: 


1.  The 

year

 will flash. 

2.  Press and release the 

+ or -

 button


to set the year (between year 2010-2039).  

3.  Press the °F/°C button


again to confirm and to enter the 

month

 setting.  

4.  The 

month

 will flash. 

5.  Press and release the 

+ or -

 button


to set the month.  

6.  Press the °F/°C button


again to confirm and enter 

date 

setting.  

7.  The 

date

 will flash. 

8.  Press and release the 

+ or -

 button to set the date.


9.  Confirm all calendar settings with the °F/°C button


to confirm and 

exit

 the program menu.


Note:

 The day of the week will set automatically once the year, month and date are set.


FAHRENHEIT/CELSIUS:


1.  Press and release the °F/°C


button once to switch from Fahrenheit to Celsius. 
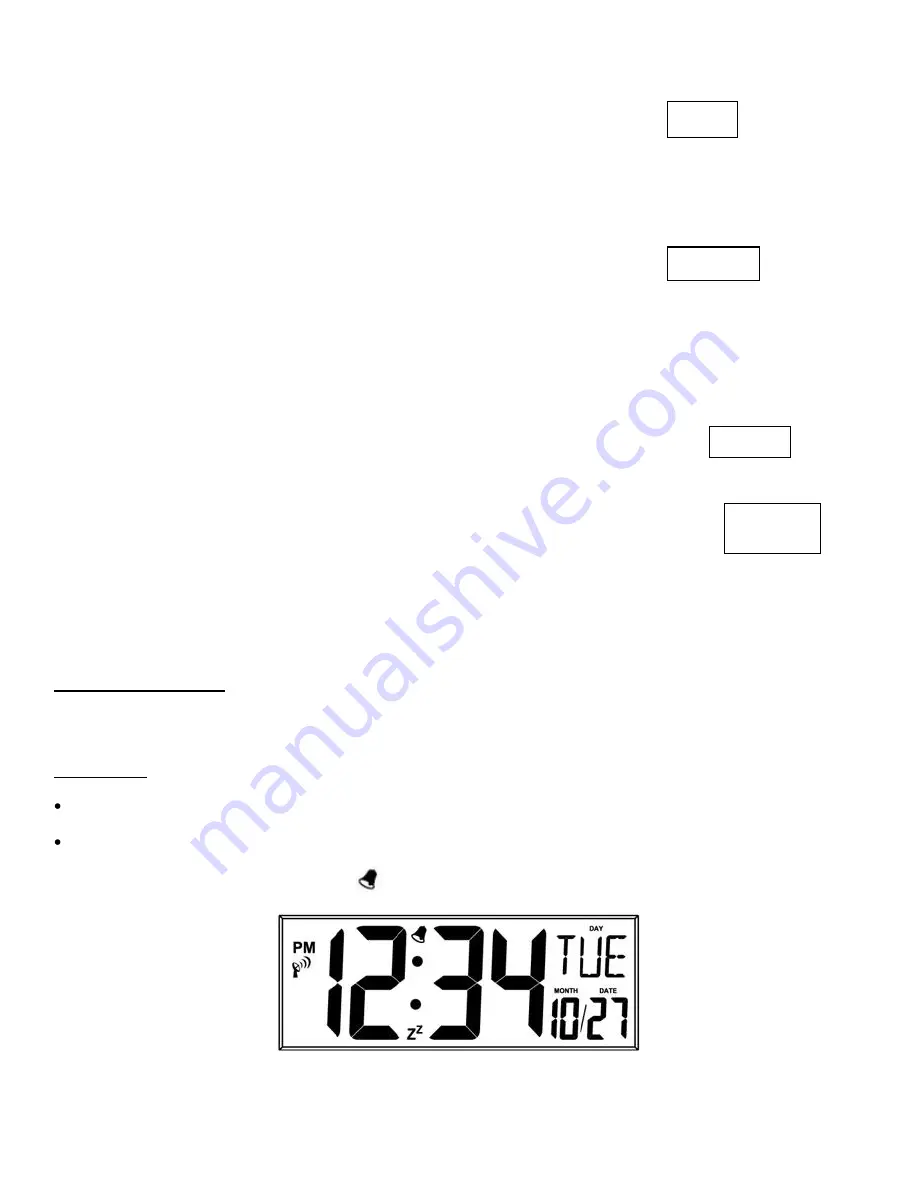


ALARM SET:


Alarm Hour

: Hold the ALARM button to enter alarm time setting mode. The Alarm Hour will flash. Use the 

+ or -

 button 

to set the Hour. Press and release the ALARM button to confirm and move to the minutes.  


Alarm Minute

: The Alarm Minutes will flash. Use the 

+ or -

 button to set the Minutes. Press and release the ALARM 

button to exit. 

Note

: When the alarm sounds the alarm icon 

will flash. 


12Hr         

2010 

Month  Date 

   1 / 1 

12:34 

Summary of Contents for K86302

Page 1: ...indoor and outdoor temperature on an easy to read display Receives signal from the Atomic Clock in Colorado for accurate time DIGITAL ATOMIC WALL CLOCK OUTDOOR TEMPERATURE TRANSMITTER TX14 Digital At...

Page 2: ...CELSIUS 5 ALARM SET 5 ALARM ACTIVATION 6 SNOOZE 6 TEMPERATURE TREND ICONS 6 LOW BATTERY INDICATIOR 6 OUTDOOR TRANSMITTER RECEPTION ICON 6 INSTALL BATTERIES IN THE DIGITAL ATOMIC CLOCK 7 INSTALL BATTE...

Page 3: ...art searching for the WWVB time signal for 2 10 minutes at start up WWVB RADIO CONTROLLED TIME The NIST radio station WWVB is located in Ft Collins Colorado and transmits the exact time signal continu...

Page 4: ...n the WWVB reception OFF 1 Hold the F C button for 5 seconds 2 WWVB and ON will flash 3 Press and release the or button to turn this OFF 4 Confirm with the F C button and move to the Time Zone TIME ZO...

Page 5: ...en year 2010 2039 3 Press the F C button again to confirm and to enter the month setting 4 The month will flash 5 Press and release the or button to set the month 6 Press the F C button again to confi...

Page 6: ...temperature trend indicators are updated every 30 minutes Trends arrows represent temperature changes over the past three hours Example At 3 00pm compare temperature readings to 12 00pm At 3 30pm com...

Page 7: ...vices in order to best receive the outdoor temperature transmitter signal Foldout Table Stand A foldout table stand is located on the back of the clock Pull the stand out from the bottom center edge o...

Page 8: ...damp cloth Do not use solvents or scouring agents The Digital Atomic Clock is not a toy Keep it out of reach of children The Digital Atomic Clock is not to be used for medical purpose or for public i...

Page 9: ...ever is longer La Crosse Technology Ltd will pay all expenses for labor and materials for all repairs covered by this warranty If necessary repairs are not covered by this warranty or if a product is...

Page 10: ...rference received including interference that may cause undesired operation NOTE THE MANUFACTURER IS NOT RESPONSIBLE FOR ANY RADIO OR TV INTERFERENCE CAUSED BY UNAUTHORIZED MODIFICATIONS TO THIS EQUIP...

Reviews: