INSTALLATION
Check the appliance is electrically safe and gas sound when you have finished.
23
Cooker
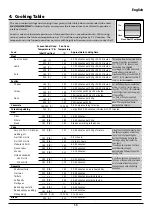
Outer stability
bracket
Floor
Wall
3 mm min
Typical wall mounting
Restraining
chain
ArtNo.070-0014 - Stability bracket - Wall fitting
Cooker
Stability bracket
Floor
3 mm min
Typical floor mounting
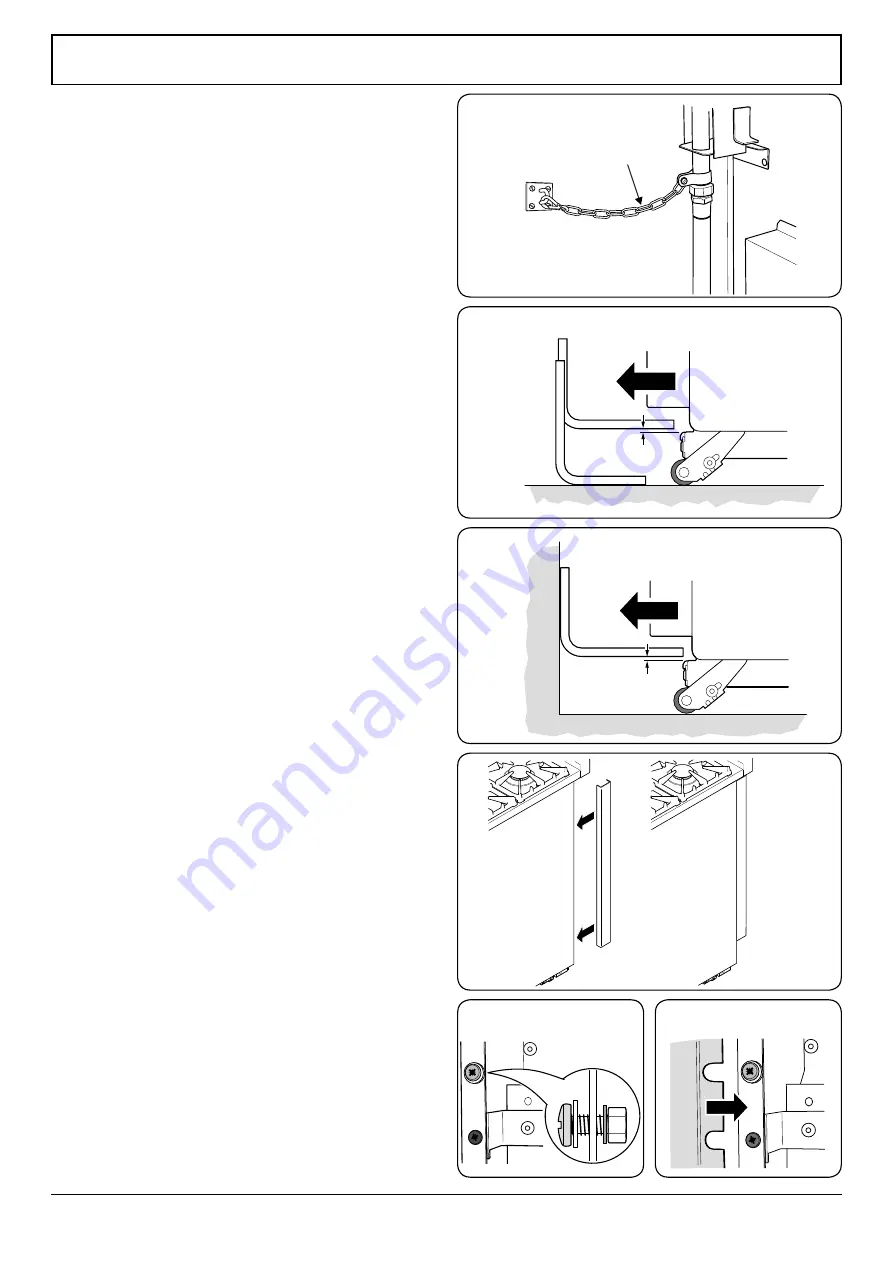
Fitting the Stability Bracket or Chain
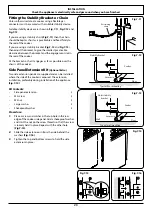
Unless otherwise stated, a cooker using a flexible gas
connector must be secured with a suitable stability device.
Suitable stability devices are shown in Fig.7-11, Fig.7-12 and
Fig.7-13.
If you are using a stability chain (Fig.7-11) then the chain
should be kept as short as is practicable and fixed firmly to
the rear of the cooker.
If you are using a stability bracket (Fig.7-12 and Fig.7-13),
then adjust the bracket to give the smallest practicable
clearance between the bracket and the engagement slot in
the rear of the cooker.
Fit the bracket so that it engages as far as possible over the
chassis of the cooker.
Side Panel Extension Kit
(Optional Extra)
Two side extension panels are supplied and can be installed
where the side of the cooker is exposed. The extension
installation, preferably during installation of the appliance
(Fig.7-14).
Kit Contents:
•
Side panel extension
2
•
M5 screw
4
•
M5 nut
4
•
Large washer
4
•
Shakeproof washer
4
Procedure:
1.
Place a screw and washer in the top hole in the rear
edge of the cooker side panel. Add a shakeproof washer
and start the nut on the screw threads so that the screw
is loosely held in place. Repeat with the other hole
(Fig.7-15).
2.
Slide the side extension in from the side behind the
washers (Fig.7-16).
3.
Tighten the top and bottom screws to hold the side
extension in place.
Fig.7-11
Fig.7-12
ArtNo.280-0070 - Side extension A
Fig.7-15
ArtNo.280-0071 - Side extension B
Fig.7-16
ArtNo.281-0004 - 90SC
- Fitting the side panel
ArtNo.281-0005 - Albertine SC
- Side panel in place
Fig.7-14
Fig.7-13
Typical floor mounting
Typical wall mounting
Summary of Contents for AlberTine 90
Page 64: ...14 ...

