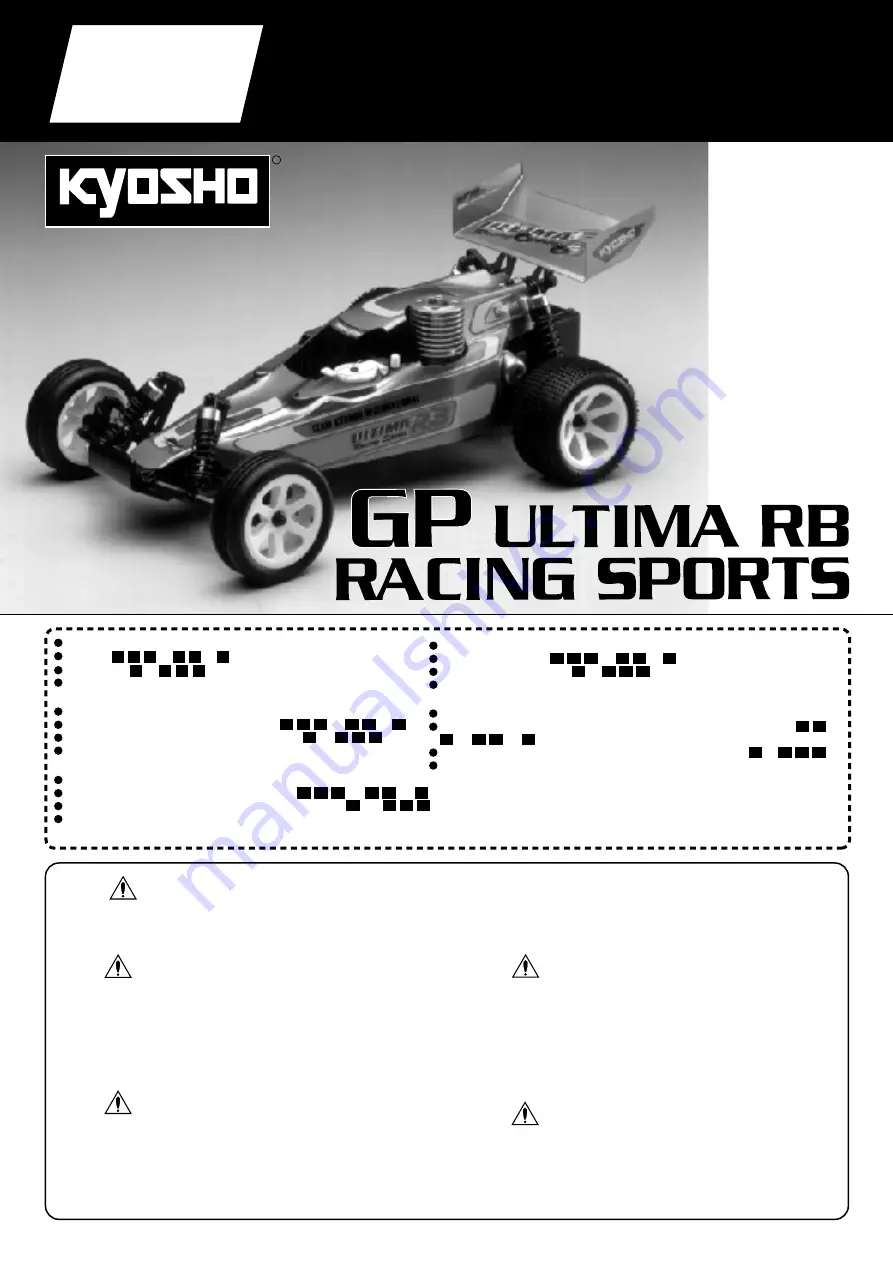
background image

THE  FINEST  RADIO  CONTROL  MODELS

R

※製品改良のため、予告なく仕様を変更する場合があります。

Specifications are subject to change without prior notice!

Technische  nderungen sind ohne vorherige AnkŸndigungen mšglich! Les sp cifications peuvent changer sans pr avis!

安全のための注意事項

この無線操縦模型は玩具ではありません!

●小さい部品があるので、組立て作業は幼児の手がとどかない所で必ずおこなっ

てください。

●動かして楽しむ場所は、万一の事故を考えて安全を確認してから、責任をもっ

てお楽しみください。

●組立てた後も、説明書がいつでも見られるように大切に保管してください。

●この商品は高い性能を発揮するように設計されています。組立てに不慣れな方は、模

型を良く知っている人にアドバイスを受け確実に組立ててください。

SAFETY PRECAUTIONS

This radio control model is not a toy!

First-time builders should seek advice from people having building experience in order to 
assemble the model correctly and to produce its performance to full extent.

Assemble this kit only in places out of childrenÕs reach!

Take enough safety precautions prior to operating this model.  You are responsible for this 
modelÕs assembly and safe operation!

Always keep this instruction manual ready at hand for quick reference, even after completing 
the assembly.

ACHTUNG!

Dieses Modell ist kein Spielzeug!

AnfŠnger sollten mšglichst Rat bei Modellbaukundigen einholen, um das Modell richtig 
zusammenzubauen und gefahrlos bedienen zu kšnnen.

Bauen Sie dieses Modell nur au§er Reichweite von Kindern zusammen!

Treffen Sie genŸgend Sicherheitsvorkehrungen, bevor Sie Ihr Modell bedienen!  Sie 
alleine tragen die Verantwortung fŸr Ihr Modell und dessen gefahrlose Bedienung!

Bitte bewahren Sie diese Dokumentation zur spŠteren Verwendung auf.

ATTENTION!

Ce mod le nÕest pas un jouet!

Si vous  tes d butant dans le mod le r duit, prenez conseils aupr s de mod listes 
con-firm s afin dÕutiliser votre mod le dans des conditions optimales.

Assemblez ce kit en dehors de la port e de jeunes enfants!

Prenez des pr cautions lors de lÕutilisation.  Vous seul  tes responsable des  
volutions de votre mod le.  La soci t  KYOSHO ou son distributeur ne peuvent 
en aucun cas  tre tenus responsables des accidents pouvant survenir lors de 
lÕutilisation de ce mod le!

Gardez cette notice ˆ port e de main afin de vous y r f rer rapidement.

    ※ご使用前にこの説明書を良くお読みになり十分に理解してください。

   Before commencing assembly, please read these instructions thoroughly.

  Bitte lesen Sie die Anweisungen vor Gebrauch genau durch!

 Veuillez attentivement lire les instructions avant lÕemploi!

Lea cuidadosamente este manual antes de comenzar el montaje

No. 31092

(和英独仏西)

© 2001 KYOSHO

/禁無断転載複製

CONSEJOS DE SEGURIDAD

Este modelo de Radio Control no es un juguete

Los no inicados en este hobby deber‡n ser aconsejados por expertos antes de 
comenzar el montaje de este modelo.

Realice el montaje en un lugar fuera del alcance de los ni–os.

Siempre extreme las medidas de seguridad. Usted es el œnico responsable del 
funcionamiento de su modelo.

Mantenga este manual a mano.

GAS

POWERED 

GP

VERSION

INSTRUCTION MANUAL

組立/取扱説明書

GP アルティマ RB  レーシングスポーツ

Diese Bauanleitung bezieht sich auf die ARR und die Readyset Version.
Bitte beachten Sie fŸr die ARR Version die Baustufen                     bis              bis       .
Bitte beachten Sie fŸr die Readyset Version die Baustufen        bis                   .
†berprŸfen Sie die Einstellungen Ihrer RC-Anlage gemŠ§ Seite 20, bevor
Sie mit dem Betrieb des Modells beginnen.

Notice de montage pour les versions ARR et Readyset.
Version ARR : Etapes                    a              a       .
Version Readyset : Etapes        a                   .
Lire attentivement la page 20 avant la mise en route de votre modele.

Este manual de instrucciones sirve para la versi—n ARR y la versi—n Readyset.
Si usted ha adquirido la versi—n ARR solamente deber‡ realizar los pasos               
      al              al       .
Si usted posee la versi—n Readyset solamente deber‡ realizar desde el        al                    .
Asegœrese de comprobar la p‡gina n¡20 "preparaci—n del equipo de radio"
antes de rodar con su modelo.

この説明書は、

ARR

readyset 

共通です。

ARR 

は、


までを組立ててください。

readyset 

は、


〜    


を組立ててください。

20

ページの、プロポのセットアップを必ず確認してください。

This is instruction manual for both ARR and Readyset version. 
ARR version need to assemble step number                   to             to      . 
Readyset version need to assemble step number        to                  . 
Make sure to check page 20 "radio set-up" before start your model. 

21 22 26

33

35 37 38

29 31

38

21 22 26

29 31

38

33

35 37 38

21 22 26

29 31

38

33

35 37 38

21 22

26

29 31

38

33

35 37 38

21 22 26

29 31

38

33

35 37 38

El fabricante se reserva el derecho de introducir modificaciones en los kits sin previo aviso

Summary of Contents for GP ULTIMA RB RACING SPORTS

Page 1: ...e de main afin de vous y r f rer rapidement ご使用前にこの説明書を良くお読みになり十分に理解してください Before commencing assembly please read these instructions thoroughly Bitte lesen Sie die Anweisungen vor Gebrauch genau durch Veuillez attentivement lire les instructions avant lÕemploi Lea cuidadosamente este manual antes de comenzar el montaje No 31092 和英独仏西 2001 KYOSHO 禁無断転載複製 CONSEJOS DE SEGURIDAD Este modelo de Radio C...

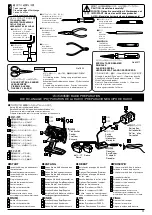
Page 2: ...RC Anlage lesen Sie bitte die Gebrauchsanweisung der RC Anlage durch Lisez la notice de la radio pour plus dÕinformations Lea el manual de instrucciones de su equipo de radio ハンドルタイプ Wheel type Drehknopfsteuerung A volant Emisora tipo volante 電池ボックス Battery Box Batteriehalter Bo tier ˆ piles Portapilas プロポセットに付いているときは必要ありません If already included with the radio no battery box needs to be purchased s...

Page 3: ...lained below Bereiten Sie die RC Anlage wie unten beschrieben vor Pr parez votre radiocommande comme ci dessous Prepare el equipo de radio tal y come se indica a continuaci n 1 2 3 4 5 6 7 8 9 10 11 12 始める時 終わる時 送信機に単3乾電池をセットする 送信機のアンテナをのばす 電池ボックスに単3乾電池をセッ トする 電池ボックスのコネクターをつ なぐ 受信機のアンテナをのばす トリムを中央にセットする 送信機のスイッチを入れる 受信機のスイッチを入れる 動かしてサーボが動いているか 確認 受信機のスイッチを切る 送信機のスイッチを切る 送信機のアンテナを縮める 1 2 3 4 5 6 7 ...

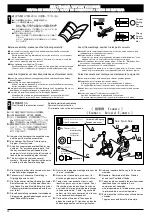
Page 4: ...segurese mirando la tabla en cada paso A la hora de apretar Tornillos Autorroscantes TP Apri telos firmemente en la pieza donde corresponda No intente apretarlos demasiado ya que podr an deformar la pieza 説明書の見かた How to read the instruction manual So funktioniert die Bauanleitung Comment lire les instruction C mo leer el manual de instrucciones 2 No 4 No 5 No 6 メタル Metal Bushing Metallager Palier ...

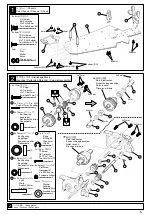
Page 5: ...mm TP F H 4 2 123 5 x 10mm Ball Bearing Kugellager Roulements à billes Rodamiento 2 125 4 x 8mm Ball Bearing Kugellager Roulements à billes Rodamiento 2 124 8 x 14mm Ball Bearing Kugellager Roulements à billes Rodamiento 8 8 4 5 3 1 2 3 4 124 19 176 129 128 123 125 130 126 125 127 123 131 124 4x4mm 4x4mm 3x12mm 3x12mm 2x10mm 2x10mm 5mm 5mm 3x8mm F H 3x8mm F H 122 121 120 123 10 3mm 3mm Fetten Grai...

Page 6: ...s 3x25mm Tornillo Pasador 3x25mm Assemble in the specified order In der angegebenen Reihenfolge zusammenbauen Assemblez dans lÕordre indiqu Realice el montaje en el orden indicado Part bags used Verwendeter Teilebeutel Sachet utilis Bolsa a utilizar Assemble left and right sides the same way Bauen Sie eine linke und eine rechte Seite Assemblez le c t gauche comme le c t droit Realice el montaje de...

Page 7: ...Gearbox GetriebegehŠuse Carter de diff rentiel Caja de transmisi n 6 3 x 12mm TP F H Screw SK Treibschraube Vis TP F H 3x12mm Tornillo 3x12mm TP F H 4 3 x 12mm TP Screw LK Treibschr Vis TP 3x12mm Tornillo 3x12mm TP 8 3 x 8mm TP F H Screw SK Treibschraube Vis TP F H 3x8mm Tornillo 3x8mm TP F H 36 0 5mm 36 0 5mm 2 3 x 8mm TP Screw LK Treibschr Vis TP 3x8mm Tornillo 3x8mm TP Insert swing shaft Halbwe...

Page 8: ... Suspensi n Delantera 4 3 x 12mm TP F H Screw SK Treibschraube Vis TP F H 3x12mm Tornillo 3x12mm TP F H 4 3 x 12mm TP F H Screw SK Treibschraube Vis TP F H 3x12mm Tornillo 3x12mm TP F H 45 Front Vorne Avant Parte Delantera Note the direction Einbaurichtung beachten Notez le sens F jese en el dibujo 46 47 44 29 45 43 Right Rechts Drolte Derecha Left Links Gauche Izquierda 29 3 x 25mm Screw Pin Schr...

Page 9: ...2mm TP F H Screw SK Treibschraube Vis TP F H 3x12mm Tornillo 3x12mm TP F H 12 Front Suspension Vordere AufhŠngung Suspension avant Suspensi n Delantera 13 2 3 x 8mm TP Screw LK Treibschr Vis TP 3x8mm Tornillo 3x8mm TP 2 47 5 8mm Pillow Ball Kugelschraube Rotule 5 8mm R tula 5 8mm 1 102 4 5mm Pillow Ball Kugelschraube Rotule 4 5mm R tula 4 5mm 4 Servo Saver Servosaver Sauve servo Salvaservos 36 36 ...

Page 10: ...y Bauen Sie eine linke und eine rechte Seite Assemblez le c t gauche comme le c t droit Realice el montaje de igual forma en ambos lados Servo Saver Servosaver Sauve servo Salvaservos 2 3 x 8mm F H Screw SK Schraube Vis F H 3x8mm Tornillo 3x8mm F H SpurstŠnge Biellette Tirante 58 3x12mm F H 3x8mm F H 3x12mm F H 3x8mm F H 2 3 x 12mm TP F H Screw SK Treibschraube Vis TP F H 3x12mm Tornillo 3x12mm TP...

Page 11: ...d ride height adjust the amount of When adjusting always run your car Der Abstandshalter existiert in 5 Grš en Justieren Sie hiermit die Bodenfreiheit des Fahrzeugs an der Vorder und Hintcrachse Les bagues existent dans 5 paisseurs diff rentes choisir le nombre et l paisseur de pour les r glages de suspension est disponible en 5 anchuras Elija la que m s se adapte al tipo de terreno 65 E2 5 E ring...

Page 12: ...escuido vea la p gina 3 90 12 13mm Cut off shaded portion Schneiden Sie die schraffierten FlŠchen heraus Coupez la partie gris e Corte la zona oscurecida Drill holes with the specified diameter Bohren Sie Lšcher im angegebenen Percez des trous dans le indiqu Perfore agujeros con la medida indicada 2 5mm Pay close attention here Vorsicht Wichtiger Hinweis Attention Avis important Preste atenci n Mu...

Page 13: ...im 1 152 169 E7 E ring E Ring E7 Clips 7mm Clip E7 E3 E ring E Ring E3 Clips 4mm Clip E3 1 2 2 6 x 30mm RK Schraube Vis 2 6x30mm Tornillo 2 6x30mm Screw 3x8mm 3x8mm Tighten the set screw with a piece of paper inserted in between the spur and pinion Legen Sie vor dem Festziehen der Schrauben ein Stück Papier zwi schen beide Zahnräder Serrez les vis en insérant une feuille de papier entre les dents ...

Page 14: ...io Box RC Box Switch Schalter Interrupteur Interruptor Throttle Control Servo Gasservo Servo de gaz Servo de Gas 3x8mm 3x8mm 3x8mm 3x8mm A 1 A 1 Must be purchased separately Das Teil ist nicht im Bausatz enthalten Doit être acheté séparément Debe comprarse por separado 4 3 x 8mm TP Screw LK Treibschr Vis TP 3x8mm Tornillo 3x8mm TP 4 3 x 8mm TP F H Screw SK Treibschraube Vis TP F H 3x8mm Tornillo 3...

Page 15: ...era necesario Rubber Band Gummiring Elastique Goma el stica 155 92 93 28 Radio RC Anlage Radio Equipo de Radio 29 Radio RC Anlage Radio Equipo de Radio Antenna Pipe Antennenrohr Tube dÕantenne Tubo Antena Receiver EmpfŠnger R cepteur Receptor Connect as per radio instruction manual Schlie en Sie die Servos gemŠ der Bedienungsanleitung Ihrer RC Anlage an Branchez selon la notice de la radio Conecte...

Page 16: ...ting servo hom Refer to page 3 arrangement of the radio system Nicht Verdrehen Siehe Seite 3 falls der Fahrtenregler versehentlich verdreht worden ist Ne pas faire pivoter Si cette pi ce a t pivot e par erreur se r f rer page 3 pour un bon r ajustement No girarlo si lo hace por descuido vea la p gina 3 No 7 A 1 Drill holes with the specified diameter Bohren Sie Lšcher im angegebenen Percez des tro...

Page 17: ...s Full Throttle For adjusting the brake Zum Einstellen der Bremse Pour ajuster le frein Para ajustar el freno 1mm 1mm x2 x2 97 98 After fitting them together pour instant glue along the seam Setzen Sle dle Relfen auf die Felgen und lassen Sie einen Tropfen Sekundenkleber ln der Naht zwlschen Reifen und Felge entlang laufen Apr s assemblage collez le bord du pneu sur la jante Aplique pegamento cian...

Page 18: ...ros 34 Wheels RŠder Roues Ruedas 4 53 Front Wheel Metal Bushing Gleitlager Felge vorn Bague m tal de roue Casquillo met lico 4mm Flanged Nylon Nut Stoppmutter Ecrou Nylstop paul Tuerca nylon 4mm con collar n Part bags used Verwendeter Teilebeutel Sachet utilis Bolsa a utilizar Assemble left and right sides the same way Bauen Sie eine linke und eine rechte Seite Assemblez le c t gauche comme le c t...

Page 19: ...ar ntesis son para el lado opuesto Before painting use a neutral detergent to remove any oil residues and dirt Bevor Sie beginnen reinigen Sie die Karrosserie grŸndlich mit einem milden Haushaltsreiniger Avant de peindre nettoyez la carrosserie soigneusement avec un produit vaisselle Antes de pintar lave la carrocer a con agua jabonosa aclare y deje secar 1 Refer to the pictures on the box for the...

Page 20: ...re heat is generated The longer you run under such cir cumstances the more likely you will damage the spur gear Je stŠrker die Kupplung im Betrieb durchrutscht desto stŠrker erwŠrmt sich die Kupplung Bei lŠngerem Betrieb kann das Zahnrad zu hei werden und dadurch beschŠdigt werden Plus le syst me de glissement est efficace plus il patine plus il chauffe Dans de telles conditions trop de patinage e...

Page 21: ...Ihr Modell Das kšnn te schwere UnfŠlle zur Folge haben Bedenken Sie da auch andere in Ihrer Umgebung ein ferngesteuertes Modell bedienen kšnnten Stellen Sie sicher da niemand zur selben Zeit die selbe Frequenz in Ihrer Umgebung benutzt Das kann zum Ver lust Ihres Model les sowie zu schweren UnfŠllen fŸhren Pour viter tout accident nÕutilisez jamais votre mod le 1 ˆ proximit de routes 2 dans un end...

Page 22: ...tstoff niemals drinnen oder in der NŠhe von Feuer und Hitzequellen gebrauchen 4 Kraftstoff niemals schlucken Vorsicht auch vor Kraftstoffspritzer in die Augen 5 Kraftstoff nur in kŸhlen trockenen und dunklen Orten au er Reichweite von Kindern aufbewaren SorgfŠltig verschlie en 6 Niemals leere Kanister in ein offenes Feuer werfen Explosionsgefahr Ne jamais mettre vos doigts dans des parties en mouv...

Page 23: ...curely tightened Ensure all moving parts move without binding Are they greased for non binding movement Install an air cleaner Ensure it is clean and not clogged Ensure the fuel lining is proof with no cracks Ensure it is not clogged Ensure the muffler and exhaust are damage free Ensure the radio batteries are fresh Are they securely installed Ensure servos and linkages move without binding Ensure...

Page 24: ...rottle control and trim and disconnect the glow plug heater 10 Sekunden nach dem Anspringen des Motors kann der GlŸhkerzenakku entfernt werden Quand le r gime moteur se stabilise baissez le stick de gaz et d connectez le chauffe bougie スロットルスティック Throttle Stick GasknŸppel Stick de gaz スロットルトリム Throttle Trim Gastrimmung Stick de gaz キャブレターに燃料が入ったら リコイルスターターを2 3回 引くと エンジン内に燃料が行きわたり 始動しやすくなる Engine s...

Page 25: ... avoir viss compl tement pour obtenir un r glage normal du moteur D autres r glages peuvent entrainer une surchauffe du moteur 5 走行させながらブレークインを続ける エンジンをいたわる つもりで走行させ 10 20 ずつニードルをしめこむ Next continue performing the break in while running the car Always screw in the needle valve 10 to 20û at a time in order not to damage the engine Lassen Sie nun den Motor beim Betrieb des Modells weiter einlaufen Sc...

Page 26: ...1 2 1 2 そこからさらにしめこむと エンジンの排気が見えなくなったり スピードが途中から落ちてきます そのまま走行を続けると エンジンが壊れてしまいます すぐにニードルをゆるめてくだ さい ニードルの最良位置から10 20 ゆるめた位置が 通常 走行の位置です When screwing the needle valve further in exhausts become in visible and rpm decrease Running the engine with this setting damages the engine Immediately unscrew the needle valve Note that for normal running the needle valve is screwed out 10 20 from the valve s opt...

Page 27: ...ly pull the recoil starter to expel excess fuel Schrauben Sie die GlŸhkerze heraus und ziehen Sie den Anrei starter krŠftig durch damit ŸberschŸssiger Treibstoff austritt Enlevez la bougie et tirez le d marreur pour expulser l exc dent Replace with a new recoil starter Tauschen Sie den Anrei starter aus Remplacez la tirette Fill in fuel Betanken Sie das Modell Remplissez se r servoir Clean the fue...

Page 28: ...1 53 96081 53 RS67 95 RS69 98 120 121 153 156 120 RS60 37 RS26 43 RS11 49 RS8 41 RS32 29 RS19 88 1889 92 W5143 72 71 105 65 69 67 76 75 W5143 W5102 65 W5143 77 117 RS13 57 50 RS13 90 189 RS14 RS13 B C E A F C G H F E G H I J J K L M O O N I M L N K P P RS30 42 RS7 10 RS32 29 47 RS142 92 1889 RS161 RS160 181 92101 RS162 RS160 RS166 166 FD29 157 FD29 1387 AB15 AB17 LD70 LD70 150 1383 RS156 RS156 SM5...

Page 29: ...5143 01 W5143 1284 1383 1889 96081 メタルキャップ G Metal Cap G 200 一律 200 一律 90 189 x 1 88 89 x 1 99 x 2 43 x 2 28 x 2 56 x 2 42 x 2 30 x 2 29 x 2 97 x 2 98 x 2 108 x 2 109 x 2 185 186 x 2 137 x 2 300 メカプレート Radio Plate RS142 154 x 1 184 x 1 300 バッテリーボックス Battery Box RS143 142 x 1 200 リヤバルクヘッド GP Rear Bulkhead GP RS144 122 x 1 200 リヤバンパー Rear Bumper RS145 141 x 1 400 ギヤボックス Gear Box RS146 130 131 x 1 40...

Page 30: ...ン King Pin フロントホイール Front Wheel フロントタイヤ Front Tire 3 16x3 8mmボールベアリング 3 16x3 8mm Ball Bearing FOR JAPANESE MARKET ONLY オプションパーツ OPTIONAL PARTS 200 一律 2セット入 2 pcs 2セット入 2 pcs フロントダンパー Front Shock フロント Front リヤダンパー Rear Shock UM128 4 8mmボールスタッド L 4 8mm Ball Stud L 印は セットで使用するパーツです 単体での使用はできません UM 104フロントハブを使う場合 下記のパーツが必要です UM103 UM112 UM113 UM126 UM128 UM129 OTW12 UM103ナックルアームを使う場合 下記のパーツが必要です UM113...

Page 31: ...L アジャスターロッド 40mm Adjuster Rod 40mm リヤタイヤ Rear Tire リヤホイール Rear Wheel ユニバーサルスイングシャフト Universal Swingshaft 5x10mmボールベアリング 5x10mm Ball Bearing リヤハブ Rear Hub フロントサスアーム Front Suspension Arm サスシャフト 24mm Suspension Shaft 24mm Eリング E2 5 E ring E2 5 FOR JAPANESE MARKET ONLY オプションパーツ OPTIONAL PARTS 200 一律 印は セットで使用するパーツです 単体での使用はできません SP107Vリヤハブを使う場合 下記のパーツが必要です UM112 UM128 UM129 OTW12 UM406ユニバーサルスイングシャフトを ...

Page 32: ...ルベアリング 4x8mm Ball Bearing 8x14mm ボールベアリング 8x14mm Ball Bearing 1000 96993 3 16x3 8 インチ ボールベアリング 3 16x3 8 in Ball Bearing 200 一律 ノーマルダンパー用 フロント for Normal Shock Front ノーマルダンパー用 リヤ for Normal Shock Rear 各 500 4ヶ入 ギヤボックス及びリヤハブ用 4 pcs for Gear Box Rear Hub 4ヶ入 ギヤボックス用 4 pcs for Gear Box 4ヶ入 ギヤボックス用 4 pcs for Gear Box 2ヶ入 フロントホイール用 2 pcs for Front Wheel シリコンオイル Silicone Oil 40cc 96607 96608 96609 96610 ...

Page 33: ...ら京商へ申し込めます お店でご希望のパーツがたまたま品切れだった場合でも 京商の パーツ直送便 を利用すればその場で注文でき ます パーツ直送便 は お店に備え付けのパーツ直送便注文用紙にご希望のパーツの品番や数量等 必要事項 をご記入の上 お店に代金をお支払いいただければ結構です 3 4日でお客様のご自宅か お店にお届けします 発送手数料が不要で早く着くお得なシステムです 一部取り扱っていないお店もございます パーツ直送便取り扱い店は このステッカーが目印 3 4日でお客様の ご自宅かお店に お届けします パーツ直送便 注文用紙に 品番 と必要数を記入 パーツ直送便の 注文用紙といっしょに 代金をお店の人に 払おう 発送手数料は 不要 お届けまで 3 4日 発送手数料 200円 発送手数料 200円 お届けまで 10 12日 お届けまで 6 7日 お店に行けない場合は郵便局から申し込んで...

Page 34: ... 10 00 18 00で電話連絡可能な時間帯 頃 電話でのお問い合わせは 月曜 金曜 祝祭日を除く 10 00 18 00 フ ァ ッ ク ス では 24時間お問い合わせの受付をして居ります 回答は 翌営業日 以降となる場合があります 営業日 月曜 金曜 祝祭日を除く これらのサービスは日本国内に限らせて頂きます 商品No ご購入店 ご使用 プロポ フリガナ 店名 ご氏名 ご自宅 住所 平日の昼間に 可能な連絡先 ご自宅の 連絡先 ご購入 年月日 ご使用 エンジン 受付No 京商記入欄 都 道 府 県 電 話 都 道 府 県 性別 生年 月日 大正 昭和 平成 男 女 電話 R C歴 商品名 ファックス 電話 ファックス 京商にお問い合わせの際は 京商ユーザー相談室 にご連絡ください お問い合わせの際は お手元に商品や組立 取扱説明書をご用意のうえ 組立 取扱説明書のページ数 行程番号 ...

Reviews: