22
Technical passporT
english
steam oven rs 969
2. Dry the water tank and introduce
it back into the slot located above the
cavity. Clean and dry the cooking space.
Leave the appliance door open so
that the cooking space can cool down
and dry completely.
IMPORTANT NOTE: It is advisable to
remove the water tank and empty it after a
cooking cycle. This prevents the formation
of bacteria and limestone inside the
appliance.
If the water tank has not been
removed from the oven and a new
cooking cycle is started, the oven
displays the warning “DEP”.
This warning can be cleared by
pressing the Stop key and proceed with
the new cooking cycle without removing
and emptying the water tank.
Cleaning the cooking space
Avoid using abrasive cleaners such
as scouring pads, steel wool, etc. as they
can damage the surface.
Wipe the cooking space clean using
a damp cloth whilst the appliance is
still warm. Finish off by drying the
cooking space.
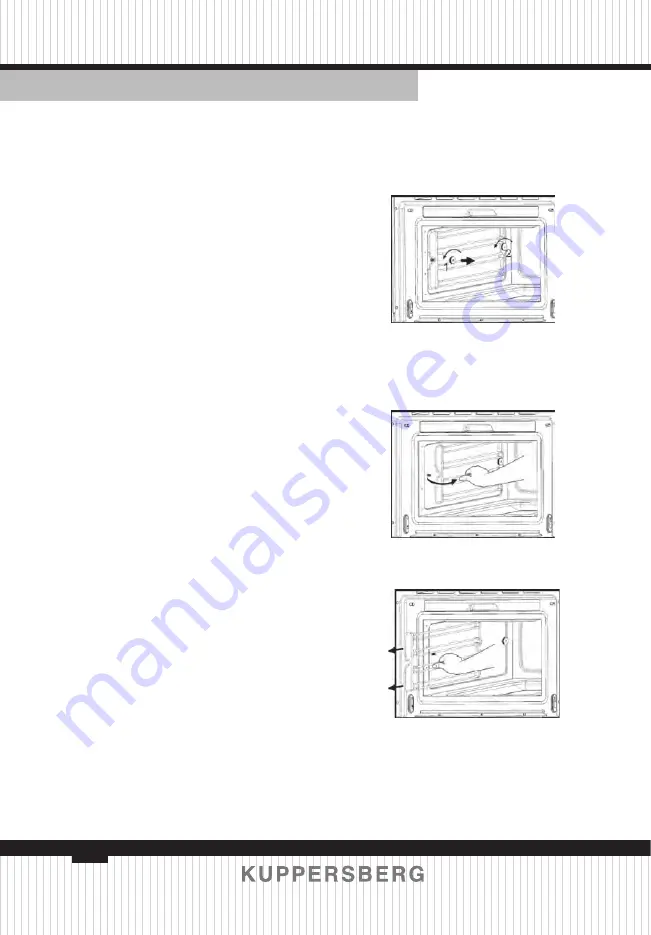
For ease of cleaning, the shelf guides
can be removed (see the following
chapter).
Removing the shelf guides
Unscrew and remove the knurled
nuts 1 in the front of the shelf guides in
an anti-clockwise direction.
Unscrew and loosen the knurled
nuts 2 in the back of the shelf guides
in an anti-clockwise direction. Do not
completely remove these nuts.
Pull the shelf guides to the inside of
the cavity and remove from the front.
To put them back, insert the shelf
guides into the knurled nuts 2 in the
back and position on the screws in the
front. Screw the knurled nuts 1 and 2 in
a clockwise direction till tight.


