


4
Installing and connecting the robot (continued)
17 of 26
Ro/Me/03/23 03.99.02 en
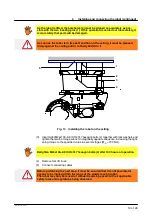
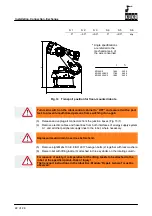
Retighten the eight hexagon bolts (4) after 100 hours of operation.
(5) Remove lifting tackle.
(6) Connect connecting cables.
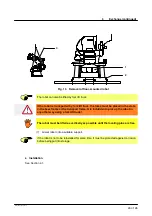
Before performing the next step, it must be ensured that it is not possible for
anyone to be injured within the range of the slowly moving robot.
The robot may only be moved at manual traversing speed, with all applicable
safety rules and regulations being observed.
(7) Put robot into operation and move it into a suitable position to install end--effector and
additional equipment.
Turn main switch on the robot control cabinet to “OFF” and secure it with a pad-
lock to prevent unauthorized persons from switching it on again.
(8) Install end--effector and additional equipment.
If any additional equipment (working range monitoring devices, etc.) is installed
on the robot, the instructions and warnings in the relevant Doc. Modules must
be strictly observed.
(9) Connect all other cables which have been removed.
(10) Put robot into operation.
4.2
Ceiling--mounted robots
Section 1 of this Doc. Module is to be observed.
This description only applies to ceiling--mounted robots with mounting variant 1 (Section 3.1).
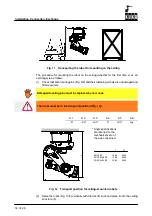
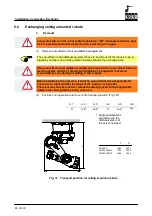
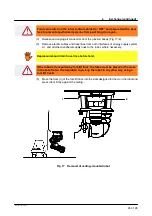
For installation on the ceiling, the robot can be transported in a transport frame -- already in
the correct orientation. It is removed from this frame by fork lift truck and brought to the site
of installation (Fig. 11). If the robot has to be turned over, the instructions applying to the
counterbalancing system in the robot Doc. Module “Adjustment Instructions” must be
observed.
If the robot is transported by fork lift truck, the forks must be placed in the slots
in the base frame or the transport frame. It is forbidden to pick up the robot in
any other way using a fork lift truck!


