24
Owner’s manual
EN
Settings
1. To enter menu, press MENU button on the remote control or M button on the projector’s
control panel. Settings window will be displayed.
2. Use arrow buttons to navigate through menu, and OK button to enter submenu/select
option/confirm. After changing settings, press MENU again to exit.
a. Options:
•
OSD language: select system language
•
Restore factory settings
•
OSD blending
•
OSD duration: select display time of captions
• Software update (USB): available after inserting USB flash drive with software
update file into USB port of the projector
b. Picture menu
•
Picture mode: select from available (standard, soft, user, vivid)
•
Color temperature: select color temperature of the displayed image
•
Aspect ratio: Auto, 4:3, 16:9
•
Noise reduction
•
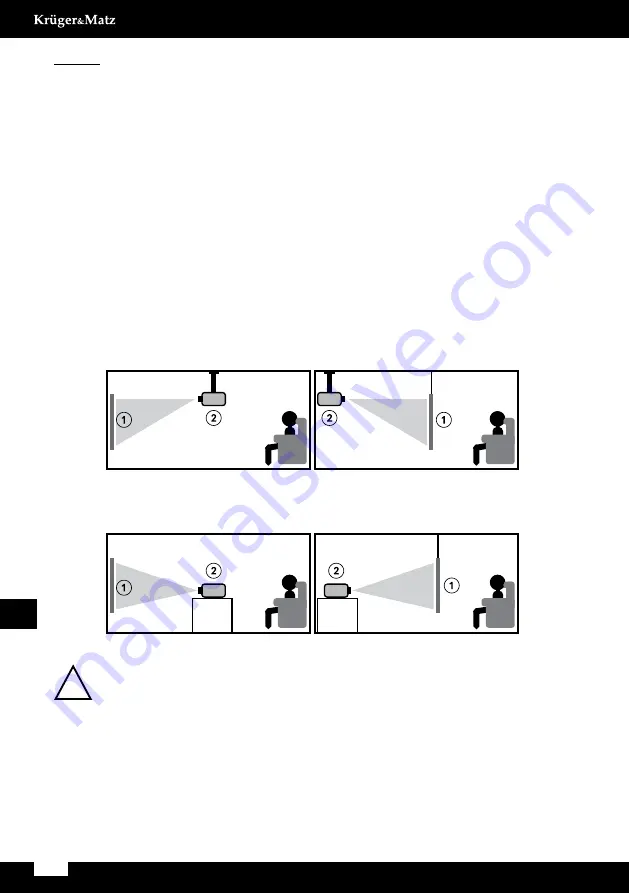
Projection direction: select display image rotation. Options available are: front
(on desk), rear, front/ceiling, rear/ceiling. See picture below:
Please note: for ceiling mounting, user needs compatible mount, and for rear (rear and
rear/ceiling) it’s required a special projection screen.
1. Screen
2. Projector
•
HDMI mode
•
PC setup
a. Sound menu
•
Sound mode: standard, user (manually set bass and treble), music, movie,
sports
!
Front / ceiling
Ceiling mounted (upside down)
Table mounted
Rear / ceiling
Front
Rear


