7
2
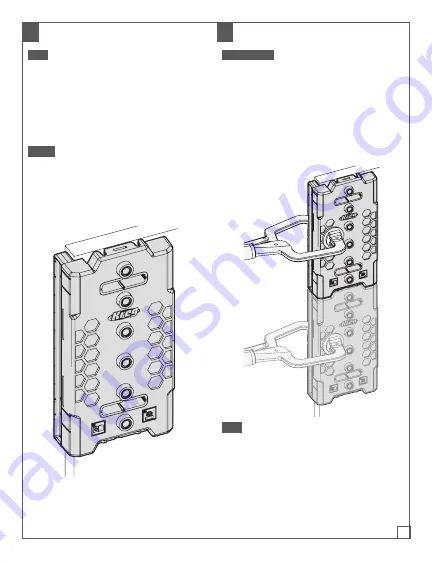
Position the Jig
Tip
Although you can use either the top
or bottom of the jig for reference, we
recommend using the top so that you
can use the jig extension as you move
downward. Use the same reference end
of the jig while drilling all shelf pin holes
to maintain accurate left to right and
front to back alignment.
Note
When moving from the front to
back holes, attach the fence to the other
side of the jig.
a. Align the jig with the inside corner of
the cabinet and the fence with the
front of the cabinet.
3
Clamp the Jig
WARNING
Follow your clamp
manufacturer’s safety guidelines. Keep
your hands clear when clamping to avoid
pinch points. The clamping limit on this
jig is 300 lbs.
a. Use a clamp in the location shown
below to secure the jig (A) in place.
b. If using two connected jigs, clamp
both.
Tip
If your cabinet is already assembled,
remove the fence and place the jig
against the back of the cabinet using the
same reference point as the front and
carefully hold in place while you drill your
first hole. Then use the jig extender and
index pin to continue.


