


Step 6: Operate VP-558
Via OSD Menu
Enter the OSD menu via the MENU button on the front panel. Select a menu item and set parameters as required.
Menu item
Function
Picture
Set the contrast, brightness red, green and blue shades and offsets. Set the hue, saturation,
sharpness, and noise reduction. When PC is the selected input, fine tune the image.
Size
Select the size of the image.
Output HDCP
Select FOLLOW INPUT or
FOLLOW OUTPUT to define
whether the HDCP will follow
the input or the output.
Resolution
Select the resolution.
Timing Shift
Set to on.
Auto Sync Off
Turn the auto sync ON/OFF. When ON, this deactivates the output after a few minutes if no input
is present.
Audio
Adjust Output 1 audio parameters: Source, embedded audio, embedded audio bypass, output
volume, mute, delay, MIC mixer settings and audio EQ.
No Signal Color
Select a BLUE or BLACK window color if no signal is detected.
OSD
Set the OSD parameters.
Factory
Reset the scaler parameters.
Audio Out
Set the parameters of the MONITOR OUT and SPEAKER OUT parameters: source, embedded
audio setup and bypass, output volume, mute, delay, MIC settings, and more.
Audio Set
Set the input volume and microphone settings.
USB
Set the USB switcher parameters.
Ether
Set the Ethernet parameters.
Misc
Set IR routing and HDCP input.
Info
Displays the
VP-558
source and input resolutions, HDCP status, MIC settings and more.
Note
: If you
don’t see an image, verify that the display, TV, or projector is in good working order, is connected to the
VP-558
,
and that the
VP-558
is selected as its source. If you still don't see an image, press and hold the
RESET TO XGA/720P
for 3
seconds to reset the output to XGA or 720p resolution.
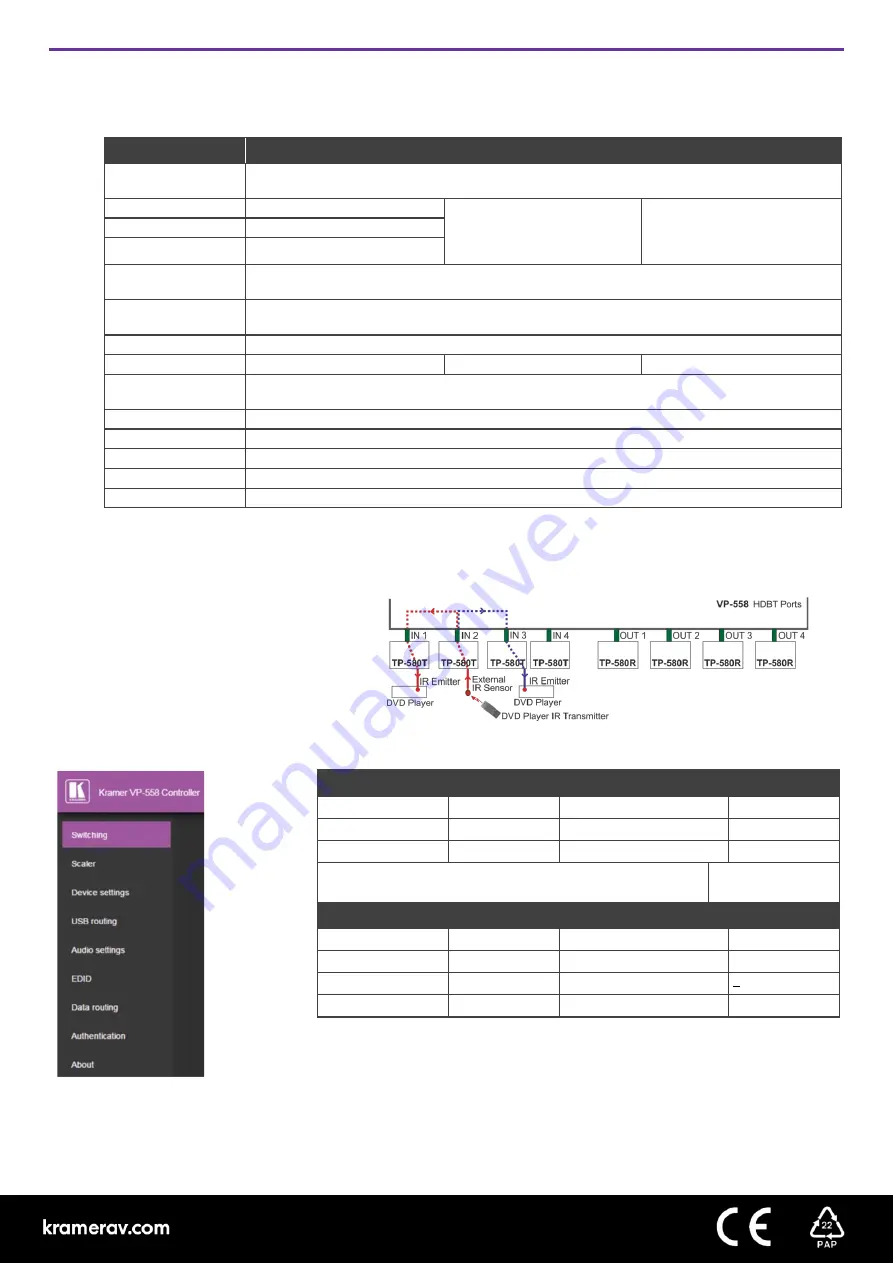
Control peripherals via IR remote control
You can use a remote control transmitter (that is
used for controlling a peripheral device, for
example, a DVD player) to send commands (to
the A/V equipment) from/to any of the transmitters
/receivers connected to the HDBT.
Via the front panel buttons and via:
RS-232 Control / Protocol 3000
Baud Rate:
115,200
Parity:
None
Data Bits:
8
Command Format:
ASCII
Stop Bits:
1
Example (Route the video from the HDMI3 input to the HDMI1
output port):
#ROUTE 1,1,3<cr>
Default Ethernet Parameters
IP Address:
192.168.1.39
TCP Port #:
5000
Subnet mask:
255.255.255.0
Default UDP Port #:
50000
Default gateway:
192.168.1.254
Maximum UDP/TCP Ports: 4
Default Username:
admin
Default Password:
admin


