background image

 
page 50                                                                             SBC-815ET-VER  User’s  Guide


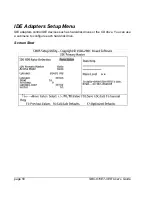
IDE Adapters Setup Menu 

IDE adapters control IDE devices such as hard-disk drives or the CD drive. You can use 
a submenu to configure each hard disk drive. 

Screen Shot 


Summary of Contents for SBC-815ET-VER

Page 1: ...SBC 815ET VER User s Guide PN 931 0031 01 September 2006 Kontron America...

Page 2: ...ts protected by copyrights or patents and does not convey any license under the patent rights of Kontron nor the rights of others Kontron is a registered trademark of Kontron All trademarks registered...

Page 3: ...imited Warranty 18 Return Procedure 19 Limitation of Liability 19 Chapter 1 Introduction 21 Overview 21 What s Included 22 Chapter 2 Specifications 23 Functional Specifications 23 Mechanical Specifica...

Page 4: ...stalling the CPU 39 Removing the CPU 39 Configuring System Bus 39 Main Memory 39 M Systems Flash Disk 40 Installing the Flash Disk 40 Installing the SBC 41 INF Chipset Component Driver 41 Graphics Con...

Page 5: ...ing Mode Control 58 RAS to CAS Override 58 RAS Timing 58 RAS Precharge Timing 58 Integrated Peripherals 59 Screen Shot 59 OnChip Primary Secondary PCI IDE 60 IDE Primary Secondary Master Slave PIO 60...

Page 6: ...VGA Palette Snoop 69 Assign IRQ For VGA USB 69 PCI Slot4 1 2 3 IRQ Assign 70 PC Health Status 70 Screen Shot 70 Frequency Voltage Control 71 Screen Shot 71 Auto Detect DIMM CLK 71 Spread Spectrum 71 C...

Page 7: ...e Installation 93 BIOS Settings 94 Loading Default Optimal Setting 94 Auto Detect Hard Disks 94 Improper Disabling 94 OS Diagnostics 96 Booting 96 Display Setup 96 Network Setup 96 Windows NT 4 0 97 L...

Page 8: ...page 8 SBC 815ET VER User s Guide This page intentionally left blank...

Page 9: ...g or operating a computer Only qualified experienced authorized electronics service personnel should access the interior of a computer The power supplies produce high voltages and energy hazards which...

Page 10: ...appropriate To help avoid possible damage to system boards wait five seconds after turning off the computer before removing a component removing a system board or disconnecting a peripheral device fr...

Page 11: ...onent s antistatic packing material until you are ready to install the component in a computer Just before unwrapping the antistatic packaging be sure you are at an ESD workstation or grounded This wi...

Page 12: ...page 12 SBC 815ET VER User s Guide This page intentionally left blank...

Page 13: ...ns Chapter 2 Specifications Provides functional mechanical electrical and environmental specifications Chapter 3 Hardware Configuration Shows the definitions and locations of jumpers and connectors fo...

Page 14: ...using the online form under Contact Us on our web site www kontron com under Technical Support Detail any errors you find We will correct the errors or problems as soon as possible and post the revise...

Page 15: ...ote A note is used to make helpful information stand out Important An important note indicates information that is important for you to know CAUTION A CAUTION indicates potential damage to hardware an...

Page 16: ...material for possible future shipment 2 Remove all items from the box If any items listed on the purchase order are missing notify Kontron customer service immediately 3 Inspect the product for damage...

Page 17: ...pment This device complies with Part 15 of the FCC Rules Operation is subject to two conditions 1 This device may not cause harmful interference 2 This device must accept any interference received inc...

Page 18: ...not in an as new and resalable condition are not eligible for a credit return and will be returned to the customer Limited Warranty Effective April 1 1998 all products carry a 2 year limited warranty...

Page 19: ...ty repairs and building replacement products If Kontron repairs or replaces a product its warranty term is not extended Kontron will normally return your replacement or repaired items via ground Overn...

Page 20: ...page 20 SBC 815ET VER User s Guide This page intentionally left blank...

Page 21: ...et integrates one floppy controller two serial ports one keyboard controller one hardware monitor one IrDA port and one parallel port Two high performance 16C550 compatible UARTs provide 16 byte trans...

Page 22: ...cable to support two interfaces One FDC cable One IDE cable One Y Cable cable for PS 2 keyboard and mouse One 5 pin to 5 pin keyboard cable for backplane connection One 4 pin ATX power control cable f...

Page 23: ...ache Memory 128KB 256KB L2 Cache built in Celeron and 256KB 512KB built in Pentium III Pentium III S processor Chipset Intel 815E B step Chipset Bus Interfaces Follows PICMG 1 0 Revision 2 0 standard...

Page 24: ...I O Interfaces System reset switch external speaker keyboard lock and HDD active LED Real Time Clock Calendar RTC Real Time Clock Calendar with battery backup for seven year data retention Watchdog T...

Page 25: ...headers with wafer System Monitoring Monitors CPU and system temperature operating voltage and fan status Bracket Supports one Mini DIN one USB port one Ethernet port and one VGA port Mechanical Speci...

Page 26: ...ernal backplane support The 82801BA hub employs the Accelerated Controller Hub architecture which makes a direct connection from the graphics and memory to the IDE controllers It supports 2 channel de...

Page 27: ...t nonvolatile memory component An on board PCI Fast Ethernet makes this a full functionality SBC The on board 68 pin PCI connector supports an additional daughter board for further capability The grap...

Page 28: ...page 28 SBC 815ET VER User s Guide Block Diagram...

Page 29: ...ion Hardware Configuration This chapter gives the definitions and shows the positions of jumpers headers and connectors All of the configuration jumpers are in the proper position Default settings are...

Page 30: ...ly and should not be altered To select an option cover the jumper cap over Short or remove NC it from the jumper pins according to the following instructions NC stands for Not Connected represents the...

Page 31: ...8 pin PCI J8 COM2 serial port J21 Standard 5 1 4 disk drive power J9 IrDA infrared port J22 External keyboard interface J10 system fan power J23 Onboard VGA J11 Two port USB interface U13 Socket 370 J...

Page 32: ...26 Track 0 27 Ground 28 Write Protect 29 Ground 30 Read Data 31 Ground 32 Head Select 33 N C 34 Disk Change Parallel Port Connector J4 Pin Signal Description Pin Signal Description 1 Strobe 14 Auto Fo...

Page 33: ...ta 4 DTR Data Transmission 5 GND Ground 6 DSR Data Set Ready 7 RTS Request to Send 8 CTS Clear to Send 9 RI Ring Indicator 10 N C IrDA Header J9 Pin Signal Description 1 VCC 5V 2 IOVSB 3 IRRX 4 Ground...

Page 34: ...r J14 Pin Signal Description 1 5V 220 Ohm pull up for power LED 2 N C 3 Ground 4 Keyboard inhibit 5 Ground IDE1 IDE2 Active LED Header J15 Pin Signal Description 1 5V 470 Ohm pull up for power HDD LED...

Page 35: ...is available on the bracket by default Pin Signal Description Pin Signal Description 1 5V 2 USBD0 3 USBD0 4 USBGND0 5 5V 6 USBD1 7 USBD1 8 USBGND1 PS 2 Keyboard Mouse J18 Six pin Mini Din Pin Signal...

Page 36: ...20 27 AD21 28 AD22 29 AD23 30 GND 31 VCC 32 AD24 33 AD25 34 AD26 35 AD27 36 AD28 37 AD29 38 AD30 39 AD31 40 GND 41 VCC 42 BE 0 43 BE 1 44 BE 2 45 BE 3 46 PAR 47 Frame 48 TRDY 49 IRDY 50 GND 51 VCC 52...

Page 37: ...rnal Keyboard J22 Pin Signal Description 1 Keyboard clock 2 Keyboard data 3 N C 4 Ground 5 5V VGA J23 Pin Signal Description 1 R 2 G 3 B 4 N C 5 Ground 6 Ground 7 Ground 8 Ground 9 N C 10 Ground 11 N...

Page 38: ...page 38 SBC 815ET VER User s Guide This page intentionally left blank...

Page 39: ...the socket after installing the CPU into place Removing the CPU To remove the CPU 1 Unlock the cooling fan 2 Lift the lever of the CPU socket 3 Lift the CPU from the socket 4 Push the lever for the CP...

Page 40: ...Buffered Registered SDRAM is not supported Buffered SDRAM will simply freeze up the system M Systems Flash Disk The SBC 815ET VER reserves one 32 pin DIP socket for installing M systems Flash disks f...

Page 41: ...he system might be unstable or not work because of a bad contact between the golden fingers and the ISA bus slot We recommend that you apply the 4 pin 5 1 4 IDE device power connectors from your power...

Page 42: ...m switches to an off board video adapter if there is one If this occurs the onboard 82815 GMCH graphic features will be disabled Driver Support You will find the Intel 82815 GMCH drivers in Video Inte...

Page 43: ...rt Windows NT 4 0 Windows 98SE Windows 2000 and Windows XP In a Windows environment Intel 82801BA MAC Fast Ethernet should appear as an Intel R PRO 100 VE Network Connection LAN LED The SBC provides t...

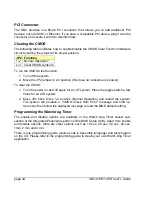
Page 44: ...he CMOS 1 Turn the power on and off again for an AT system Press the toggle switch a few times for an ATX system 2 Move JP2 back to the 1 2 position Normal Operation and restart the system The system...

Page 45: ...abort start up Entering Setup Turn on or reboot the computer When the message Hit DEL if you want to run SETUP appears press the Del key immediately to enter the BIOS Setup program If the message disa...

Page 46: ...page 46 SBC 815ET VER User s Guide...

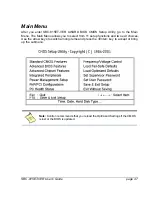
Page 47: ...go to the Main Menu The Main Menu allows you to select from 11 setup functions and two exit choices Use the arrow keys to switch among items and press the Enter key to accept or bring up the submenu N...

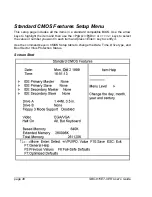
Page 48: ...tandard compatible BIOS Use the arrow keys to highlight the item and then use the PgUp PgDn or keys to select the value or number you want in each item and press Enter key to certify it Use the comman...

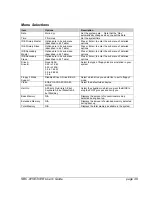
Page 49: ...in its sub menu described in 4 4 Table Press Enter to enter the sub menu of detailed options Drive A Drive B None 360K 5 25 in 1 2M 5 25 in 720K 3 5 in 1 44M 3 5 in 2 88M 3 5 in Select the type of flo...

Page 50: ...page 50 SBC 815ET VER User s Guide IDE Adapters Setup Menu IDE adapters control IDE devices such as hard disk drives or the CD drive You can use a submenu to configure each hard disk drive Screen Shot...

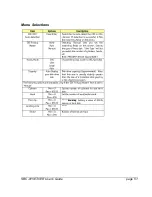
Page 51: ...SBC 815ET VER User s Guide page 51 Menu Selections...

Page 52: ...Virus Warning Enabled Activates automatically when the system boots up causing a warning message to appear when anything attempts to access the boot sector or hard disk partition table Disabled No wa...

Page 53: ...Select whether a password is required every time the system boots or only when entering setup System The system will not boot and access to Setup will be denied if the correct password is not entered...

Page 54: ...4MB Select the operating system that is running with greater than 64MB of RAM on the system Options Non OS2 OS2 HDD S M A R T Capability This option allows users to enable disable the PC to predict th...

Page 55: ...he default settings have been chosen because they provide the best operating conditions for your system The only time you might consider making any changes would be if you discovered that data was bei...

Page 56: ...a read or write command If your system has quality SDRAM you can set this option to 3 SCLKs to obtain better memory performance Normally the option is set to Auto Options 2 3 SCLKs or Auto SDRAM RAS...

Page 57: ...isabled Delayed Transaction Select Enabled to enable delay transaction This enhances performance for data transmission between different PCI buses Options Enabled Disabled Display Cache Frequency This...

Page 58: ...to leave pages open or closed Options Open Close RAS to CAS Override This option selects in units of display cache clock periods indicates the RAS to CAS delay Options by CAS LT Override 2 RAS Timing...

Page 59: ...SBC 815ET VER User s Guide page 59 Integrated Peripherals Screen Shot...

Page 60: ...2 Mode 3 Mode 4 IDE Primary Secondary Master Slave UDMA Ultra DMA 33 66 100 implementation is possible only if your IDE hard drive supports it and the operating environment includes a DMA driver Windo...

Page 61: ...supply Keyboard Power On Password In the event of Power On Function being configured as Password this item will be enabled for tuning Press Enter key to enter a customized password and confirm again w...

Page 62: ...nabled RxD TxD Active This item is to configure Infrared transmission rate Four options are available Hi High rate for receiving High rate for transmitting Hi Lo High rate for receiving Low rate for t...

Page 63: ...wer supply after a power loss On System automatically restores power Off System stays at power off Former Sts System restores back to previous status On or Off Watch Dog Timer Select This option enabl...

Page 64: ...allows you to configure you system to most effectively save energy while operating in a manner consistent with your own style of computer use Screen Shot ACPI Function This item allows you to enable d...

Page 65: ...min to 15 min Video Off Method This determines the manner in which the monitor is blanked V H SYNC Blank This selection will cause the system to turn off the vertical and horizontal synchronization po...

Page 66: ...y a Wake On Modem signal Options Enabled Disabled Resume by Alarm This item allows users to enable disable the resume by alarm function When Enabled is selected system using ATX power supply can be po...

Page 67: ...system so as to keep system out of suspend mode if the associated device is busy Options Enabled Disabled FDD COM LPT Port This item is to configure floppy device COM ports and parallel port being mo...

Page 68: ...y recommended that only experienced users should make any changes to the default settings Screen Shot PNP OS Installed Select Yes if you are using a Plug and Play capable operating system Select No if...

Page 69: ...you to determine the IRQ assigned to the ISA bus and is not available to any PCI slot Legacy ISA for devices compliant with the original PC AT bus specification PCI ISA PnP for devices compliant with...

Page 70: ...Guide PCI Slot4 1 2 3 IRQ Assign This BIOS option helps users assign IRQ numbers to particular slots Available IRQ numbers include 3 4 5 7 9 10 11 12 14 and 15 Auto is the default value for each slot...

Page 71: ...ll be detected different combinations of CPU and DIMM produce different option tables Refer to the following table as a quick reference guide Based on the FSB of the processor used the default value o...

Page 72: ...2 SBC 815ET VER User s Guide Only the Engineering Sample Processor is allowed to be configured with a different system clock CPU Clock Ratio This item allows you to select the CPU core bus ratio Optio...

Page 73: ...dialog box with the following message appears Load Fail Safe Defaults Y N N Pressing Y loads the BIOS default values for the most stable minimal performance system operations Load Optimized Defaults W...

Page 74: ...ss Esc to abort the selection and not enter a password To disable a password just press Enter when you are prompted to enter the password A message will confirm the password will be disabled Once the...

Page 75: ...you turn your system off The next time you boot your computer the BIOS configures your system according to the Setup selections stored in CMOS After saving the values the system is restarted again Exi...

Page 76: ...or during the POST This list includes messages for both the ISA and the EISA BIOS CMOS BATTERY HAS FAILED CMOS battery is no longer functional Replace it CMOS CHECKSUM ERROR Checksum of CMOS is incorr...

Page 77: ...lot EISA Configuration Is Not Complete PLEASE RUN EISA CONFIGURATION UTILITY The slot configuration information stored in the EISA non volatile memory is incomplete Note When either of these errors ap...

Page 78: ...mory Address Error at Indicates a memory address error at a specific location You can use this location along with the memory map for your system to find and replace the bad memory chips Memory parity...

Page 79: ...to boot or you can reboot the system with the NMI enabled RAM PARITY ERROR CHECKING FOR SEGMENT Indicates a parity error in Random Access Memory Should Be Empty But EISA Board Found PLEASE RUN EISA CO...

Page 80: ...SE RUN EISA CONFIGURATION UTILITY The board ID does not match the ID stored in the EISA non volatile memory The board ID does not match the ID stored in the EISA non volatile memory Note When this err...

Page 81: ...alize the keyboard Make sure the keyboard is attached correctly and no keys are being pressed during the boot BIOS ROM checksum error System halted The checksum of ROM address F0000H FFFFFH is bad Mem...

Page 82: ...the last test performed In this case the terminal error cannot be displayed on the screen The following POST checkpoint codes are valid for all AWARDBIOS products with a core BIOS date of 07 15 95 ver...

Page 83: ...19h Reserved lAh Reserved lBh Initial interrupts vector table If no special specified all H W interrupts are directed to SPURIOUS INT HDLR S W interrupts to SPURIOUS soft HDLR ICh Reserved lDh Initial...

Page 84: ...rved 2Fh Reserved 30h Reserved 31h Reserved 32h Reserved 33h Reset keyboard except Winbond 977 series Super I O chips 34h Reserved 35h Reserved 36h Reserved 37h Reserved 38h Reserved 39h Reserved 3Ah...

Page 85: ...go 2 Early ISA PnP initialization Assign CSN to every ISA PnP device 58h Reserved 59h Initialize the combined Trend Anti Virus code 5Ah Reserved 5Bh Optional Feature Show message for entering AWDFLASH...

Page 86: ...7Eh Reserved 7Fh 1 Switch back to text mode if full screen logo is supported If errors occur report errors wait for keys If no errors occur or Fl key is pressed to continue Clear EPA or customization...

Page 87: ...daylight saving 2 Update keyboard LED typematic rate 96h 1 Build MP table 2 Build update ESCD 3 Set CMOS century to 20h or 19h 4 Load CMOS time into DOS timer tick 5 Build MSIRQ routing table FFh Boot...

Page 88: ...page 88 SBC 815ET VER User s Guide This page intentionally left blank...

Page 89: ...ane The SBC 815ET VER is a full sized SBC and therefore is able to run on any PICMG backplane active or passive ATX Power The SBC 815ET VER is designed to support ATX mode Please refer to the followin...

Page 90: ...le of the ATX POWER with the CN7 ATX POWER CONNECTOR 20 pin connector on the backplane The CN7 which is white is located on the upper right side of the backplane 3 Use a 4 pin power cable to connect t...

Page 91: ...r part of the SBC in white You also will see a mark with J5 at the right top corner of the J5 header Connect the 4 pin power control cable to this J5 header 5 Connect the TOGGLE SWITCH with the J6 con...

Page 92: ...the above cabling Move jumper JP3 to 3 5 short and 4 6 short support ATX function Q How can I build an AT system using an ATX power supply A Do not forget to move JP3 back to 1 3 short and 2 4 short...

Page 93: ...different system clock please move JP2 CMOS clear Jumper to 2 3 power on the system to clear CMOS power off the system move JP2 back to 1 2 and power on again Q I power on the system but the CPU speed...

Page 94: ...n to Load Optimal Defaults press Enter and Y to load in default optimal BIOS setup This forces your BIOS setting back to the initial factory configuration Do this to make sure that system is running w...

Page 95: ...listed above to release more A quick review of the basic IRQ mapping is given below for your reference IRQ Description 0 System counter 1 Keyboard 2 Programmed controller 3 COM2 4 COM1 5 Nothing 6 Flo...

Page 96: ...ase note that reinstallation of this NT hard disk is inevitable You have to backup your data stored in this hard disk because it is almost impossible to switch back this system unless booting up with...

Page 97: ...your system administrator for assistance Windows NT 4 0 1 Please install your network adapter manually in Control Panel Network Adapter Drivers are required at this stage 2 Proceed to Binding after yo...

Page 98: ...page 98 SBC 815ET VER User s Guide This page intentionally left blank...

Reviews: