KÖNIG & MEYER
GmbH & Co. KG
Kiesweg 2, 97877 Wertheim, www.k-m.de
26754-000-55 Rev.02 03-80-839-00 3/18
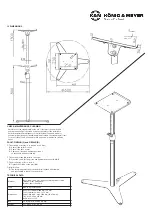
26754 Monitor stand
- Modern design and flexible handling
- Load bearing weight up to 35 kg centered load
- Secure stand through its stylish 3-point steel base
- Absorbs unwanted vibrations from foot traffic thanks to felt pads
- Functional monitor tray (W x D 230 x 250 mm):
-
- Variable angle adjustment up to 12.5° with safety ledge
-
- Movable to ensure that the load is centered
- Variable height adjustment, double reinforced tube combination
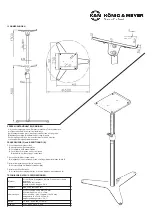
- Data: Height 800 – 1300 mm, root diameter 600 mm, Weight: 6.8 kg
SAFETY NOTES
Thank you for choosing this product. The instructions provide directions to all of the important
setup and handling steps. We recommend you keep these instructions for future reference.
A. GENERAL
A.
- Weight Bearing Load max. 35 kg centered load
A.
- Careful handling required - during all phases of use (
A - F
)
A.
- WORK ON THE STAND (Moving its location, Extend Retract, Adjust Tray) MUST ALWAYS
A.
-
BE PERFORMED WITHOUT ANYTHING ON THE STAND (due to the risk of it falling over)
A.
- Keep unauthorized personnel away from the stand
A.
- Only to be used indoors
A.
- Equipment and aids (e.g. ladders) are to be inspected to ensure that they are in
A.
-
working order
B. INSTALLATION NOTES
B.
- The floor must be suitable, i.e. load bearing and even
B.
- Proper assignment of setup crew (qualified and physically fit individuals)
B.
- Wear protective gloves during assembly, if needed
B.
- In particular, during assembly do not drop - or crush limbs
B.
- Securely screw components (base, tube combination, joint, tray) together
C. STAND SETUP
C.
- Please consider the information provided in the SETUP INSTRUCTIONS
C.
- The screw connection between the stand tube and base plate
C.
-
must be screwed in as far as it will go
2.1
C.
- The weight bearing load is not to be placed on the tray until the extension tube
C.
-
height has been adjusted, i.e. when: - the catch
4.4
is always clicked into place;
C.
- height has been adjusted, i.e. when:
- the clamping screw
4.5
has been tightened;
C.
- height has been adjusted, i.e. when:
- the angle of the tray
c
has been adjusted and
C.
- height has been adjusted, i.e. when: -
the safety nut has been re-tightened
3
and
8
C.
- Note: initially the load is carefully placed on the tray and held securely.
C.
-
If the tray tilts, the nuts
8.4
have to be tightened.
C.
- The load is to be centered on the tube combination
12
, anything
C.
-
that is not centered can have a negative effect on stand stability
D. PRIOR TO USE
D.
- Prior and after use the stand should undergo visual inspection,
D.
-
to ensure that all components are there and in working order.
D.
- Damaged stands may not be used i.e. the
D.
-
stand must be repaired by a qualified technician.
E. DURING OPERATION
E.
Safety during operation is based on:
E.
1. ...FOLLOWING the points listed here under
A - F
.
E.
2. ...MASTERING the LATERAL FORCES (DANGER OF THE STAND FALLING OVER).
E.
2.
Lateral forces should be avoided at all costs. It occurs in the following cases:
E.
2.
a. the stand is tilted (uneven surface)
E.
2.
b. the load bearing weight is not centered
E.
2.
c. external shocks such as bumping into the stand, brushing into the stand, wind etc.
E.
2.
NOTE: Maintain safety distance, keep unauthorized persons away from the stand;
E.
2.
If the effectiveness of these measures cannot be guaranteed, (e.g. the safety
E.
2.
distance not being kept and not being checked) the installer should implement
E.
2.
the following additional steps, e.g. rigging, anchoring of the base plate to the floor
E.
2.
- suitable extension/expansion/weighting down of the base plate
E. DISASSEMBLY
E.
- Always remove the load from the tray first - then retract the tube and
E.
-
disassemble the stand
SETUP INSTRUCTIONS
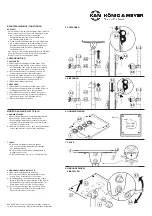
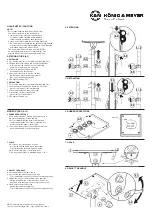
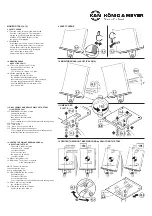
1 COMPONENTS (a-k)
SETUP (2-3)
2 STAND
2.1 Place base plate
a
onto the base tube
b.1
and screw them together tightly
2.1
using the hexagon screws M6 x 20 mm
f
and the washers ø 6.4 mm
g
.
2.1
To accomplish this use SW10
i
Allen wrench /hexagon key.
2.2 Now setup the stand and place it on the floor carefully. To protect the floor
2.2
the base plate has four screw-in feet that are covered in felt.
2.2
Parts: Carriage bolt M5 x 16 mm - Base ø 30 mm - Washer - Nut - Felt covering ø 25 mm.
2.2
Tighten the loosened stand legs with a socket wrench (SW8 = M5).
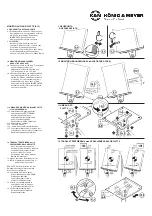
3 MONITOR TRAY
3
The tray has a safety ledge
c.1
the is either placed...
3A ...exactly above one foot or...
3B ...between two feet.
NOTE: Important information on the tray is available in Sections
9-12
.
3.1 The tray is placed on the joint using the threaded bolt
b.4
and screwed together...
3.2 ...with the safety nuts
h
and the washers ø 6.4 mm
g
.
3.2
To accomplish this, use the SW10
i
Allen wrench /hexagon key. In the final step
3.2
place the caps
e
.
1. COMPONENTS
2. STATIV
3. MONITOR-ABLAGHEPLATTE


