USABILITY
The newly developed software RANGE VIEWER allows comfortable scanning operations.
The software, designed specifically for KONICA MINOLTA RANGE Series, makes the process
from scanning to data integration quick and easy.
01
Capable of measuring dark surfaces with-
out using spray or a special darkroom.
The RANGE5 is equipped with a new Dark Surface Mode
measurement function
*1
developed utilizing our original data-
processing technology that enables measurements of dark
objects (with reflectances as low as 2.5%
*2
). Since spraying before
measurement is not required, measurement inaccuracies caused
by uneven spray layer thickness are eliminated, and since spray
and cleaning liquids are not used, environmental load is also
reduced. Plus, measurements can be taken in a normal office
environment
*3
, so there is no need to invest in a special darkroom.
*1 Although it has been greatly improved compare to our previous instruments,
there is no guarantee that the RANGE5 can measure all dark surfaces or metallic
gloss surfaces without spraying. Whether or not treatment of the surface prior to
measurement is necessary depends on actual use conditions.
*2 Reflectance at 660nm excluding specular reflectance. Based on Konica Minolta
standard measurement conditions.
*3 500 lx or less
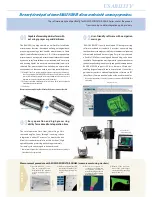
Measurement example using Dark Surface Mode measurement function
Measurement subject
Measured data
03
Easy operation and high processing
ability for reduced total operation time
The total operation time from the setting of dis-
tance and angle of view, through scanning, to data
integration is about 35 minutes* to measure Konica
Minolta’s standard sample from 30 directions. High
operability and a processing ability of approximately
1 minute/cycle on average has been achieved.
* Measurement using markers (optional accessory). Other conditions are according to
Konica Minolta Sensing standards.
02
User-friendly software with navigation
messages
”RANGE VIEWER” is newly developed 3D data processing
software included as standard. It provides various editing
functions from scanning control of the instrument to alignment
of measured data and data merging. Easy-to-see icons and
a flexible GUI allow scanning and data editing to be done
seamlessly. The navigation messages which show instructions or
the next step allow beginners to easily and quickly learn operation.
RANGE VIEWER supports 64-bit editions of Windows®,
enabling large volumes of data to be processed. It also allows
quick data transfer to optional application software via IPC
(Inter Process Communication) without the need to save files.
* For detailed specifications, refer to the Operating Environment of RANGE VIEWER in
this catalog.
①
Attach markers so that
five to ten markers are
displayed on the monitor
screen during measure-
ment.
②
Perform measurement and
check that the markers are
displayed on the monitor
screen.
③
Position is aligned ac-
cording to the automatic
recognition of three or
more matching markers in
overlapped images during
measurements.
④
Results of the measure-
ment of the entire target
are obtained by repeating
steps
②
and
③
.
Measurement procedure with KONICA MINOLTA RANGE5 (measurement using markers)
WO
RK
FL
OW
Navigation message
Personal computer
(commercial product)


