background image

92

S

ETUP MENU

LANGUAGE

The language used in the menus can be changed in section 1 of the setup menu. See
page 19 for details.

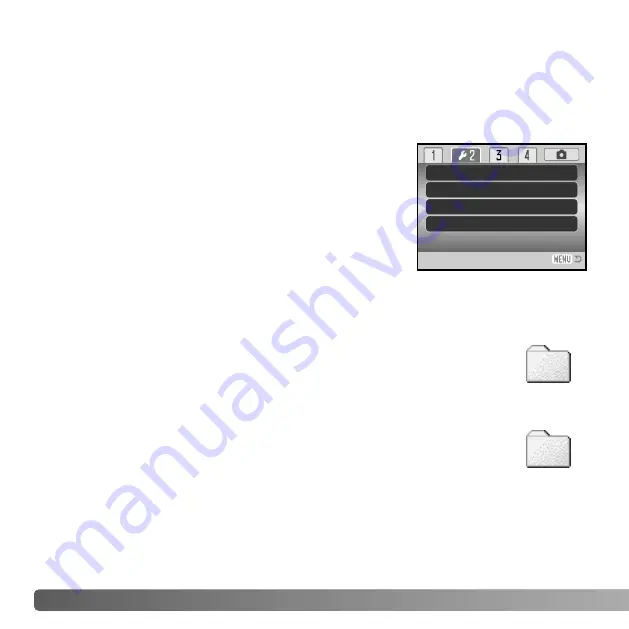
If file number memory is selected, when a new folder is
created or a new memory card is used, the next image
recorded will have a file number one greater than the last
file saved. If the new card contains an image with a greater
file number, the new image will be assigned a file number
one greater than the greatest on the card. If the file number
memory is disabled, the image file number is reset to 0001
when saved in a new folder or card. File number memory is
activated in section 2 of the setup menu.

FILE NUMBER (#) MEMORY

FOLDER NAME

All recorded images are stored in folders on the memory card. Two folder-
name formats are available in section 2 of the setup menu, standard and
date. 

Standard folders have an eight character name. The initial folder is named
100KM029. The first three digits are the folder’s serial number, which will
increase by one each time a new folder is created. The next two letters
refer to Konica Minolta, and the last three numbers indicate the camera
used; 029 indicates a DiMAGE Z6.

A date folder name also starts with the three digit serial number and is
followed by one register for the year, two register for the month, and two
registers for the day: 101YMMDD. The folder 10151219 was created in 2005 on
December 19th.

100KM029

(Standard)

10151219

(Date)

File # memory
Folder name

Date imprint

Off
Std. form

Date/Time set


Off

Summary of Contents for DiMAGE DiMAGE Z6

Page 1: ...INSTRUCTION MANUAL E...

Page 2: ...es available at the time of printing To obtain compatibility information on products not contained in this manual contact a Konica Minolta service facility BEFORE YOU BEGIN Konica Minolta is a tradema...

Page 3: ...our eye immediately rinse the eye with plenty of fresh water and contact a doctor If fluid from the batteries makes contact with your skin or clothing wash the area thoroughly with water Tape over bat...

Page 4: ...ic shock Do not use the product near inflammable gases or liquids such as gasoline benzine or paint thinner Do not use inflammable products such as alcohol benzine or paint thinner to clean the produc...

Page 5: ...r extended periods of use Turn the camera off and wait for it to cool Do not fire the flash while it is in contact with people or objects The flash unit discharges a large amount of energy which may c...

Page 6: ...ng the strap and lens cap 12 Inserting batteries 13 Battery condition indicator 14 Auto power save 14 Connecting the optional AC adapter 15 Changing the memory card 16 Turning on the camera and displa...

Page 7: ...election 42 Attaching an accessory flash 43 Navigating the recording menus 44 Drive modes 46 Self timer 47 Using continuous advance 48 Continuous advance notes 49 Using Progressive Capture 50 Bracketi...

Page 8: ...t 76 Lock 77 Movie editing 78 Copy and E mail Copy 80 Copy 81 E mail Copy 81 Slide Show 82 About DPOF 84 DPOF setup 84 Date print 85 Index print 85 Viewing images on a television 86 Setup menu 87 Open...

Page 9: ...8 Changing the memory card 110 QuickTime system requirements 110 Uninstalling the driver software Windows 111 PictBridge 112 Notes on printing errors 113 Navigating the PictBridge menu 114 Kodak EasyS...

Page 10: ...aces clean Please read the care and storage instructions in the back of this manual p 122 NAMES OF PARTS Shutter release button Lens Self timer lamp p 47 Flash p 26 Strap eyelet p 12 The tripod socket...

Page 11: ...dial p 21 29 36 40 Accessory shoe p 43 Controller Zoom lever p 20 Menu button Quick View Delete button p 30 31 Information button p 28 32 Mode switch Main switch Flash mode button p 26 Macro button p...

Page 12: ...sing your thumb and index finger pinch the outside tabs of the lens cap to remove or attach When the camera is not in use always replace the lens cap Pass one of the small loops of the lens cap strap...

Page 13: ...use other types of AA batteries The camera should be off when replacing batteries Close the battery chamber door and slide it toward the body 3 to engage the safety catch After installing the batteri...

Page 14: ...de within a minute To restore power press the shutter release button partway down or press the main switch or controller The length of the auto power save period can be changed in section 1 of the set...

Page 15: ...et The AC Adapter is recommended when the camera is interfaced with a computer or during periods of heavy use Open the terminal cover 1 and insert the mini plug of the AC adapter into the DC terminal...

Page 16: ...rce the card If the card does not fit check that it is oriented correctly 3 To eject a memory card press the card into the slot and release The card can then be pulled out Take care when removing the...

Page 17: ...r display the camera can record images and the monitor is viewed directly Recording mode Viewfinder display the camera can record images and the monitor is viewed through the viewfinder The viewfinder...

Page 18: ...te and time of recording If the clock and calendar have not been set a message is displayed for a few seconds each time the camera is turned on This message is also displayed if the clock and calendar...

Page 19: ...the controller 2 move the cursor and change settings on the menu The central button of the controller selects menu options and sets adjustments Digital Use the right key of the controller to highligh...

Page 20: ...n of this camera Thoroughly familiarize yourself with the operations in this section before moving on to the other sections in the manual USING THE ZOOM LENS The zoom lever controls the lens 1 Sliding...

Page 21: ...hile many of the camera s systems in this mode are automatic some of the functions can be changed The following list shows changes that can be made in auto recording 1 Functions which can be changed w...

Page 22: ...re An AF sensor a is displayed to indicate the subject Automatic Digital Subject Selection will choose the appropriate exposure mode see the facing page The focus signal b on the monitor will confirm...

Page 23: ...onitor display indicates Automatic Digital Subject Selection is active Place the subject in the focus frames the procedure is the same as the basic recording operation described on page 22 Press the s...

Page 24: ...to take the picture FOCUS LOCK Place the subject within the focus frame Press and hold the shutter release button partway down The focus signal indicates the focus is locked The shutter speed and ape...

Page 25: ...frame The subject is near a very bright object or area When using the sports action digital subject program the camera continually focuses when the shutter release button is pressed partway down the...

Page 26: ...ditions when taking photographs of people or animals The pre flashes contract the pupils of the subject s eyes Fill flash the flash fires with each exposure regardless of the amount of ambient light F...

Page 27: ...ens towards the wide angle position until the warning disappears CAMERA SHAKE WARNING FLASH RANGE AUTO RECORDING MODE The camera controls the flash output automatically For well exposed images the sub...

Page 28: ...the menu button to close the screen without applying any changes 28 BASIC RECORDING Pressing the information i button changes the monitor display The display cycles among the standard display real ti...

Page 29: ...eduction is used When using the flash ask your subjects not to move after the main burst the shutter may still be open for the background exposure Landscape optimized to produce sharp colorful landsca...

Page 30: ...NGLE FRAME PLAYBACK AND HISTOGRAM DISPLAY Date of capture Frame number total number of images Lock indicator p 77 DPOF indicator p 84 Image size p 54 Image quality p 54 Time of capture Shutter speed A...

Page 31: ...splayed image can be deleted Once deleted an image cannot be recovered To delete the displayed image press the QV delete button A confirmation screen appears Press the central button of the controller...

Page 32: ...ed image can be deleted using the QV delete button p 31 or a movie clip can be played by pressing the central button of the controller When the display button is pressed again the highlighted image is...

Page 33: ...the image has been reached In single frame playback in Quick View or the playback mode a still image can be enlarged for closer examination from 1 2X The maximum magnification depends on image size ra...

Page 34: ...p 94 18 Frame counter p 55 26 Color mode indicator p 65 24 Image size display p 54 23 Image quality indicator p 54 2 Mode indicator 10 Exposure mode indicator p 36 38 14 Macro mode indicator p 35 9 Ex...

Page 35: ...selected the lens automatically zooms to a specific focal length position and cannot be changed Standard macro allows the zoom to be used The minimum focus distance changes with focal length see below...

Page 36: ...aperture values of the exposure are displayed on the monitor when the shutter release button is pressed partway down If shutter speed and aperture displays turn red the scene is beyond the exposure c...

Page 37: ...t The shutter speed can be set between 1 1000 and 4 seconds If the shutter speed is beyond the aperture range the aperture display turns red The flash mode can be set to fill flash fill flash with red...

Page 38: ...d If the monitor is black increase the exposure until the image is visible decrease the exposure if the monitor is white In manual exposure mode the auto camera sensitivity setting fixes the ISO value...

Page 39: ...itions This can affect the capture rate Allow the camera to cool before taking pictures Camera Notes Konica Minolta History Innovation and creativity is the cornerstone of Minolta s success The Electr...

Page 40: ...ord until the recording time is used or the shutter release button is pressed again This camera can record digital video with sound Total recording time varies with the frame rate see page 68 The opti...

Page 41: ...the adjustment The camera exposure can be adjusted to make the final picture lighter or darker by as much as 2Ev in 1 3 increments Exposure compensation can only be used with Digital Subject Programs...

Page 42: ...re Once a focus area is selected it remains active even after the picture has been taken Press and hold the central button of the controller to return to the standard focus frames Press and hold the c...

Page 43: ...ts Off camera flash cables and accessories are not compatible with this camera The Close up Diffuser CD 1000 can be used 43 ATTACHING AN ACCESSORY FLASH To extend the versatility of the camera an acce...

Page 44: ...ys to scroll through the menu options Highlight the option whose setting needs to be changed With the menu option highlighted press the right controller key the settings are displayed with the current...

Page 45: ...sitivity Color mode Contrast Auto NaturalColor Normal Normal Sharpness Auto recording menu Digital Subject Program menu Movie menu P A S and M exposure mode menu Flash mode 62 26 Focus mode 58 Frame r...

Page 46: ...ged Refer to the following sections for descriptions of the drive modes Single frame advance to take a single image each time the shutter release button is pressed p 22 Continuous advance to continuou...

Page 47: ...and is accompanied by an audio signal A few seconds before the exposure the self timer lamp blinks rapidly The lamp glows steadily just before the shutter fires To stop the countdown slide the zoom l...

Page 48: ...in the basic recording operation section p 22 Press the shutter release button partway down 1 to lock the focus and exposure for the series Press and hold the shutter release button all the way down 2...

Page 49: ...apture is also reduced The following chart lists the approximate maximum number of images that can be captured at the maximum frame rate the rate of capture after this limit depends on file size and t...

Page 50: ...g pictures focus and exposure are locked with the first frame When the shutter release button is pressed and held the camera begins recording Release the shutter 3 to save the images in the camera mem...

Page 51: ...res to process large numbers of images quickly Jobs can be created for specific adjustments and applied to other images as well as used for batch processing Processing can be simply cut and pasted fro...

Page 52: ...increment Press the central button of the controller to set the value To change the increment select the bracketing drive mode again with the menu 52 ADVANCED RECORDING BRACKETING Compose the picture...

Page 53: ...ries has completed the camera will reset and the entire bracket must be made again The flash cannot be used with the bracketing drive mode The order of the bracket series is normal exposure underexpos...

Page 54: ...fine mode produces the highest quality image and the largest image files Image size and quality must be set before the picture is taken Changes are displayed on the LCD monitor Changes made on one men...

Page 55: ...by more than one When the frame counter displays zero it indicates no more images at the image size and quality settings can be captured Changing those settings may allow more images to be saved to th...

Page 56: ...speed in use and the degree of shaking The system may not work with moving subjects or when the camera is panned Camera shake warning Anti shake indicator When the system is active the Anti Shake indi...

Page 57: ...ct of the Anti Shake system can be seen in the live image Exposure Anti Shake is only applied during the exposure and is not apparent in the live image When the shutter release button is pressed partw...

Page 58: ...t AF indicated by S on the monitor allows the focus to be locked before recording the image see the basic recording section Continuous AF indicated by C continually focuses the camera When capturing s...

Page 59: ...ally a scale shows the approximate subject distance The scale changes depending on the focusing range Use the up down controller keys to focus the monitor image is automatically magnified by a maximum...

Page 60: ...ting conditions When the built in flash is used the white balance is set for the color temperature of the flash Fluorescent for fluorescent lighting office ceiling lights Tungsten for incandescent lig...

Page 61: ...image area with a white object the object does not need to be in focus Press the central button of the controller to make the calibration or press the menu button to cancel the routine The live view...

Page 62: ...isabled FLASH MODE The flash modes can be changed in section 2 of the P A S and M menus p 44 This menu option is used when another function is assigned to the flash mode button see page 67 on the cust...

Page 63: ...lues over the entire image area with emphasis given the central region Spot metering uses a small area within the image to calculate the exposure A small circle appears in the middle of the live image...

Page 64: ...1ft 0 5 5 1m 1 7 16 7ft 1 2 1 8m 3 9 5 9ft 1 2 2 5m 3 9 8 2ft 1 2 3 2m 3 9 10 5ft Flash range wide angle The auto setting automatically adjusts the camera sensitivity to the light conditions between...

Page 65: ...his mode uses no monitor indicator when active Vivid Color increases the saturation of the colors in the scene Black White produces neutral monochrome images The sepia mode creates warm tone monochrom...

Page 66: ...ccents or softens details in an image in three levels hard normal and soft This can be set in section 3 of the P A S and M menus p 44 Any changes made are applied to the live image but may be difficul...

Page 67: ...ase button partway down to apply the setting When selecting custom white balance the calibration screen appears Fill the frame with a white object and press the central button of the controller to cal...

Page 68: ...of the card and the recording rate The actual file size is determined by the scene some subjects can be compressed further than others The performance of the memory card may prematurely end the recor...

Page 69: ...h camera sensitivity to record under low light levels camera sensitivity will automatically increase in low light Image quality can be lower with Night Movies because of the higher sensitivity The mov...

Page 70: ...tton to view the movie with or without the guidance bar During playback the up down keys adjust the volume and the left right keys rewind and fast forward the recording The basic functions in this mod...

Page 71: ...d to jog the clip to display the correct frame Play Rew Fwd Press the up key of the controller to capture the frame Before the frame is captured a confirmation screen appears Choosing Yes executes the...

Page 72: ...y the settings are displayed with the current setting highlighted If Enter is displayed press the center of the controller to continue Use the up down keys to highlight the new setting Once a setting...

Page 73: ...for the Slide Show p 82 To specify how long each image is played back p 82 To repeat the Slide Show presentation automatically p 82 To select images for DPOF printing p 84 To print the date with the D...

Page 74: ...u button cancels the screen and any operation made The garbage can indicates the image is selected for deletion The key indicates the image is locked or selected to be locked The check indicates the i...

Page 75: ...frames To delete multiple files When this setting is chosen the frame selection screen is displayed Use the left right keys of the controller to highlight the first file to be deleted Pressing the up...

Page 76: ...No cancels the formatting operation A screen appears to indicate the card has been formatted 76 ADVANCED PLAYBACK FORMAT When a memory card is formatted all data on the card is erased A memory card us...

Page 77: ...rked frames To lock or unlock multiple files When this setting is chosen the frame selection screen p 74 is displayed Use the left right keys of the controller to highlight the file to be locked Press...

Page 78: ...e function menu indicates the active step in the editing procedure The up down key selects functions Find 1st frame of cut function find Find last frame of cut function find Use the left right keys of...

Page 79: ...d points To cancel the edit operation press the menu button Save edit function save Save edit function save After the edited movie clip is saved the file name is displayed The original movie file can...

Page 80: ...pied The copy and E mail copy functions have two menu options To copy the file displayed or highlighted in the playback mode This frame Marked frames To copy single or multiple files When selected the...

Page 81: ...o camera memory Change card Copying to card Copied to 101KM_CP OK E mail copy makes a 640x480 VGA JPEG copy of an original still image The copy of a fine quality image is converted to standard quality...

Page 82: ...n When this setting is chosen the frame selection screen p 74 is displayed Use the left right keys of the controller to highlight the image to be included in the presentation Pressing the up key will...

Page 83: ...l button of the controller to pause and restart the slide show presentation Press the menu button to cancel the presentation Camera Notes The controller can be used to control the presentation during...

Page 84: ...age This frame All frames Marked frames To chose a group of images to be printed or when the number of copies of each image varies When selected the frame selection screen p 74 appears Use the left ri...

Page 85: ...n printed the DPOF file will still remain on the memory card and must be canceled manually DATE PRINT To print the date of capture with each image with a DPOF compatible printer turn the section 3 men...

Page 86: ...AV cable into the camera s AV out terminal The arrow on the plug should face the back of the camera 3 Plug the other end of the AV cable into the video and audio input terminals on the television The...

Page 87: ...Image Quality Auto D Drive mode Image size Quality Auto DSP Anti shake Drive m Setup menu The setup menu is opened from the other menus It can be accessed from any of the recording or playback menus P...

Page 88: ...ll through the menu options Highlight the option whose setting needs to be changed With the menu option highlighted press the right controller key the settings are displayed with the current setting h...

Page 89: ...format p 92 To activate date imprinting p 94 To reset camera functions p 95 To change or turn off audio signals p 97 To change or turn off the shutter sound effect p 97 To adjust the volume of camera...

Page 90: ...ration is made within a certain period The length of the auto power save period can be changed to 1 3 5 or 10 minutes When the camera is connected to a computer the auto power save period is fixed at...

Page 91: ...e Release the shutter button to end the playback Camera Notes LENS ACCESSORY This camera is compatible with the optional Wide Angle Converter ZCW 300 Kit This kit contains a 0 75X wide angle converter...

Page 92: ...NUMBER MEMORY FOLDER NAME All recorded images are stored in folders on the memory card Two folder name formats are available in section 2 of the setup menu standard and date Standard folders have an e...

Page 93: ...and file names see page 106 DATE AND TIME SETUP It is important to accurately set the clock When a still image or a movie clip is recorded the date and time of the recording are saved with the image...

Page 94: ...e imprinting function must be activated in section 2 of the setup menu p 88 before the image is taken Once activated the date will continue to be imprinted until the function is reset a yellow bar is...

Page 95: ...firmation screen appears choosing Yes resets the following functions and settings No cancels the operation p 26 Flash mode Autoflash Fill flash in A S M modes p 46 Drive mode Single frame advance p 23...

Page 96: ...save period 1 minute p 91 Lens accessory None p 92 File number memory Off p 92 Folder name Standard p 97 Audio signals 1 p 90 LCD Brightness Normal p 91 Instant playback Off Setup menu p 97 Shutter FX...

Page 97: ...the shutter is released a shutter sound effect gives a positive confirmation a still image is recorded The sound effect can be turn off in section 3 of the setup menu p 88 Two shutter effects are ava...

Page 98: ...ages on your television set TRANSFER MODE The data transfer mode must be specified depending on whether images are transferred to a computer or printed directly The data storage option must be selecte...

Page 99: ...tion 4 of the setup menu p 88 The transition between the optical zoom and digital zoom is seamless When the digital zoom is active the image magnification is displayed on the monitor and the focus fra...

Page 100: ...river software must repeat the installation procedure The updated version of the driver software included on the supplied Digital Camera Software CD ROM is required for the operation of the DiMAGE Z6...

Page 101: ...ed to a computer see page 110 3 Open the terminal cover and attach the smaller plug of the USB cable to the camera The arrow on the plug should face the back of the camera Make sure the plug is firmly...

Page 102: ...eted a drive icon or volume appears in My Computer or the desktop the name varies with memory card When using Windows XP a window opens requesting instructions on what to do with the image data follow...

Page 103: ...or other Windows or Macintosh operating systems CONNECTING TO WINDOWS 98 AND 98 SE Before connecting the camera to the computer place the Digital Camera Software CD ROM in the CD ROM drive The DiMAGE...

Page 104: ...OM drive at Win98 USB When the location is shown in the window click Next Manual Installation To install the Windows 98 driver manually follow the instructions in the connecting the camera to a comput...

Page 105: ...r in the system One of three drivers may be located MNLVENUM inf USBPDR inf or USBSTRG inf The last window confirms the driver has been installed Click Finish to close the add new hardware wizard Rest...

Page 106: ...CP 103KM_EM From left to right standard folder date folder copy folder e mail copy folder Copy images p 80 are placed in a folder with a name ending in CP E mail Copy images are placed in a folder end...

Page 107: ...ting the original data the Exif tag information is erased Some Exif compatible applications rewrite the Exif data preventing DiMAGE Master Lite from reading it When using software other than the DiMAG...

Page 108: ...and quit the application before disconnecting the camera Windows 98 98 Second Edition Never disconnect the camera when the access lamp is red the data or memory card may permanently be damaged To disc...

Page 109: ...device components check box Highlight the device to be stopped by clicking on it then click Stop A confirmation screen appears to indicate the devices to be stopped Clicking OK stops the device The s...

Page 110: ...SB connection 1 Stop the USB connection by dragging the drive icon into the trash p 109 2 Turn off the camera 3 Change the memory card 4 Turn on the camera to remake the USB connection Never remove th...

Page 111: ...universal serial bus controller or other devices location of the device manager Click on the locations to display the files The driver should be indicated with Konica Minolta the camera name or USB M...

Page 112: ...menu navigation section on page 114 The information i button switches between the single frame and index playback formats on the PictBridge screen Enlarged playback activated with the zoom lever can b...

Page 113: ...ed battery or the optional AC adapter If a minor problem occurs during printing such as the paper runs out follow the procedure recommended for the printer no action is required for the camera If a ma...

Page 114: ...ettings are displayed with the current setting highlighted If Start is displayed press the center of the controller to continue Use the up down keys to highlight the new setting Once a setting has bee...

Page 115: ...on screen is displayed before the print routine starts The options that can be changed vary with the printer Batch print in section 1 selects all still images on the memory card for printing Two optio...

Page 116: ...d 100mmx150mm Postcard L Printer setup 4 x 6 2L 8 x 10 A4 Letter 116 DATA TRANSFER MODE Paper size Print quality The print quality can be set The printer setup option uses the quality set with the pri...

Page 117: ...select the start option from the menu to begin the routine The number of prints in the print run are displayed an index print is counted as one Press the central button of the controller to begin pri...

Page 118: ...editing tools To take advantage of these features install Kodak EasyShare software on your computer Kodak EasyShare software is not supplied in all sales regions The following are the system requireme...

Page 119: ...e setup type screen select Typical to automatically install all the applications Select Custom to choose the applications you wish to install Mac OS X Follow the on screen instructions 5 Restart the c...

Page 120: ...wing are the system requirements for DiMAGE Master Lite software DiMAGE Master Lite If you are running Windows 2000 or XP you require administrator privileges to install DiMAGE Master Lite Compatibili...

Page 121: ...based computer The launcher appears Click the camera support Applications button and then the install DiMAGE Master Lite button to begin the installation routine If the launcher does not appear see s...

Page 122: ...ESHOOTING Pictures are not sharp Subject is too close Make sure the subject is within the autofocus range p 24 or use the macro mode p 35 The camera is in macro mode Cancel the macro mode setting p 35...

Page 123: ...ol before removing or disconnecting the power supply Always turn the camera off using the main switch otherwise the memory card may be damaged and the camera reset The camera controls the live monitor...

Page 124: ...ry well ventilated area away from dust and chemicals For long periods of disuse store the camera in an airtight container with a silica gel drying agent Remove the batteries and memory card from the c...

Page 125: ...performance If batteries have been exhausted when used in the camera do not reload them even if their charge seems to recover over time These batteries will interfere with normal camera operation A s...

Page 126: ...necessary The response time is longer with MultiMediaCards compared with SD Memory Cards This is not a defect but rather due to the specifications of the cards When using large capacity cards some op...

Page 127: ...ta has no responsibility for any damage or loss incurred by equipment malfunction Questions and service If you have questions about your camera contact your local camera dealer or write to the Konica...

Page 128: ...cordance with the instructions may cause harmful interference to radio communications However there is no guarantee that interference will not occur in a particular installation If this equipment does...

Page 129: ...shutter speed needed to make the exposure Usually landscape photographs use a large depth of field large aperture value to keep the foreground and background in focus and portraits use a shallow depth...

Page 130: ...es from the front of the lens Autofocusing system Video AF Focus modes Single shot AF Continuous AF with Predictive Focus Control Full time AF Manual focus Shutter CCD electronic shutter and mechanica...

Page 131: ...playback Approximate continuous playback time 300 min with alkaline batteries 400 min with 2500mAh Ni MH batteries based on Konica Minolta standard Optional external power source AC Adapter AC 11 Dime...

Page 132: ...2005 Konica Minolta Photo Imaging Inc under the Berne Convention and the Universal Copyright Convention 9222 2806 11 CR A507 Printed in China...

Reviews: