background image

bizhub C3851FS/C3851/C3351

2-3

2.2

Introduction to user's guide

2

Us

e

r's

 Gui

d

e

s

Chapt

e

r 2

2.2

Introduction to user's guide

The user's guide of this product consists of this manual and the User's Guide CD.

This guide describes basic procedures required to use this machine and how to configure initial settings.

If you want to learn about more detailed functions or operation methods, refer to the User's Guide included 
in the User's Guide CD.

This manual also contains notes and precautions that should be followed in order to use this machine. Be 
sure to read "Safety information" in chapter 1 of this manual before use.

2.2.1

User's Guide CD

The User's Guide CD is provided with this machine.

Select a desired function on the top page (Home), and check the details of the function.

Selecting [Introduction] on the top page (Home) allows you to view detailed methods for using the User's 
Guide.

Name

Overview

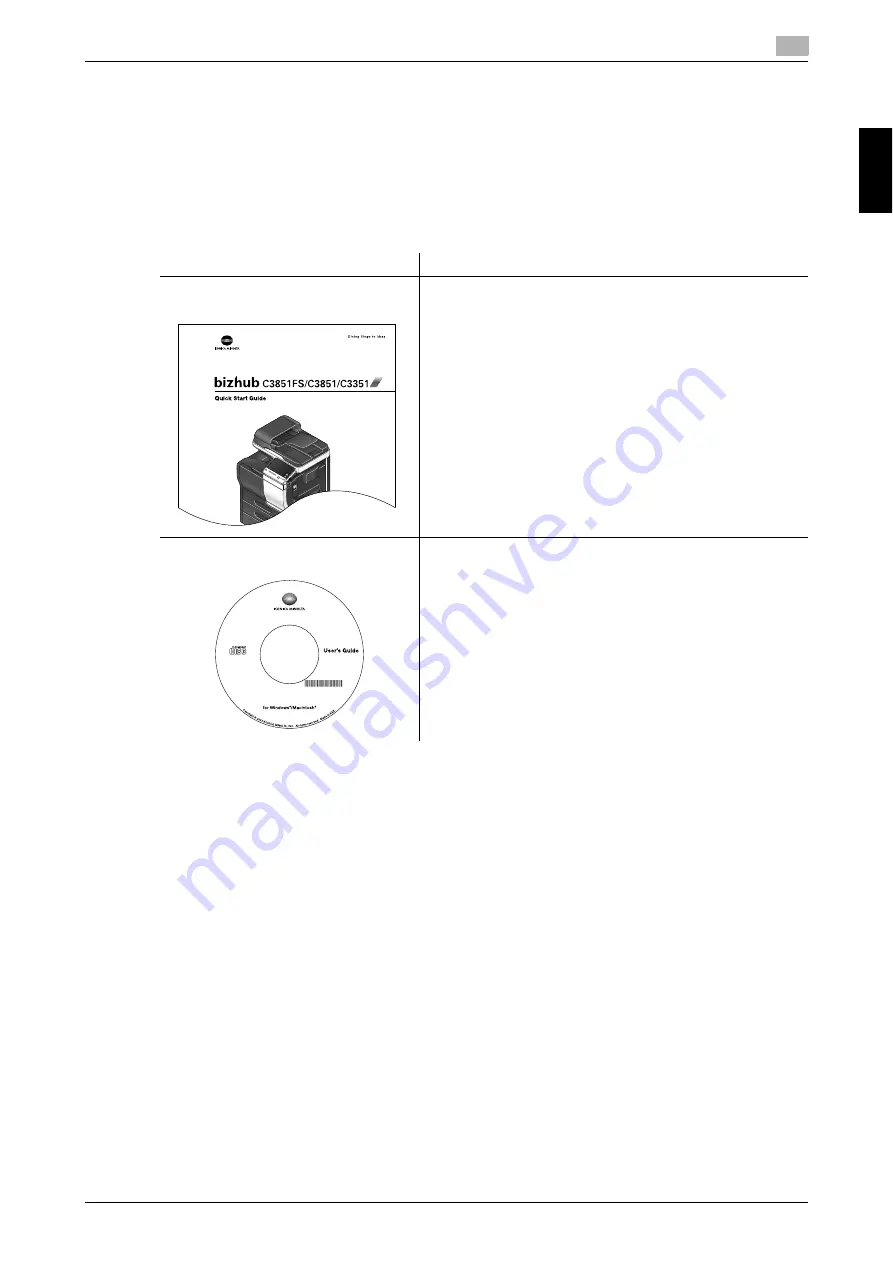
Quick Start Guide

This manual describes basic procedures users will need to 
know in order to use this machine.
This manual also contains notes and precautions that should 
be followed in order to use this machine. Please be sure to 
read this manual before using this machine.

User's Guide CD

This CD contains basic and detailed information on the func-
tions of this product and also explanations of other various 
setting functions.

Summary of Contents for BIZHUB C3351

Page 1: ...INDEX 1 Introduction 2 User s Guides 3 Overview of This Machine 4 Loading Paper 5 Initial Settings of This Machine 6 Basic Usage 7 Index Quick Start Guide...

Page 2: ...CDRH regulations 1 13 For European users 1 13 Laser safety label 1 14 Ozone Release 1 14 Acoustic noise for European users only 1 14 Notification for California Customers 1 14 Recycling batteries for...

Page 3: ...on 3 6 List of optional components 3 6 List of other optional components 3 7 3 2 Power Supply 3 9 3 2 1 Power Switch and Power key locations 3 9 3 2 2 Turning the Power Switch ON or OFF 3 10 3 2 3 Usi...

Page 4: ...s environment 6 2 6 1 1 Printer driver 6 2 6 1 2 Preparation for printing network connection 6 2 Checking the LAN cable connection 6 2 Checking the network settings 6 2 Installing the printer driver 6...

Page 5: ...51 C3351 6 6 Registering a destination 6 20 6 6 1 Address book 6 20 6 6 2 Registering address books 6 20 Registering from the Utility 6 20 Registering from Address Book 6 24 Registering from the Fax S...

Page 6: ...1 Introduction Chapter 1 Introduction...

Page 7: ...roduct safety Precautions when using the machine Descriptions on trademarks and copyrights The illustrations and screens used in this manual may appear slightly different from views of the actual equi...

Page 8: ...By setting the time to go into power saving modes e g sleep mode shorter or optimal electricity consumption can be reduced Recycled Paper This product can print on recycled paper and environmental ste...

Page 9: ...espond with the purchased product Warning and precaution symbols Be sure to observe the safety precautions This manual contains the instructions that should be strictly observed at all times to preven...

Page 10: ...power cord exposed core wire broken wire etc could result in a fire or breakdown Should any of these conditions be found immediately turn OFF the pow er switch unplug the power cord from the power ou...

Page 11: ...ic symbols Keep this bag away from babies and children Do not use in cribs beds carriages or playpens The thin film may cling to nose and mouth and prevent breathing This bag is not a toy Do not place...

Page 12: ...ations specified in the User s Guide or other documents If the unit is moved while held at loca tions other than those specified it may fall causing severe personal inju ry Descriptions Graphic symbol...

Page 13: ...n implantable medical equipment cardiac pacemaker etc do not bring the IC card reader close from the implant within 12 cm at all times The radio waves may affect implantable medical equipment cardiac...

Page 14: ...They could cause these products to malfunction Do not force open the toner related parts e g toner cartridge develop ing unit and Waste Toner Box If toner tumbles from the toner bottle take utmost car...

Page 15: ...tion is extremely hot Before replacing the fusing unit be sure to open doors and covers of the machine Then leave the machine to stand idle for a specified period of time and make sure that the fusing...

Page 16: ...d Radiation Power UK 216 includes approved Wireless module MODEL DAUB KM66 2 4 GHz Max 20 dBm 5 GHz Max 23 dBm EK P06 includes approved Wireless module MODEL MBH7BLZ02 2 4 GHz Max 3 dBm AU 201S Authen...

Page 17: ...hielded cables is likely to result in interference with radio communications and is prohibited under FCC rules INTERFERENCE CAUSING EQUIPMENT STANDARD ICES 003 ISSUE 5 for Canada users This Class B di...

Page 18: ...ted to the Center for Devices and Radiological Health CDRH of the U S Food and Drug Administration of the U S Department of Health and Human Services DHHS This means that the device does not produce h...

Page 19: ...onnement de l appareil quand celui ci est uti lis normalement Cependant une odeur d sagr able peut tre ressentie dans les pi ces dont l a ration est insuffisante et lorsque une utilisation prolong e d...

Page 20: ...information of your local community or contact our dealers re grading the proper handling of end of life electric and electronic equipments Re cycling of this product will help to conserve natural res...

Page 21: ...ollowing positions Be very careful that an accident does not occur when operations such as removing paper jams and staple jams are performed 7CAUTION Do not remove caution labels or notations If any c...

Page 22: ...ct It is designed to be connected to a compatible modular jack that is also compliant See installation instructions for details The REN is used to determine the number of devices that may be connected...

Page 23: ...ng machine or such business other entity or individual The telephone number provided may not be a 900 number or any other number for which charges exceed local or long distance transmission charges In...

Page 24: ...operation consumables replenishing part replacement and regular maintenance can easily be performed adhere to the recommended space requirements detailed below Unit inch mm Front view bizhub C3851 bi...

Page 25: ...851FS C3851 C3351 Space requirements 1 1 6 Introduction Chapter 1 Right view with optional devices installed The hatched parts indicate optional devices in this figure 23 584 36 11 16 932 32 15 16 836...

Page 26: ...here they are not exposed to light in order to prevent them from fading Adhesive that contains solvent e g spray glue may dissolve the toner on copies Color copies have a thicker layer of toner than n...

Page 27: ...1 22 bizhub C3851FS C3851 C3351 Operation precautions 1 1 7 Introduction Chapter 1 bizhub C3851FS bizhub C3851 bizhub C3351 53 1 kg 117 lbs 49 2 kg 108 lbs...

Page 28: ...bizhub C3851FS C3851 C3351 1 23 1 7 Operation precautions 1 Introduction Chapter 1 Do not place the machine where air or wind will blow on it The machine may not operate properly...

Page 29: ...overnment agencies Internal revenue stamps canceled or uncanceled Passports Immigration papers Motor vehicle licenses and titles House and property titles and deeds General Identification cards badges...

Page 30: ...ndroid and Google Cloud Print are registered trademarks or trademarks of Goog le Inc Mopria the Mopria Logo and Mopria Alliance logo are registered trademarks and service marks of Mo pria Alliance Inc...

Page 31: ...gistered trademarks or trademarks of the Wi Fi Alliance FeliCa is a registered trademark of Sony Corporation MIFARE is a registered trademark of NXP Semiconductors Bluetooth is a registered trademark...

Page 32: ...nditions of this Agreement 5 You agree not to modify adapt or translate the Software and Documentation 6 You agree that you will not attempt to alter disassemble decrypt reverse engineer or decompile...

Page 33: ...SSIBILITY OF SUCH DAMAGES OR FOR ANY CLAIM BY ANY THIRD PARTY KM OR ITS LICENSOR DISCLAIMS ALL WARRANTIES WITH REGARD TO THE PROGRAM EXPRESS OR IMPLIED INCLUDING WITHOUT LIMITATION IMPLIED WARRAN TIES...

Page 34: ...2 User s Guides Chapter 2 User s Guides...

Page 35: ...scan destinations such as FTP WebDAV and E mail The intended use also requires that The system is used within the limits of device specifications and specifications of optional components All safety i...

Page 36: ...ety information in chapter 1 of this manual before use 2 2 1 User s Guide CD The User s Guide CD is provided with this machine Select a desired function on the top page Home and check the details of t...

Page 37: ...lpha bet characters to carry out a search Some pages are not targeted for searching 3 Search by Usage Searches for the required operations of this machine based on the re quest format of wanting to do...

Page 38: ...ription User Persons using the system for its intended use see page 2 2 as well as man aging system functions and consumables according to the assigned user rights Administrator Persons managing consu...

Page 39: ...ors This check mark symbol shows a precondition of a procedure This symbol indicates a supplementary explanation of a procedural instruction An item enclosed by brackets indicates a key name on the To...

Page 40: ...3 Overview of This Machine Chapter 3 Overview of This Machine...

Page 41: ...up in this tray 2 d Original Output Tray The scanned original is fed out onto this tray 2 e Document Stopper Used to prevent the output original from falling 3 USB Port Type A USB2 0 1 1 Used to conne...

Page 42: ...cription 1 Scanner Lock Lever Used to lock or unlock the scanner To use this machine unlock the scanner 2 Original Glass Used to load the original 3 Slit Scan Glass Used to scan an original image when...

Page 43: ...a cable No Name Description 1 Power Switch Press this switch to turn the machine on or off 2 Power Connection Connect the power cord to this inlet to supply power to this machine 3 USB Port Type B Co...

Page 44: ...his machine 3 Overview of This Machine Chapter 3 Finisher bizhub C3851FS No Name Description 1 Main Tray Outputs printed pages 2 Processing Tray Used to conduct stapling Also this tray is used to outp...

Page 45: ...05 or Local Interface Kit EK P06 is required in addition to the Mount Kit MK P02 This unit can also be installed on the Working Table WT P02 4 Working Table WT P02 Provides an area to temporarily plac...

Page 46: ...ne of special fonts 9 i Option LK 107 Used to add a unicode font that is one of special fonts 10 i Option LK 108 Used to add an OCR font that is one of special fonts In the standard the OCR B font Pos...

Page 47: ...About this machine 3 3 1 Overview of This Machine Chapter 3 17 Mount Kit MK P02 Required to have Authentication Unit AU 201S built in to the main unit 18 Staple Kit SK 602 Used in the Finisher of bizh...

Page 48: ...se it may lead to a paper jam If the Power Switch is turned off or the Power key is pressed while this machine is running the system de letes the currently loaded data or communicating data as well as...

Page 49: ...hen the Power key is pressed To configure settings Utility Administrator Settings System Settings Power Supply Power Save Set tings Power Save Key default Power Save When using the Power key as a Powe...

Page 50: ...mode To enable the machine to return to the normal mode from the Sub Power Off status press the Power key again Power key Status of this ma chine Status of LED Description Power key Status of this ma...

Page 51: ...tication with an operation from PageScope Mobile for iPhone iPad For details on the association with an Android iOS terminal refer to Web Management Tool in the User s Guide CD 3 Keypad KP 101 Keypad...

Page 52: ...Start Press this key to start an operation such as copying scanning faxing or printing Lights up blue This machine is ready to start operating Lights up orange This machine is not ready to start oper...

Page 53: ...n immediately This action is available when selecting or determining a menu Double tap Lightly touch the screen with your finger twice in succession Used to retrieve detailed information to enlarge a...

Page 54: ...e your finger on it and move your finger Used to move the scroll bar or document Pan Slide your finger parallel in a front to back and side to side direction on the screen Used to move to the intended...

Page 55: ...he document to the intended place Pinch in Pinch out Place two fingers on the screen and then open or close them Used to enlarge or reduce a preview image Related setting When Zoom Display Setting is...

Page 56: ...fingers on the screen and then rotate them Used to rotate a preview image Displaying the Keypad Tap a number or input area on the screen to display the Keypad Used to enter numerals Moving the Keypad...

Page 57: ...ng force to the Touch Panel will damages the Touch Panel and potentially cause a breakage When operating the Touch Panel do not press on it using excessive force or with a pointed object such as a mec...

Page 58: ...le by adjusting the Touch Panel or changing keying sounds For details refer to Accessibility in the User s Guide CD 3 Counter The total number of pages printed by this machine will be displayed while...

Page 59: ...Page switching key Tap this key to switch pages when main menu keys are assigned to multiple pages Pages can also be switched by dragging or flicking the screen 11 Utility Tap this button to configure...

Page 60: ...delete a character or value you entered Tap this key to move the cursor Delete Tap this key to delete characters you entered one by one Shift Tap this key to enter uppercase letters or symbols Enlarge...

Page 61: ...3 22 bizhub C3851FS C3851 C3351 Entering characters 3 3 6 Overview of This Machine Chapter 3...

Page 62: ...4 Loading Paper Chapter 4 Loading Paper...

Page 63: ...e Side Only 2 Special Paper 3 Colored Paper 5 User Paper 1 6 User Paper 2 6 15 15 16 lb to 23 15 16 lb 60 g m2 to 90 g m2 Bypass Tray 100 sheets 1 Tray 1 550 sheets 1 Letterhead 4 15 15 16 lb to 23 15...

Page 64: ...ar gin is selected there may be some part of the paper that is not able to be printed on To obtain the optimal result configure the custom setting so that an image is included in the printable area of...

Page 65: ...f the body Paper with different paper quality roughness on the front and back sides Paper that is too thin or too thick Paper containing static electricity Acidic paper Other types of unavailable pape...

Page 66: ...ray NOTICE To use the Bypass Tray load paper and specify the paper size and paper type Do not load the following paper into the Bypass Tray Doing so may cause a paper jam or damage to the machine Fold...

Page 67: ...paper sizes refer to page 4 3 For details on how to load postcards envelopes and letterhead paper refer to Introduction in the User s Guide CD NOTICE Do not load an excessive number of sheets such th...

Page 68: ...User s Guide CD 1 Pull out Tray1 2 Slide the Lateral Guide to fit the size of the loaded paper 3 Load paper into the tray with the print side facing up For details on the available paper sizes refer...

Page 69: ...r Chapter 4 4 Slide the Lateral Guide to fit the size of the loaded paper NOTICE Exercise care to ensure that there is no clearance between the Lateral Guide and paper 5 Close Tray1 6 Change the paper...

Page 70: ...5 Initial Settings of This Machine Chapter 5 Initial Settings of This Machine...

Page 71: ...s manually enter the IP address subnet mask and default gateway ad dress In the Control Panel select Utility Administrator Settings Network Settings TCP IP Setting IPv4 Settings then configure the fol...

Page 72: ...ent register an outside line number To configure settings Utility Administrator Settings Fax Settings PBX Connection Setting Selecting a receiving method Methods of receiving faxes include the followi...

Page 73: ...ine In order to use this machine securely we recommend that you change the administrator password to one that complies with the password rules and specify the settings for Quick Security Setting in ad...

Page 74: ...6 Basic Usage Chapter 6 Basic Usage...

Page 75: ...f no IP address is displayed you need to set up the network For details refer to page 5 2 Installing the printer driver Use the installer to install the printer driver on your computer 0 Administrator...

Page 76: ...t the check box of the printer driver you want to install in Components to Be Installed For features of each printer driver refer to page 6 2 The PCL driver is installed by de fault In Print Type Defa...

Page 77: ...er 2012 R2 Server 2016 while pressing the Windows key press the X key and then click Control Panel in the displayed menu In Windows 7 Server 2008 R2 click the Start menu then click Control Panel 2 Cli...

Page 78: ...ntinue or Yes 3 Select the Agree the Software End User License Agreement check box 4 Select Install printers MFPs in Select menu to setup and click Next Connected printers are detected 5 Select this m...

Page 79: ...ntrol Panel Hardware and Sound Printers 2 Open the printer properties In Windows 7 8 1 Server 2008 R2 Server 2012 Server 2012 R2 Server 2016 right click the icon of the installed printer and from Prin...

Page 80: ...er has been selected The Print dialog box varies depending on the application software 3 Specify the print range and the number of copies to print 4 Click Properties or Preferences to change the print...

Page 81: ...e to the WebDAV server This function is useful when transferring a file through the WebDAV server Save in User Box Saves the original data scanned by this machine in a User Box of this machine The ori...

Page 82: ...original can be specified in Scan Size default 8 1 2 e 11 inch area A4 centim eter area If you fail to set the original size correctly the image may be cut off 5 Configure Scan option settings as nece...

Page 83: ...telephone lines including facsimile communication networks PBX Private Branch Exchange 2 wire Fax data cannot be sent or received in color You cannot connect a business phone as an external telephone...

Page 84: ...and settings as necessary To redo operations for specifying destinations or option settings press the Reset key If the screen to confirm the specified destination or settings appears check the conten...

Page 85: ...TX Password TX sends a fax with a password It is used to send faxes to a device on which fax peers are restricted by passwords a device with Closed Network RX enabled Polling TX Polling TX stores a f...

Page 86: ...on The same network as the one used by the computers is used to transmit faxes Therefore communication costs are not charged as they are for normal faxes In addition to IP address you can also use a h...

Page 87: ...original can be specified in Original Settings default 8 1 2 e 11 inch area A4 centimeter area If you fail to set the original size correctly the image may be cut off 4 If necessary configure copy set...

Page 88: ...est copy and check it is accept able When making a large number of copies use the proof copy function to prevent a large number of copy errors from occurring Color Select a color for copying Density A...

Page 89: ...u will create a large poster Image Adjust Specify how to arrange the original image on the paper You can enlarge a part of the original to the maximum limits of the paper or arrange the original image...

Page 90: ...hadows outside the original Save in User Box Save original images in the hard disk user box of this machine You can also save an original in a user box and print at the same time Program Jobs Original...

Page 91: ...ile this machine is active Do not disconnect the USB memory directly after connecting it How to print Any of PDF Compact PDF JPEG TIFF XPS Compact XPS OOXML docx xlsx pptx and PPML ppml vdx zip format...

Page 92: ...int then tap Print You can directly enter the path to the file folder in the File Path field Tap Top to move upward Tap Open to open the folder and move downward Tap Details to display and check the d...

Page 93: ...mon settings Description No Use the Keypad to enter the registration number for a one touch destination If no number is entered the smallest number available is assigned to the des tination Name Enter...

Page 94: ...ey match Settings Description E Mail Address Enter the E mail address as a destination If prefixes and suffixes are registered you can recall a registered domain name etc to complement entry Settings...

Page 95: ...xample User ID If authentication is required in the destination FTP server enter the available user name to log in using up to 64 characters Password Enter the password of the user specified in User I...

Page 96: ...e entry host example com Also enter a domain name You can also specify a destination by E mail address To specify a destination by E mail address enter the destination IP address or host name followin...

Page 97: ...book on the main menu 2 Tap New 3 Select the type of the destination you want to register from Address Type 4 Enter destination information then tap Register The registered information is the same as...

Page 98: ...ic Usage Chapter 6 2 Tap Address Reg 3 Tap New then tap the type of the destination you want to register 4 Enter destination information then tap Register The registered information is the same as tha...

Page 99: ...6 26 bizhub C3851FS C3851 C3351 Registering a destination 6 6 6 Basic Usage Chapter 6...

Page 100: ...7 Index Chapter 7 Index...

Page 101: ...1 4 7 M Main Menu 3 19 N Name of parts 3 2 Front 3 2 Side rear 3 4 Network Setting 5 2 O Option Configuration 3 6 P Paper Available Paper Sizes 4 3 Available Paper Types 4 2 Storing Paper 4 4 Unavail...

Page 102: ...http konicaminolta com Printed in Thailand 2017 10 A92E 9612 22 2016...

Reviews: