


QUICK REFERENCE
3/3
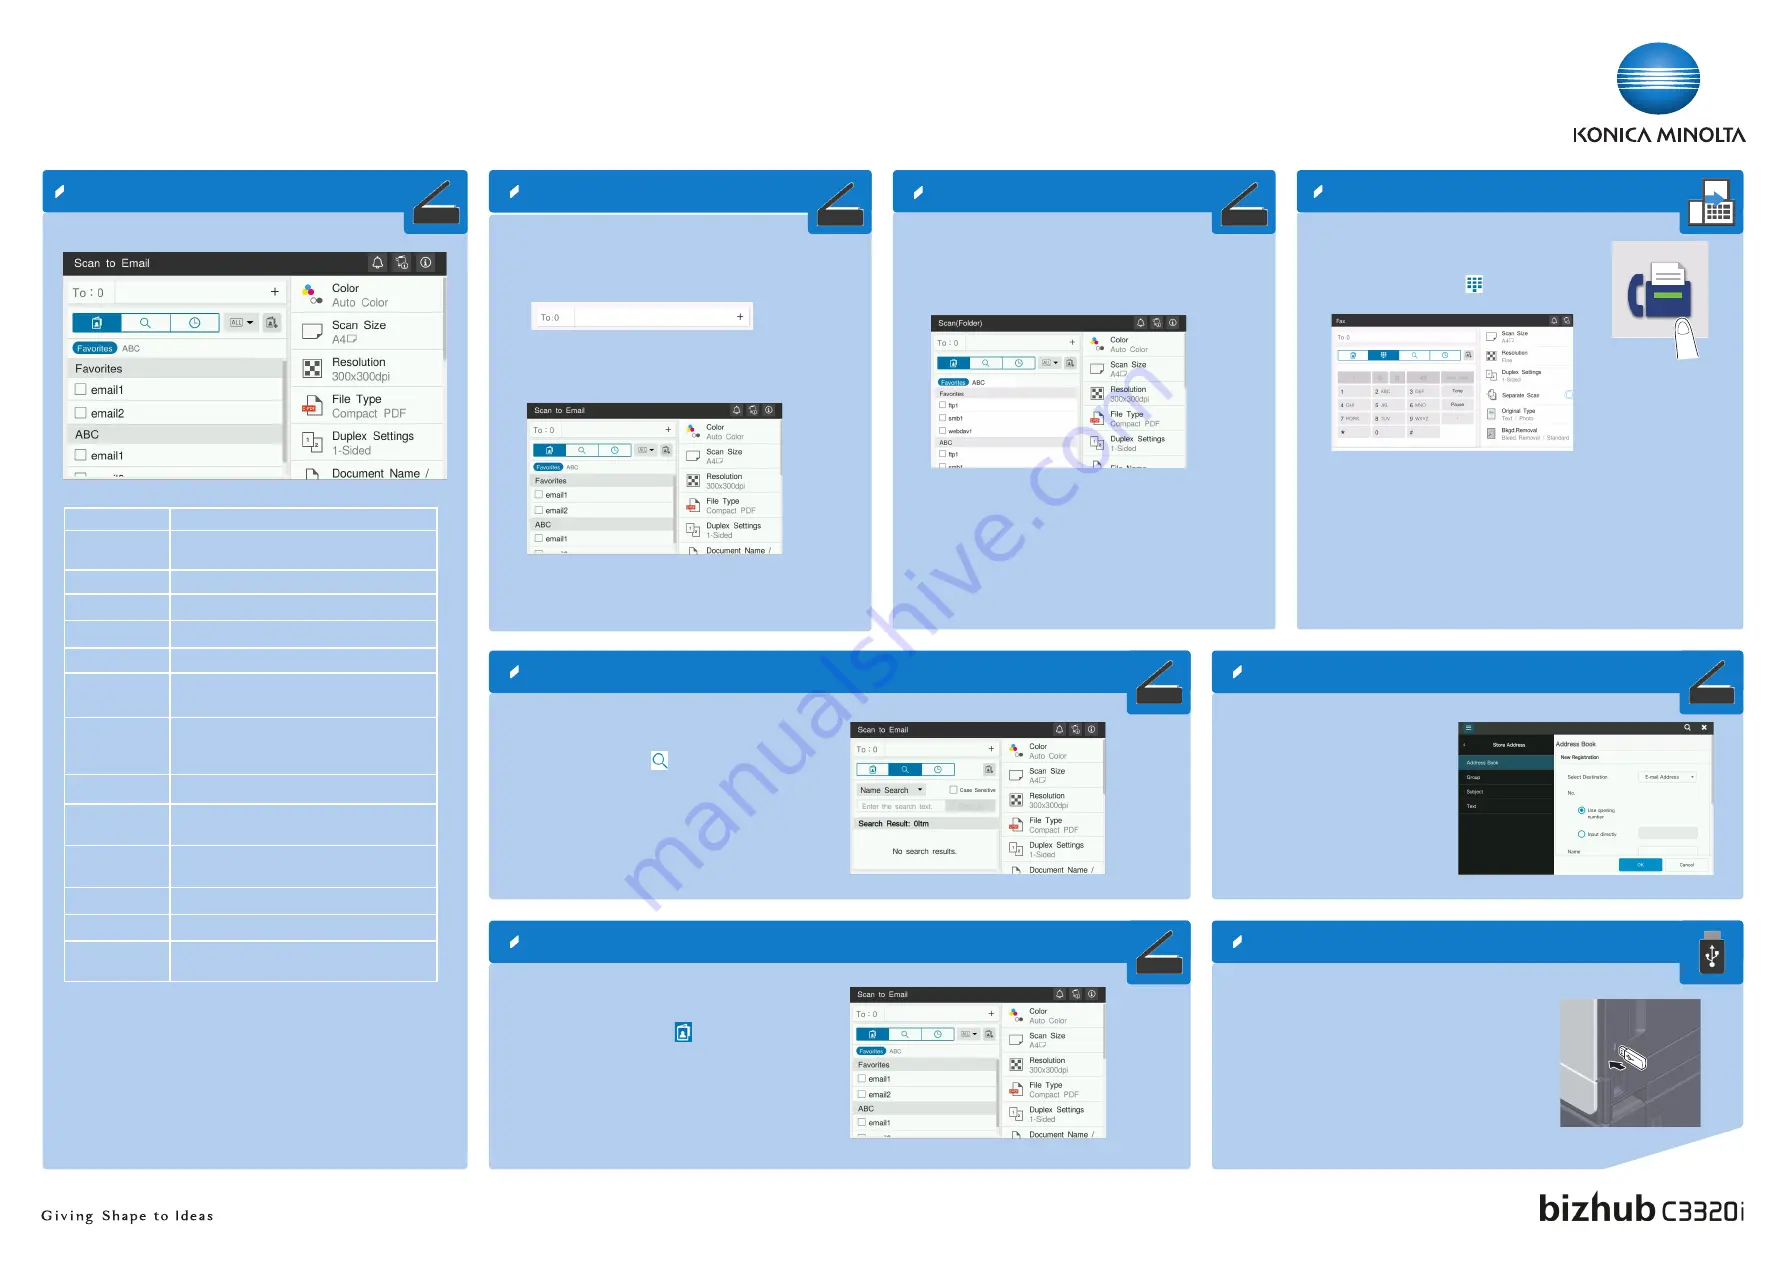
Scan operations – Settings*
Sending data to multiple destinations / using the address book
Scan to e-mail (Direct input)
1.
Position the original(s).
2.
Tap
Scan to Email
,
Scan to Box
or
Scan (Folder)
.
3.
Select the destination tab.
4.
Specify two or more destinations.
or
Specify a group.
5.
Tap
OK
.
6.
Press the
Start
key.
The file is sent.
1.
Position the original(s).
2.
Tap
Scan to Email
,
Scan to Box
or
Scan (Folder)
.
3.
Select the search tab.
4.
Select
Name Search
,
Address Search
or
Search
Box No
.
5.
Enter the search text and tap
Search
.
6.
Specify the target destination from the search result.
7.
Press the
Start
key.
The file is sent.
1.
Position the original(s).
2.
Tap
Scan to Email
on the home screen.
3.
Tap
+
.
4.
Enter the destination address.
5.
Tap
OK
.
6.
Specify settings as needed.
7.
Press the
Start
key.
The file is sent.
*Available settings depend on system configuration.
Setting*
Description
Color
Select the scan color mode (Full Color,
Black&White)
Scan Size
Specify the original size
Resolution
Specify the scan resolution
File Type
Specify the file type for saving
Duplex Settings
Specify 1-sided or 2-sided scanning
Document Name/
Subject/Other
Change the file name, E-mail subject, or mes-
sage text.
Separate Scan
Scan a large number of originals in several
batches /scan originals using both ADF and
original glass
Mixed Original
Scan originals of different sizes
Blank Page
Removal
Skip blank pages
Original Direction Select orientation of the original loaded into
ADF or placed on the original glass
Original type
Select the image quality level of the original
Density
Adjust the scan brightness
Background
Removal
Adjust the the background brightness (e.g. for
originals with colored background)
Save file in a shared folder
1.
Position the original(s).
2.
Tap
Scan (Folder)
on the home screen.
3.
Select the desired folder.
4.
Specify settings as needed.
5.
Press the
Start
key.
The file is saved.
Search for a destination
Register a destination (address book)
1.
Tap
Utility
on the home screen.
2.
Tap
Utility > Store Address >
Address Book.
3.
Tap
New Registration
4.
Select the type of destination you
want to register.
5.
Enter the destination information
and tap
OK.
1.
Position the original(s).
2.
Plug the USB memory device into the USB port.
3.
Tap
External Memory Print
on the home screen.
4.
Select the desired file.
5.
Specify settings as needed.
6.
Press the
Start
key.
The file is printed.
Print from USB memory
Fax operations - Send a fax (direct input)*
* only with fax option
1.
Position the original(s).
2.
Tap
Fax
on the home screen.
3.
Tap the direct input tab.
4.
Enter the fax number.
5.
Specify settings as needed.
6.
Press the
Start
key.
The file is sent.


