English
44
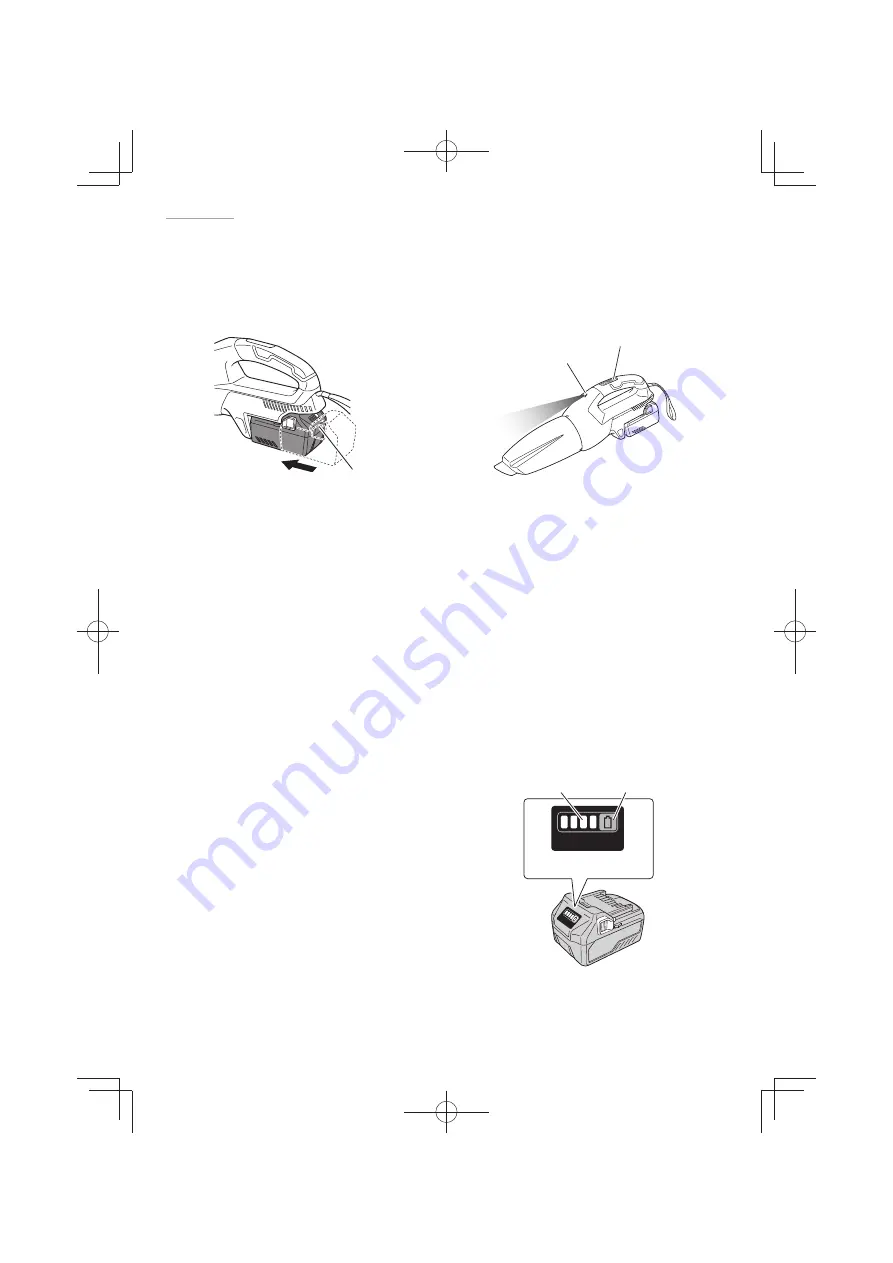
3. Install the battery (
Fig. 18
)
As shown in the diagram below,
fi
rmly insert until a click is heard.
4. Switch on the appliance (
Fig. 19
)
Press the button for the mode you wish to operate.
(See “THE SWITCH PANEL” on page 42.)
Firmly insert
Battery
Fig. 18
Switch
LED light
Fig. 19
CAUTION
○
Do not expose directly your eye to the light by looking into the LED light.
If your eye is continuously exposed to the LED light, your eye will be hurt.
○
Wipe
o
ff
any dirt or grime attached to the lens of the LED light with a soft cloth,
being careful not to scratch the lens.
Scratches on the lens of the LED light can result in decreased brightness.
○
If the intake port becomes blocked during use - for example while vacuuming
carpets - the main unit will make a pulsing sound, the indicator lamp will illuminate,
or the LED light will
fl
ash. However, this is not a sign of a fault.
Clear the blockage from the intake port if this happens.
○
When using 3 mode on certain surfaces, the suction force may make the action feel
heavy. If this occurs, switch to 2 or 1 mode instead.
5. Remaining battery indicator
(1) Battery
You can check the battery’s remaining capacity
by pressing the remaining battery indicator
switch to light the indicator lamp. (
Fig. 20,
Table 4 on page 44
)
The indicator will shut o
ff
approximately
3 seconds after the remaining battery indicator
switch is pressed.
It is best to use the remaining battery indicator
as a guide since there are slight di
ff
erences
such as ambient temperature and the condition
of the battery.
NOTE
Also, the remaining battery indicator may vary from that equipped to a charger.
Fig. 20
Remaining battery
indicator switch
Remaining battery
indicator lamp
Display panel
000Book̲R36DB̲ChT.indb 44
000Book̲R36DB̲ChT.indb 44
2022/04/21 8:25:47
2022/04/21 8:25:47


