background image

12

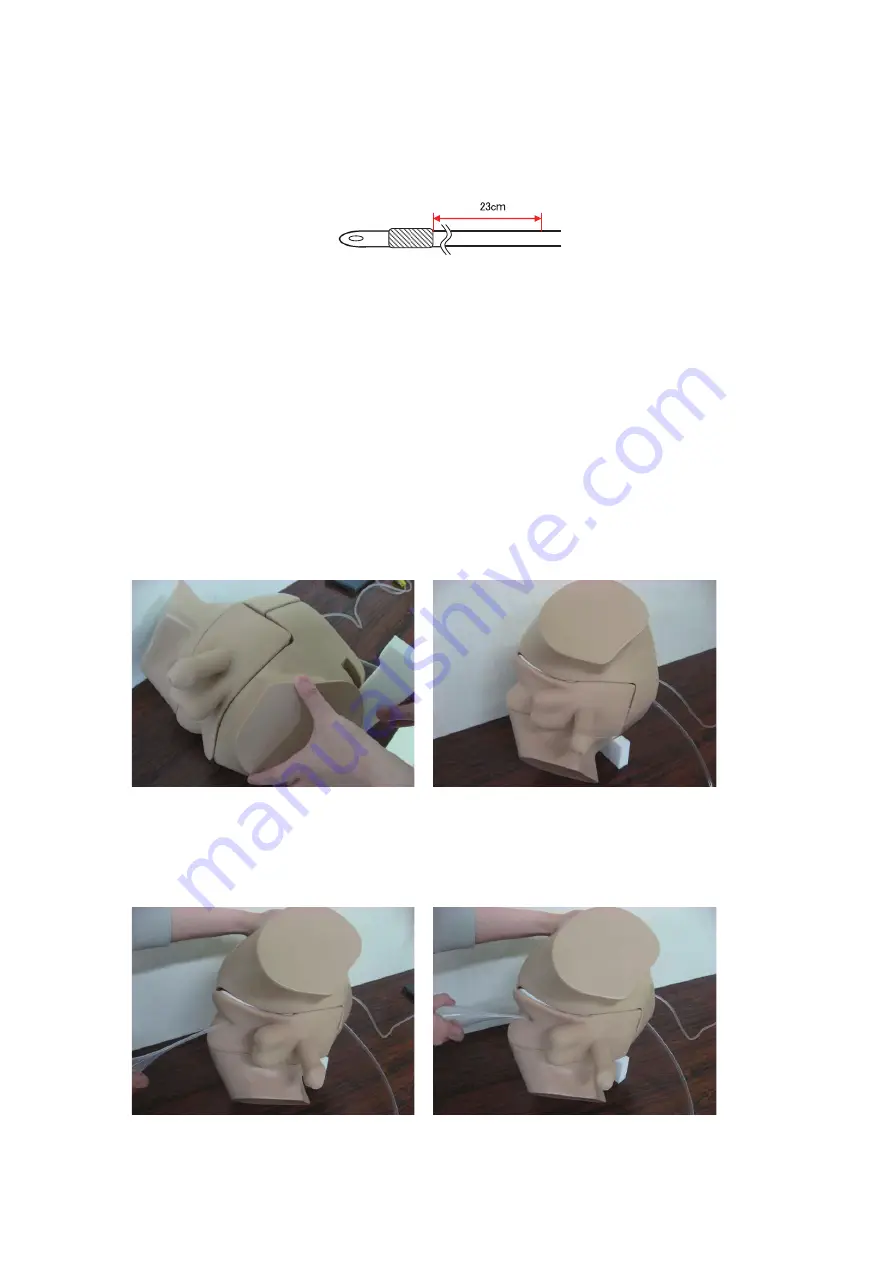
  * When indwelling the catheter, please inflate the balloon after inserting the catheter apart  
    from the balloon end portion by a distance equal to or greater than 23 cm.  Inflating the   
    balloon in an intermediate of the valve may cause the valve and the catheter to be broken.

6.   Once the catheter is inserted, please remove the moisture from its wet tip, apply the lubricant 
  each time, and then insert the catheter.
  If the lubricant is applied where water remains, the lubricant slides easily off of the catheter.   
  This makes it difficult to insert the catheter.

3-3 Enema
1.   Please prepare a bucket etc. under a desk or a bed and put the distal end of the drain tube in it.

2.   Please insert the stand for lateral decubitus in the groove of the left part of the main body,  
  and fix the main body in the left lateral decubitus.

3.   Please apply lubricant to the distal end of a glycerine enemator, insert it into the anus, and  
  pour enema liquid (water) into it.  At this time, please lower the distal end of the drain tube  
  to a position below the anus.  Otherwise, the enema liquid (water) may flow backward. 

Summary of Contents for LM-109M

Page 1: ...zation and Enema Simulator Please read this instruction manual carefully to ensure correct use of the product and store it in a safe place for easy access KOKEN CO LTD 1 4 14 Koraku Bunkyo ku Tokyo 11...

Page 2: ...10000...

Page 3: ...about 60 degrees 4 When you practice cleaning or disinfecting of the pubic area please use water Use of alcohol may cause breakage of the simulator Use of colored disinfectant liquid may cause pigment...

Page 4: ...ollowing use 17 Please check the state of the genital skin every three years as a reference and exchange it accordingly 18 Please do not place objects on the simulator Otherwise the simulator may be d...

Page 5: ...3 Table of Contents 1 Outline and Features 2 Components and Configuration 3 Handling Method 4 Washing and Storage Methods 5 Specifications 6 Replacement Parts Sold Separately...

Page 6: ...ve presence when practicing A series of techniques of catheterization such as disinfecting of the pubic area inserting fixing and removing of a catheter can be practiced The simulator is shaped to imi...

Page 7: ...Bladder 6 Bladder Valve Male Female 7 O ring 8 Rectal plate 9 Bladder tube 10 Rectum connecting connector 11 Bag for irrigator 12 Tube for irrigator 13 Stand for lateral decubitus 14 Prostate usual 15...

Page 8: ...or irrigator with the bladder tube and put water into the bag for irrigator Please open a clamp fill the bladder tube with water close the clamp and attach the bladder valve to it 2 Please attach the...

Page 9: ...it into the genital skin Please check whether or not the glans is twisted and then fix the urethral part and the genital skin with hook and loop fasteners 5 Please separate the main body into right an...

Page 10: ...cover the connector for connecting the urethral part and the bladder tube with the prostate When covering the connector with the prostate hypertrophy please stretch and extend a constricted portion o...

Page 11: ...t the rectum connecting connector from the rear side of the genital skin 10 Please fit and fix the rectal plate to the right part of the main body 11 Please attach the right and left parts to close an...

Page 12: ...are a bucket etc under a desk or a bed and put the distal end of the drain tube in it 3 2 Insertion of Catheterization Catheter 1 Please open the clamp of the tube for irrigator and check whether or n...

Page 13: ...the catheter is forced to be inserted If it is difficult to insert the catheter please use water mixed with a small amount approx 5 of surfactant neutral detergent as urine If the insertion of the cat...

Page 14: ...here water remains the lubricant slides easily off of the catheter This makes it difficult to insert the catheter 3 3 Enema 1 Please prepare a bucket etc under a desk or a bed and put the distal end o...

Page 15: ...tal plate 2 Please remove the pubic area frame from the main body and remove the prostate the bladder and the rectum connecting connector Please pay attention to the outflow of the water 3 Please clos...

Page 16: ...ring 5 Please remove the bladder valve from the bladder tube and drain the water in the tube 6 Please remove the genital skin from the pubic area frame and remove the urethral part from the genital sk...

Page 17: ...al skin After using the simulator please do not keep the genital skin attached to the main body Please wrap it in cooking paper gauze etc put it into an attached reclosable poly bag and keep it therei...

Page 18: ...g Approx 25 cm Approx 39 cm Approx 21 cm Approx 2 3 kg Approx 29 cm Approx 53 cm Approx 32 cm Product name Bag for irrigator 3pcs set LM 025J Tube for irrigator 3pcs set LM 025H Product name Product N...

Reviews: