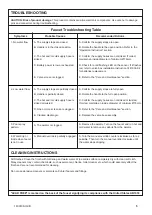
Kohler TAUT 26259K-4 Installation Instructions Manual Download Page 5

TROUBLESHOOTING

Faucet Troubleshooting Table

CAUTION: Risk of product damage.

 This product contains sensitive electronic components. Use care not to damage 

pins and connectors during troubleshooting.

A. The supply stops are closed.

B. Handle is in the closed position.

C. The hot and/or cold supply hose is 

kinked.

D. Battery power is low or exhausted.

E.  Valve screen is clogged.

Symptoms

Probable Causes

Recommended Actions

1. No water flow.

2. Low water flow.

3. Poor spray 

pattern.

A. The aerator is clogged.

A. Remove the aerator. Turn on the faucet and run hot and 

cold water to remove any debris from the aerator.

4. Water drip or 

trickle when faucet 

is not in use.

A. Manual override is partially engaged. A. Turn the manual override counter-clockwise as far as 

possible. Then turn the manual override clockwise until 

the water stops dripping.

A. Confirm the supply stops are open.

B. Rotate the handle to the open position. Refer to the 

″Operation Instruction″ section.

C. Confirm the supply hoses are not kinked. If coiled, 

maintain an inside diameter of minimum Ø76mm.

D. 

Check for a red flashing LED on the sensor. If it flashes 

red, refer to valve box installation instruction 1441903-K2 

for batteries replacement.

E. Refer to the ″Care and maintenance″ section.

A. Confirm the supply stops are fully open.

B. Rotate the handle to the full open position. 

C. Confirm the supply hoses are not kinked or twisted. 

If coiled, maintain an inside diameter of minimum Ø76mm.

D. Refer to the ″Care and maintenance″ section.

E. Replace the valve box assembly.

A. The supply stops are partially closed.

B. Handle is partially closed.


C. The hot and/or cold supply hose is 

kinked or twisted.

D. One or more screens are clogged.

E. Cracked diaphragm.

"LEAD FREE" is marked on the back of the faucet signifying its compliance with the United States AB1953

CLEANING INSTRUCTIONS

All Finishes: Clean the finish with mild soap and warm water. Wipe entire surface completely dry with clean soft cloth. 

Many cleaners may contain chemicals, such as ammonia, chlorine, toilet cleaner etc. which could adversely affect the 

finish and are not recommended for cleaning.

Do not use abrasive cleaners or solvents on Kohler faucets and fittings.


1439198-H2-B


5


Summary of Contents for TAUT 26259K-4

Page 1: ...damage Please read all instructions thoroughly before beginning installation 4 Follow all plumbing electrical and building codes 5 Risk of fresh water contamination This faucet contains back siphonage protection Do not remove any internal components 6 Risk of product damage This product contains sensitive electronic components Do not store open containers of chemical or cleaning products near this...

Page 2: ...nsor away from the steam Do not place anything within 200mm from the sensor to avoid accidentally activating the sensor and power consumption Valve Box LED Indicators Green LED Indicates that the AC plug is installed and connected Red flashing LED Indicates low batteries Features Automatic shut off After 4 minutes of inactivity the water will automatically shut OFF Manual Sensor Override In case of...

Page 3: ...g screws Way 2 Only apply for flat and smooth walls 1 Clean the bracket backside and installed location of the wall Be sure to remove oil water and dust 2 After the surface is dry tear off one paper of the 3M double sided tape stick it on the bracket backside and press it evenly for a while after bonding 3 Tear off another paper of the 3M double sided tape Ensure the bracket is horizontal and in t...

Page 4: ...e sure it is securely connected in place Ensure that all connections are tight Ensure that the handle is in the off position Turn on the main water supplies and drain Check all connections for leaks Repair as needed Remove the aerator Turn on the faucet run hot and cold water about one minute to remove any debris Remove any debris from the aerator Shut off the faucet Reinstall the aerator How to C...

Page 5: ...ed If coiled maintain an inside diameter of minimum Ø76mm D Check for a red flashing LED on the sensor If it flashes red refer to valve box installation instruction 1441903 K2 for batteries replacement E Refer to the Care and maintenance section A Confirm the supply stops are fully open B Rotate the handle to the full open position C Confirm the supply hoses are not kinked or twisted If coiled mainta...

Page 6: ...de must be specified when ordering 1439198 H2 B 6 1209778 1209777 1441910 1441911 1228834 1474445 1466824 1492098 1176162 1377106 1410195 1292054 1243532 1309847 833438 833730 3008523 836549 1031238 3002868 1441898 836589 871624 1459525 1455660 1128531 1455661 1441912 ...

Reviews: