


5
1036303-T01-B
B. Bath Rim Support
Drop-In Models:
Risk of product damage. Do not support the
weight of the bath by the rim.
After the bath is securely positioned and bath rim well
supported, please complete step 7). Install the
plumbing and thoroughly check the unit for leaks. When
you are satisfied with the result, proceed with step (1)
and step (2) below.
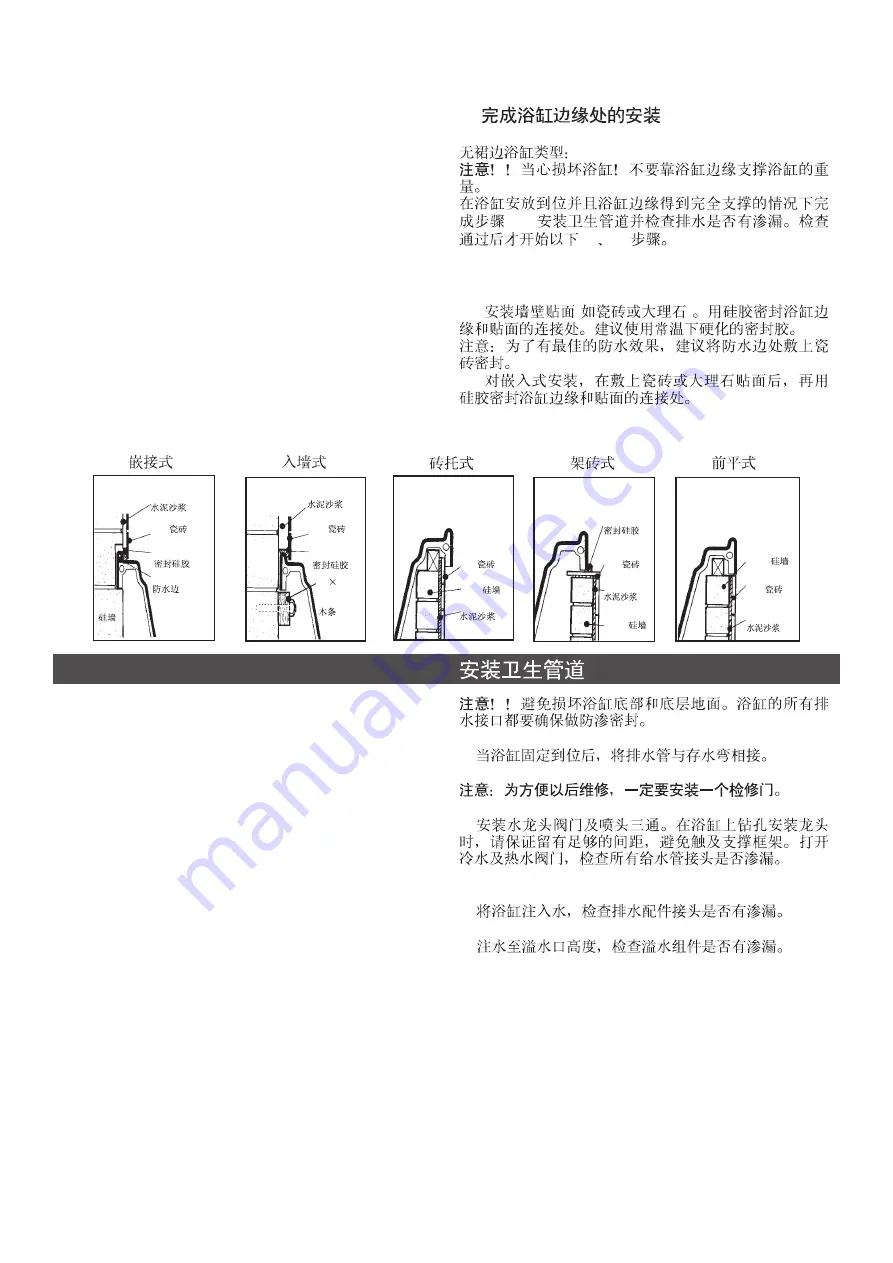
(1). Install the ceramic or marble tiles. Seal the joints
between the bath rim and the finished tiled wall using
silicone sealant. RTV (Room Temperature Vulcanizing)
sealant is recommended.
(2). For sunken type installation, construct the ceramic
or marble tiles. Seal the joints between the bath rim
and the tiled wall with silicone sealant.
CAUTION:
Paste Mortar
Tile
Ng Silicone
Sealant
Tiling Bead
Brick
Rebated Into Wall
Ng Silicone
Sealant
50
25mm
Timber
Batten
Paste Mortar
Tile
Packed Out From Wall
Paste Mortar
Tile
Brick
Under Flange Tiling
Ng Silicone
Sealant
Tile
Paste Mortar
Brick
Hob Mount Tiling
Flush Front Tiling
Brick
Paste Mortar
Tile
B.
7). :
(1)
(2)
(1).
(
)
(2).
A.
B.
C.
D.
CAUTION:
NOTE: An access panel will simplify future
maintenance.
Risk of damage to bath bottom and subfloor,
Ensure a watertight seal on the bath drain connections.
A. When the bath is securely positioned, connect the
drain to the trap.
B. Install the faucet valving and spout tee. When drilling
bathtub for faucet, ensure sufficient clearance to avoid
brick support wall. Open the hot and cold water valves
and check the supply connections for leaks.
C. Run water into the bath and check the drain
connections for leaks.
D. Fill the bathtub up to the overflow level and check
overflow unit for leaks.
INSTALL PLUMBING


