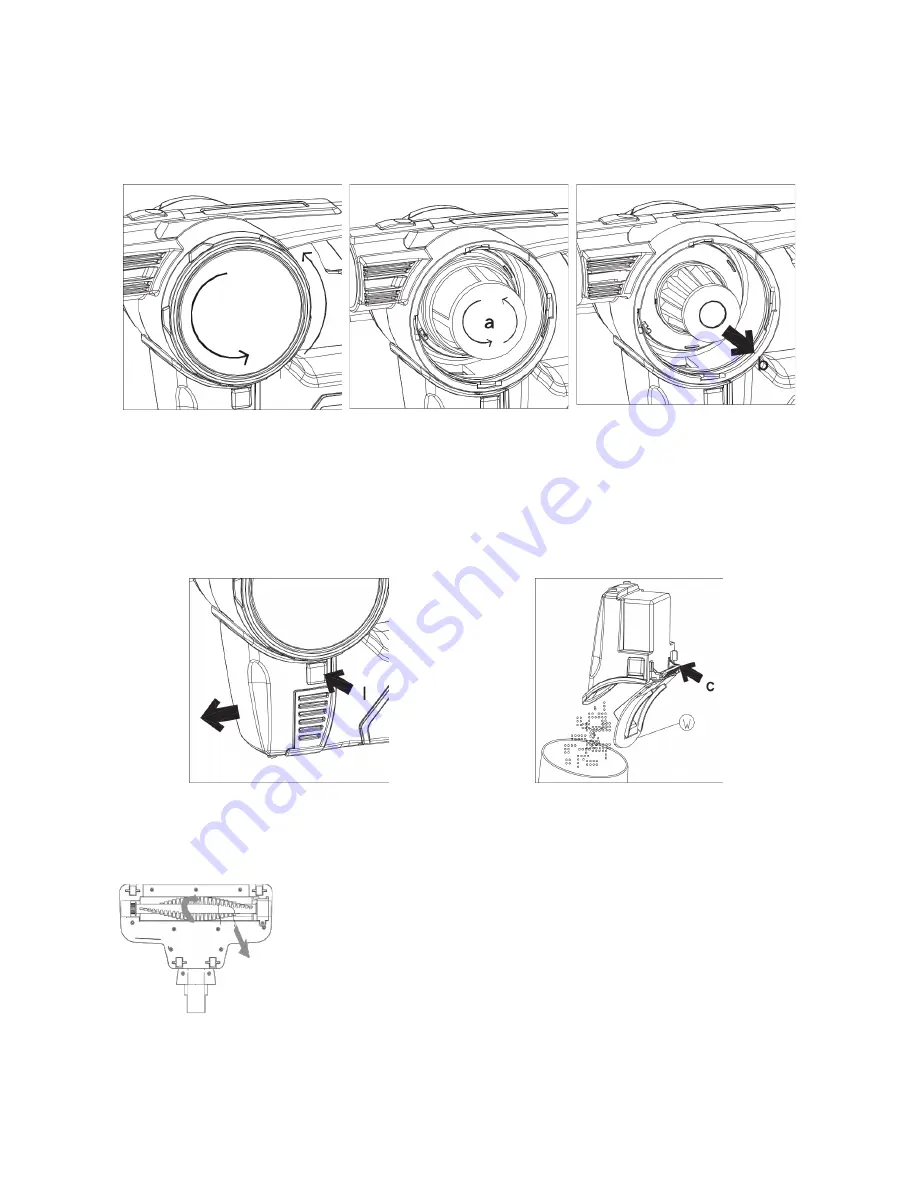
position and then turning the outer filter clockwise until click into position.
8. Close the container door by turning clockwise until lock into position.
9. Replace the filter when the airflow of the vacuum cleaner become very weak even when
the filter was washed and the dust container was empty.
10. Spare parts can be obtained from authorised technical service centres.
Fig. 14
Fig. 15
Fig.16
Dust Bin
Clean the dust bin (H) after each use:
1.
Remove the dust bin (H) by pressing the dust bin release button (I) on both side and pull
the dust bin out.(Fig.17)
2. Empty the contents out of the dust bin by pressing the dust bin cover (c) down. (Fig.18)
3. To replace the dust bin, place it back onto the appliance and lock into place.
Fig. 17
Fig. 18
Floor Brush
Carry out maintenance if any waste threads or hair gets tangled in the brush.
Slowly rotate the brush manually and remove any foreign objects
tangled around the brush.
9
Remove waste
Summary of Contents for KAVACSTK18VA
Page 1: ......


