background image


Heater body (x1) 


Castors (x4) 


Brackets (x2) 


U-bolts (x2) 


User guide (x1) 


Ensure all components are included within the packaging. If any components are missing, 

contact help.Kogan.com for assistance. 
If the power cord or plug is cracked or broken, do not use it and contact help.Kogan.com for 
assistance.


Before using the heater, the castors must be assembled and attached.  


1.


Place the heater upside down on a clean, flat, dry surface. 

2.


Unscrew the nuts from the castors then insert two castors into the outer holes on 
each bracket.  

3.


Twist and remove the wing nuts from the U-bolts then insert the hooked end of the 

U-bolts into one of the inner holes of the brackets. 


          ASSEMBLY 

WARNING: 

Do not use the heater without the castors attached.


        COMPONENTS LIST 

          BEFORE FIRST USE 

Summary of Contents for KAOILHTB24A

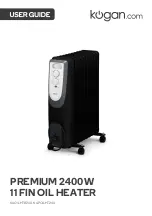
Page 1: ...PREMIUM 2400W 11 FIN OIL HEATER KAOILHTB24A KAPOILHT24A...

Page 2: ......

Page 3: ...power cord is fully visible Route the cord away from high traffic areas to avoid it being tripped over Do not immerse the heater in water or any other liquids or allow liquids to drip into the interio...

Page 4: ...OVERVIEW Thermostat Power indicator Storage ring Heat setting dial Castors...

Page 5: ...for assistance Before using the heater the castors must be assembled and attached 1 Place the heater upside down on a clean flat dry surface 2 Unscrew the nuts from the castors then insert two castor...

Page 6: ...cting the fins 5 Rotate and insert the other end of the U bolts through the remaining inner hole on the brackets Ensuring the castors are straight secure the end with the wing nuts 6 Turn the heater i...

Page 7: ...n the MIN and MAX markers to adjust the temperature of heat being emitted by the heater The closer it is turned towards the MAX marker the hotter the temperature If the room becomes too hot turn the t...

Page 8: ...ting dial to the desired setting Higher settings will lead the heater to emit more heat heating rooms at a faster rate Powering off Turn the heat setting dial back to 0 and turn off the power at the s...

Page 9: ...age Wrap the power cord around the storage ring and store the heater in a cool dry place away from children and metal objects CLEANING CARE Notes Do not place heavy objects on top of the heater as thi...

Page 10: ...NOTES...

Page 11: ......

Page 12: ...ion We hope that this user guide has given you the assistance needed for a simple set up For the most up to date guide for your product as well as any additional assistance you may require head online...

Reviews: