background image

Navigating Menus

Before using the TV, follow the steps below to learn how to navigate the menu in order to select and adjust 

different functions. The access steps may differ depending on the selected menu.

1.

Press MENU to display the main menu.

2. Press   to cycle through the main menu.

◀▶

3. Press   to select the desired sub-item.

▲▼

4. Press ENTER to access the submenu.

5. Press 

 to select the desired values. The adjustment in the OSD may differ depending on the 

◀▶▲▼

selected menu.

6. Press MENU to return to the previous menu.

7.

Press EXIT to exit from the menu.

NOTE:

When an item in the MENU is displayed in gray, it means the item is not available or cannot be 

adjusted.

Buttons on the TV have the same functions as the corresponding buttons on the remote control. If 

your remote control is lost or doesn't work, you can use the buttons on the TV to select menus. This

manual will focus on remote control menu operation.

Some items in the menus may be hidden depending on modes or signal sources used.
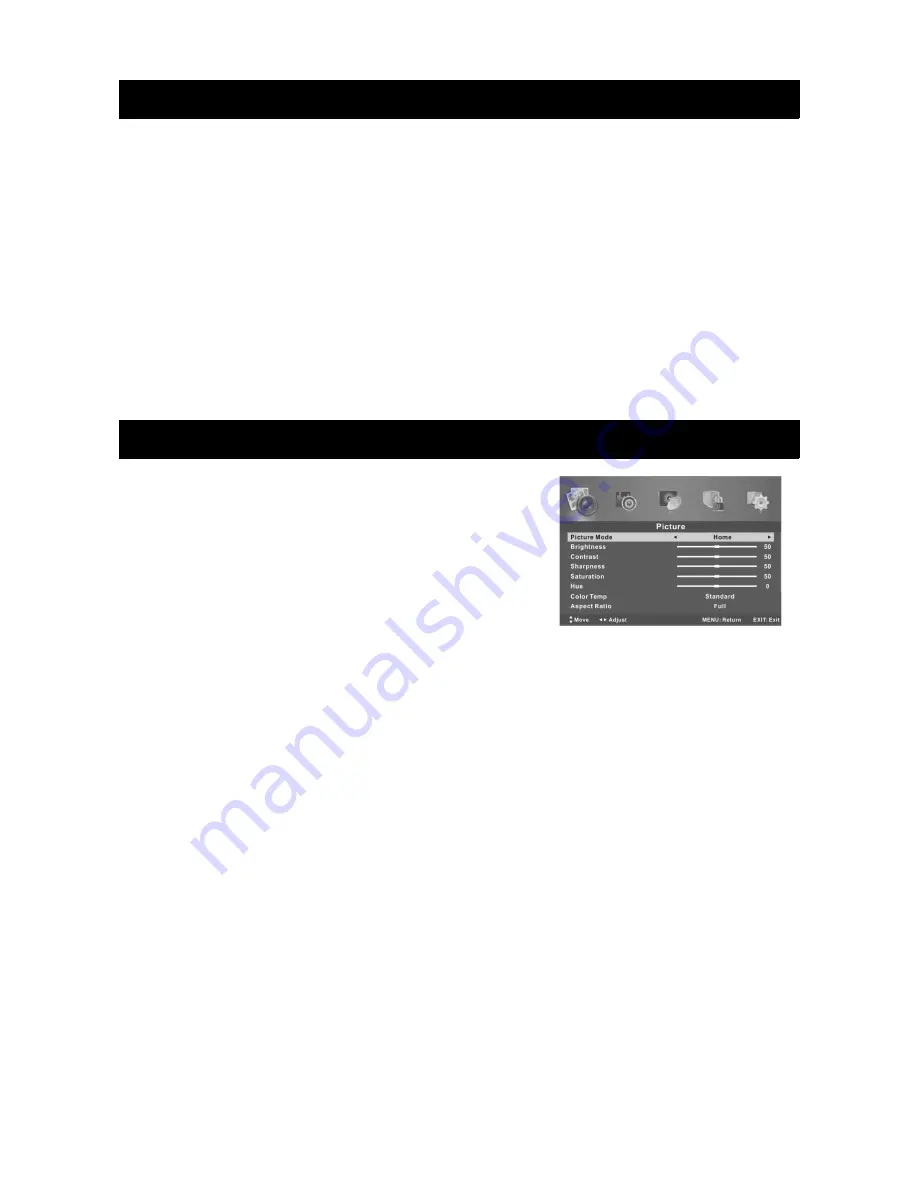
Picture Menu

Picture Mode

You can select the type of picture that best corresponds to

your viewing requirements.

We recommend the "Home" mode for most use.

Brightness

Adjusts the base level of the signal in the picture.

Contrast

Adjusts the signal level between black and white 

in the picture.

Sharpness

Adjusts the level of crispness in the edges between the light

and dark areas of the picture.

Saturation

Adjusts colour intensity.

Hue

Adjusts the balance between red and green levels. (Only available in NTSC mode)

Color Temp

Select the colour temperature of the image.

Aspect Ratio

You can select the picture size that best corresponds to your viewing requirements.

PC Setup

Auto adjust: adjusts the image automatically

H Position: center the image by moving it left or right

V Position: center the iamge by moving it up or down

Phase: Minimize horizontal distortion

Clock: Minimize the vertical stripes in the image

Screen Mode

Press   to select the screen mode, then press 

 to select Auto, Video or PC. (HDMI mode only)

▲▼

◀▶

Advanced Settings

NR: Set options to reduce video noise.

Dynamic Contrast: Automatically adjust picture detail and brightness.

10

Summary of Contents for KALED55XXXTA

Page 1: ......

Page 2: ... 9 digital buttons 9 Volume Adjustment 9 Changing the Input Source 9 Navigating Menus 10 Picture Menu 10 Sound Menu 11 Channel Menu 11 Lock Menu 12 Settings Menu 12 Multimedia Operation 13 Accessing Quitting Media Mode 13 Supported Media Formats 13 Media Operating Interface 14 Multimedia Operation 15 Photo 15 Music 15 Movie 15 Text 15 Additional Usage 15 Programme Guide in DTV mode 15 Channel List...

Page 3: ...t the Kogan customer support team Never attempt to make repairs yourself Never push objects of any kind into the set through the cabinet slots as they may touch dangerous voltage points or short circuit parts that could result in a fire or electric shock Never spill any liquids onto the set Use special caution in households where children are present The television is not suitable for children und...

Page 4: ...d or limited by covering the ventilation slots with items such as newspapers tablecloths curtains etc At least 10cm of space should be left around the apparatus for sufficient ventilation The television should be situated away from heat sources such as radiators heaters stoves or other products that product heat Place the television in a position where the screen is not exposed to direct sunlight ...

Page 5: ...d location allow some time for any dew or condensation inside the television to evaporate fully before you turn the unit on To prevent injury the television must be securely attached to the floor wall in accordance to the supplied installation instructions Cleaning Unplug the television from the power supply before cleaning Do not use any liquid cleaners or harsh chemicals Use a soft damp cloth 4 ...

Page 6: ...odel KALED55XXXTA Display Screen Size 55 Diagonal Power Supply 220 240V 50 60Hz Video In PAL NTSC Sound Output 2 x 10W Remote Power Input DC 3V Two AAA batteries Power Consumption 120W Operating Temperatures 0 C 40 C Accessories Remote Control 5 ...

Page 7: ...rn power ON OFF Switch the signal source MENU Display main MENU and confirm MENU item selection VOL Adjust volume CH Change channels Back View 1 Headphone 4 PC 7 HDMI 1 2 3 2 YpbPr 5 Optical Digital Audio Out 8 USB 3 PC DVI Audio 6 ANT 9 AV in 6 ...

Page 8: ...Remote Control 7 ...

Page 9: ...NOTE All images in this manual are examples to be used only for reference Actual product may differ slightly Any buttons not mentioned here are not used in TV operation 8 ...

Page 10: ...g the power cable and antenna cable if the TV will not be used for an extended period of time No Signal There will be a No Signal menu on the screen if there is no valid input signal In DTV mode if there is no signal for 15 minutes the TV will turn off automatically In PC mode the TV will turn off automatically after 1 minute of receiving no signal When a VGA cable is connected the TV will turn on...

Page 11: ...s or signal sources used Picture Menu Picture Mode You can select the type of picture that best corresponds to your viewing requirements We recommend the Home mode for most use Brightness Adjusts the base level of the signal in the picture Contrast Adjusts the signal level between black and white in the picture Sharpness Adjusts the level of crispness in the edges between the light and dark areas ...

Page 12: ...table volume level by making automatic adjustments for each program SPDIF You can adjust a desired SPDIF output mode Audio Description in DTV mode Press the buttons to select the Audio description then press to enter the sub menu Press the buttons to select the Mode then press to select between On Off When the mode is ON the volume can be adjusted by the user Sound Type in DTV mode Press the butto...

Page 13: ...ons to select a parental rating then press to select Lock Keypad Enable to prevent anything being changed by young children or other unexpected usage New Password Press to select the new password then enter a 4 digital number you want to set twice Clear Lock Restore the Lock System settings to their original factory settings Settings Menu OSD Language Select your preferred On Screen Display langua...

Page 14: ...ogram During the recording press the RECORD button again to bring up the record menu 2 Press the STOP button to stop recording The TV will return to normal broadcast television NOTE The USB disk must have a minimum capacity of 512MB Please format the USB disk with the television prior to attempting to record media During the device formatting do not remove the USB disk When you format the disk all...

Page 15: ... Level 4 Music mp3 MPEG 1 Layer 3 Bit Rate up to 320Kbps Sample Rate 32KHz 44 1KHz 48KHz MPEG 2 Layer 3 AAC aac m4a AAC HE AAC V1 HE AAC V2 wav LPCM ADPCM Photo jpg jpeg Baseline Mode 72x72 Baseline resolution 7680x4320 Progressive Mode Progressive Mode Size 1280x1024 File Size 10MB Text txt UTF 8 UNICODE ASCII File Size 1MB Note There is a maximum of 500 files per directory Media Operating Interf...

Page 16: ...urce disk then press ENTER Press to change pages Press INDEX to access the quick menu Use the arrow buttons to highlight a folder then press ENTER to select it Use the arrow buttons to highlight a file then press the PLAY button to view it Press the STOP button to stop playing files Press EXIT to go back to the previous menu Text Press to select Text in the menu then press ENTER Press to select th...

Page 17: ...ion Poor picture and sound quality Try a different channel Adjust the antenna Check all connections No picture or sound in TV status Try another channel Press the TV AV button Make sure TV is plugged in Check the antenna connection No sound or sound is too low at maximum volume Check the volume settings on any external speakers connected to your television Adjust the TV volume accordingly Check th...

Page 18: ...lmost dry then wipe down the screen Make sure all excess water is off the screen and let it air dry before turning it on Cleaning the Cabinet To remove dirt or dust wipe the cabinet with a soft dry lint free cloth Do not use a wet cloth Extended Absence If you are expecting to leave your TV dormant for a long time such as while going away on vacation it is a good idea to unplug the power cord and ...

Reviews: