36
Kodak Prosper
S10 Printer
Chapter 3. Printer Maintenance
Filter Replacement
3.
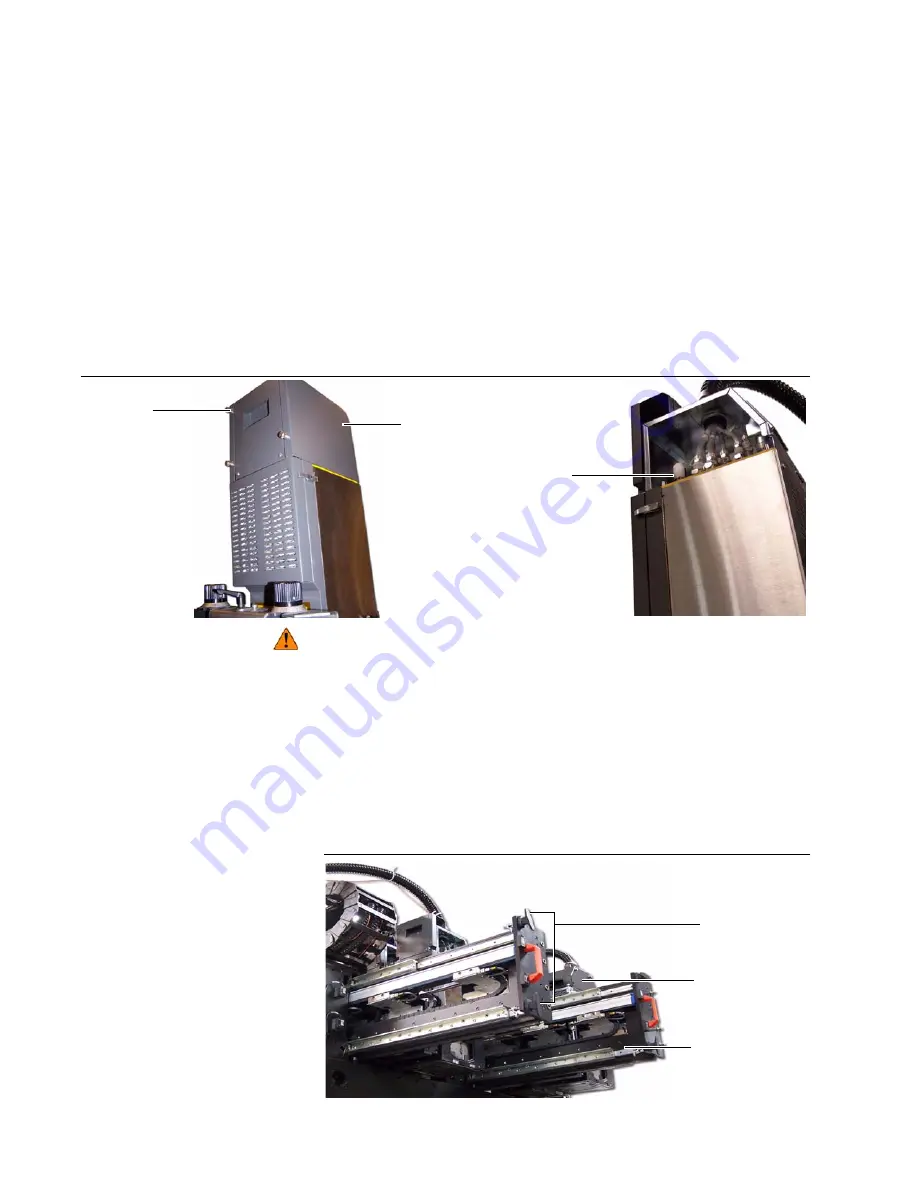
Get access to the top of the PIC box (Figure 29).
a.
Loosen the six captive screws (four on the back and two on the
front).
b.
Remove the cosmetic cover.
4.
Replace the damaged dry shutdown valve filter (Figure 29).
a.
Turn the damaged dry shutdown valve filter counterclockwise to
remove it.
b.
Turn the new dry shutdown valve filter clockwise to install it.
5.
Close the top of the PIC box (Figure 29).
a.
Replace the cosmetic cover.
b.
Tighten the six captive screws (four on the back and two on the
front).
Figure 29
PIC box dry shutdown valve filter
WARNING
Pinch hazard can cause damage to hands and fingers at these places:
•
Between two buckets
•
Between outer most bucket and bucket frame on the left side
•
Between inner most bucket and bucket frame on the right side
6.
If necessary, put the carriage rail back to its initial position (Figure 30).
a.
Push in the carriage rail.
b.
Rotate the lock handles clockwise.
7.
Do “Turn On the Print Station” on page 15.
.
Figure 30
Carriage rail
Dry shutdown
valve filter
Cosmetic
cover
Captive
screw
Carriage rail
PIC box
Lock handles
Summary of Contents for Prosper S10
Page 1: ...Prosper S10 Printer Operator s Guide 0114379 603 ...
Page 6: ......
Page 8: ......
Page 37: ...Operator s Guide Glossary See Kodak Prosper S10 Imprinting System Glossary ...
Page 38: ......