4
ELECTRICAL
ELECTRICAL CONNECTION
This tool is powered by a precision-built electric motor. It should
be connected to a
power supply that is 120 volts, 60 Hz, AC
only
(normal household current). Do not operate this tool on
direct current (DC). A substantial voltage drop will cause a loss
of power and the motor will overheat. If the tool does not operate
when plugged into an outlet, double check the power supply.
SPEED AND WIRING
The belt speed of this tool is approximately 1,900 SFM. This
speed is not constant and decreases under a load or with lower
voltage. For voltage, the wiring in a shop is as important as the
motor’s horsepower rating. A line intended only for lights cannot
properly carry a power tool motor. Wire that is heavy enough for
a short distance will be too light for a greater distance. A line
that can support one power tool may not be able to support two
or three tools.
GROUNDING INSTRUCTIONS
In the event of a malfunction or breakdown, grounding provides a
path of least resistance for electric current to reduce the risk of
electric shock. This tool is equipped with an electric cord having
an equipment-grounding conductor and a grounding plug. The
plug must be plugged into a matching outlet that is properly
installed and grounded in accordance with all local codes and
ordinances.
Do not modify the plug provided. If it will not fit the outlet, have
the proper outlet installed by a qualified electrician. Improper
connection of the equipment-grounding conductor can result in a
risk of electric shock. The conductor with insulation having an
outer surface that is green with or without yellow stripes is the
equipment-grounding conductor. If repair or replacement of the
electric cord or plug is necessary, do not connect the
equipment-grounding conductor to a live terminal.
Check with a qualified electrician or service personnel if the
grounding instructions are not completely understood, or if
in doubt as to whether the tool is properly grounded.
Repair or replace a
damaged or worn
cord immediately.
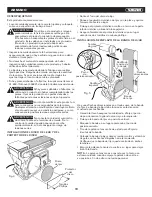
This tool is intended
for use on a circuit
that has an outlet like
the one shown in
figure 1. It also has
a grounding pin like
the one shown.
KNOW YOUR BELT/DISC SANDER
Fig. 1
Grounding
pin
120 V grounded outlet
The safe use of this product requires an understanding
of the information on the tool and in this operator’s
manual as well as a knowledge of the project you are
attempting. Beforeuse of this product, familiarize
yourself with all operating features and safety rules.
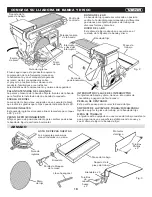
BELT TENSION LEVER
The belt tension lever releases
the belt tension for easy belt replacement.
BEVEL SCALE
The worktable comes equipped with a bevel
scale that indicates the degrees the worktable can be tilted
up to 45°.
MITER GAUGE
The miter gauge aligns the wood for
positive stops at 90° and 45°.
POSITIONING BOLT
Loosen the positioning bolt to
change sanding belt positions from horizontal to vertical.
Work
support
Tracking
knob
Belt tension
lever
Sanding
disc
Sanding belt
Positioning
bolt
Work
table
Miter gauge
Bevel
scale
Switch and
switch key
Fig. 2
SANDING BELT The sanding belt can be adjusted
from horizontal to vertical providing different positions for
sanding workpieces of different shapes and sizes.
SANDING DISC A round sanding disc is located on the side
of the belt/disc sander.
SWITCH AND SWITCH KEY Your belt/disc sander has an
easy access power switch.
TRACKING KNOB
A tracking knob aids in centering the
sanding belt.
WORK SUPPORT (BACKSTOP)
Supports the work-
piece on the sanding belt.
WORK TABLE
Equipped with a sturdy work table that
provides a stable surface when using either the disc
sanding or the belt sanding feature.


