background image

23

23

1

33

-

33

32

1

31

-

23

Summary of Contents for Supernova Blast Roller Coaster

Page 1: ......

Page 2: ...ANTS Garde ces instructions port e de la main Elles comportent d importantes informations de s curit Lis tous les avertissements et les instructions avant de commencer le montage et l exploitation du...

Page 3: ...ur product and packaging responsibly The wheelie bin symbol indicates that the product and batteries must not be disposed of in the domestic waste as they contain substances which can be damaging to t...

Page 4: ...jours attendre quelques secondes apr s avoir d marr le moteur avant de pousser doucement la voiture vers le moteur 2 3 1 Start Building To begin your model find the and follow the numbers Each piece h...

Page 5: ...tice Nous sommes l pour t aider EN Building Idea Bonus instructions at www knex com thrill rides FR Id e de construction Plans supplementaires www knex com thrill rides ES Idea para la construcci n In...

Page 6: ...NTO CONTIENE PICCOLE PARTI Non adatto per bambini al di sotto di 3 anni AVISO PERIGO DE SUFOCA O PE AS PEQUENAS N o se destina a crian as com menos de 3 anos de idade WAARSCHUWING VERSTIKKINGSGEVAAR K...

Page 7: ...7 7 4 5 1 5 1 3 2 2 7...

Page 8: ...8 8 x6 x8 7 1 6 1 7 1 5 1 6 6...

Page 9: ...9 9 8 9 1 9 1 7 2 2 1 9...

Page 10: ...10 10 10 1 10 1 9 8 3 10 10...

Page 11: ...11 11 11 12 1 12 1 10 1 11 1 1 1 2 1 1 6 3 2...

Page 12: ...12 12 14 1 14 13 1 13 1 12 1 13 x8 x7 4...

Page 13: ...13 13 15 1 15 1 14 1...

Page 14: ...14 14 16 17 1 17 1 15 2...

Page 15: ...15 15 18 1 19 1 17 19 7 1 1 1 2...

Page 16: ...16 16 20 1 20 1 21 1 19 1 20 x7 x5 21...

Page 17: ...17 17 22 23 22 23 4 3...

Page 18: ...18 18 24 25 22 25 22 23 2 2 1...

Page 19: ...19 19 22 27 22 25 27 26 2 2 4 4 19...

Page 20: ...tall 3 piles C ou LR14 dans le moteur ES Instalaste 3 pilas C o LR14 en el motor DE Hast du 3 C oder LR14 Batterien in den Motor eingelegt IT Hai installato 3 batterie C o LR14 nel motore PT Foram ins...

Page 21: ...21 21 22 28 1 21 29 1 29...

Page 22: ...ves It will be easier to attach to your model if you bend it back and forth first Tiges flexibles Un Tiges flexibles est une tige que tu peux courber pour faire des courbes Elle pourra tre attach e pl...

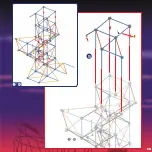
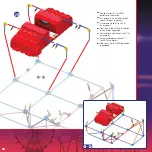
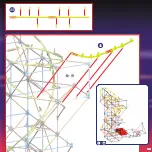
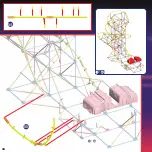
Page 23: ...23 23 1 33 33 32 1 31 23...

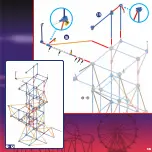
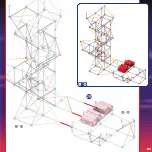
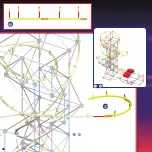
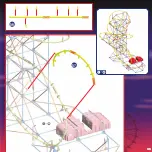
Page 24: ...24 24 1 35 34 35 1 33...

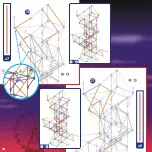
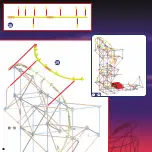
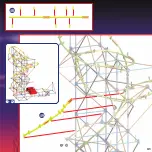
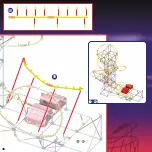
Page 25: ...25 25 1 37 36 37 1 35...

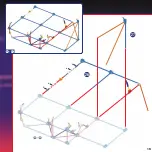
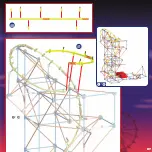
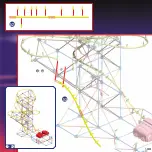
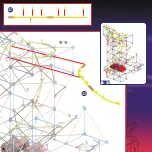
Page 26: ...26 26 1 39 38 39 1 37 26...

Page 27: ...27 27 1 41 40 41 1 39...

Page 28: ...28 28 1 43 42 43 1 41 28...

Page 29: ...29 29 1 45 44 45 1 43...

Page 30: ...30 30 1 47 46 47 1 45 30...

Page 31: ...31 31 1 49 48 49 1 47 31...

Page 32: ...32 32 1 51 50 51 1 49 32...

Page 33: ...33 33 1 53 52 53 1 51 33...

Page 34: ...34 34 1 55 54 55 1 53 34...

Page 35: ...35 35 1 57 56 57 1 55...

Page 36: ...36 36 1 59 58 59 1 57 36...

Page 37: ...37 37 1 61 60 61 1 59...

Page 38: ...38 38 1 63 62 63 1 61...

Page 39: ...39 39 64 65 1 65 1 63 Track Tip Be sure to push the connectors on firmly until they click Conseils Piste Pousse bien les connecteurs jusqu ce qu ils cliquent...

Page 40: ...e puis connecter le reste de la piste la tour DE Immer beitreten dieses Ende der Strecke zum vorherigen Track St ck zuerst dann treten der Rest der Strecke auf den Turm IT Sempre partecipare a questo...

Page 41: ...41 41 68 69 1 69 1 67...

Page 42: ...42 42 70 71 1 71 1 69 42...

Page 43: ...43 43 72 73 1 73 1 71...

Page 44: ...44 44 74 75 1 75 1 73 44...

Page 45: ...45 45 76 1 77 1 75 77...

Page 46: ...46 46 78 79 1 79 1 77 46...

Page 47: ...47 47 80 81 1 81 1 79...

Page 48: ...48 48 82 83 1 83 1 81...

Page 49: ...49 49 84 85 1 85 1 83...

Page 50: ...50 50 86 87 1 87 1 85 50...

Page 51: ...51 51 88 89 1 89 1 87 51...

Page 52: ...52 52 90 91 1 91 1 89...

Page 53: ...53 53 92 93 1 93 1 91...

Page 54: ...54 54 94 95 1 95 1 93 54...

Page 55: ...55 55 96 97 1 97 1 95...

Page 56: ...tting any K NEX parts Pour fixer les voiture d fais un tron on du circuit puis fais passer les roues de la voiture par dessus le c t sup rieur du circuit Assemble ensuite les tron ons du circuit Si de...

Page 57: ...lesiones personales Retire todas las pilas si el juguete no se usar por mucho tiempo Proteja el medio ambiente desechando su producto y el embalaje de una manera responsable El s mbolo del recipiente...

Page 58: ...ktieren FALLS DIE WAGEN BEI DER ABFAHRT STECKEN BLEIBEN Ist das Modell richtig zusammengebaut berpr fe ob der Wagen gegen einzelne Bauteile st t Sind die Schienenst cke richtig miteinander verbunden S...

Page 59: ...NEX As pe as da Pista est o ligadas correctamente A Carruagem est presa Pista correctamente Ajusta a Pista para eliminares qualquer ponto plano na Pista NL Nederlands Bladzijde 2 BELANGRIJKE GEGEVENS...

Page 60: ......
Reviews: