11
To prevent electric shocks and/or damage to persons,
read and follow the procedure given below:
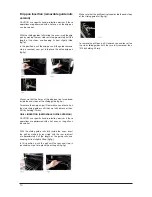
WARNING: Ensure that the appliance is switched off
before replacing the lamp to avoid the possibility of
electric shock.
Do not touch the hot bulb with a damp cloth, the bulb may
break.
Replace the light bulb with another suitable one of 25 W
for 220 - 230 V with attachment type E14 suitable for high
temperatures.
In case the protection cap is damaged or broken, do not
use the oven until the cap has been replaced or re-inserted
correctly and safely.
This oven interior has a unique oleophobic (oil repellent) finish
which allows assisted cleaning at much lower temperatures
and energy consumption than in pyrolytic ovens. The CLEAN
function may be used at any time the oven is not being used
for cooking.
1. It is recommended for ease of cleaning but not required
that the wire grills, trays, racks and rack holders be
removed from the oven and stored in a safe location. If
the oven is hot use a thick cloth or oven mitt to do this.
2. Use the timer touch control to set the cooking time to 30
minutes (00:30). Do not set a finish time (immediate start).
3. Set both cooking function and temperature selections to
CLEAN. The CLEAN function will commence immediately.
4. When the acoustic signal sounds, set both cooking
function and temperature selections to “0” (OFF).
5. Open the oven and allow to cool for 15 minutes.
6. Use a slightly damp cloth to wipe clean the enamel interior
of the oven while still warm.
7. If they were removed, return the rack holders, racks, trays
and wire grills to desired locations.
To remove
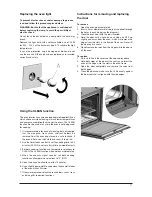
1 Open the oven door completely.
2. Insert a 3mm diameter metal rod (not supplied) through
the holes in each hinge (see the diagram).
3. Close the oven door with the rods inserted.
4. Hold the door with a hand on each side and lift it up
slightly and away from the oven, which will remove the
hinges from the slots in the frame of the oven. Never lift
the door by its handle.
5. Do not remove the rods from the hinges while the door is
off the oven
To replace
1. Re-installation is the reverse of the above procedure.
2. Hold both sides of the door at the centre and insert the
ends of the hinges into the slots in the oven frame.
3. Open the door completely and remove the rods from
both hinges.
4. Close the door and make sure that it fits evenly against
the door seal and is aligned with the side edges.
Replacing the oven light
Using the CLEAN function
Instructions for removing and replacing
the door


