KLAXON Mobility Gmbh – ENG
KLICK Electric User's Manual (ENG) - rev.6.1 of 15.06.2018
14
13. KLICK ELECTRIC RACE VERSION OPERATION
13.1 USER INTERFACE
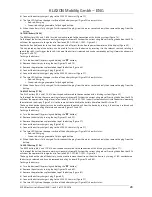
The device is equipped with a multifunction LCD display, used to switch the device on and off, select the maximum speed and
display several operating parameters (Figure 60).
•
The icon located top left (1) shows the current battery charge level.
•
The number (2) in the centre of the display shows the speed, in km/h.
•
The number (3) in the left part of the display shows the desired maximum speed level.
•
The number (4) shows the distance travelled, in km.
•
The number (5) shows the time the device has been on, in minutes.
•
The number (6) shows the data regarding the device’s motor (power absorption in watts and internal temperature in °C).
•
The number (7) shows the external temperature, in °C.
13.2 TURNING ON AND SETTING UP THE DEVICE (FIGURE 60).
A. Turning On and Selecting the Speed
•
Press and hold the “
POWER
” button for 5 seconds, until the display turns on.
•
Press the “
UP ARROW
” and “
DOWN ARROW
“ buttons to select the desired maximum speed level (viewable in the left panel
of the display, number (5) in the legend); various speed levels can be selected, between 0 (motor disabled), 1 (minimum
speed, 3 km/h), 2 (normal speed, 6 km/h), 3 (medium speed, 10 km/h), 4 (high speed, 13 km/h) and 5 (maximum speed, 15
km/h).
B. Navigating the data
•
After turning on the display, the initial screen shows the partial distance (DST – number 4), the partial time the device has
been on (TM – number 5), the motor’s current power absorption (MOTOR W – number 6) and the external temperature
(number 7).
•
Pressing the “
POWER
” button once will open the second screen, which shows the average speed (AVS – number 2), the total
distance (ODO – number 4), the total time the device has been on (TTM – number 5) and the motor’s internal temperature
(MOTOR °C – number 6).
•
Pressing the “
POWER
” button again will open the third screen, which shows the maximum speed (MXS – number 2) and the
motor’s electrical tension in volts (VOL. – number 4).
•
To reset trip data, hold down the “
UP ARROW
” and “
DOWN ARROW
“ buttons together for 5 seconds; when the data start
flashing, press the “
POWER
” button to reset them.
C. Screen Backlighting
•
Hold the “
UP ARROW
” button for 5 seconds to turn on the screen backlight.
•
To turn off the backlight, press the “
UP ARROW
” button for 5 seconds again.
•
When the device is turned off, the light is also automatically switched off.
CAUTION: this procedure must also be used to turn on and off the front LED light connected to the RACE battery, if the device is
equipped with it (listed under accessories in the order form).
D. Speed Hold Function
•
Press the “
DOWN ARROW
” button for 5 seconds to turn on the speed hold function. This function accelerates the device up
to a speed of 4.5 km/h and holds it as long as the button is pressed.
•
When the button is released, the device instantly stops accelerating.
E. Cruise Control function
•
To activate this function the speed has to be higher than 8 km/h.
•
Keep a constant speed for at least 10 seconds and press the "
DOWN ARROW
" key for 5 seconds to automatically insert the
Cruise Control function, which will run the KLICK at the actual speed; the display at number (3) will show the letter "C" as
long as the function is activated.
•
The Cruise Control function must be activated by one of the following modes: operating on the Brake lever (left or right),
operating on the Accelerator control, pressing one of the buttons on the Display.
ATTENTION: By pressing the Reverse button the Cruise Control function will be NOT switched off.
DANGER
During the use of the Cruise Control function it is compulsory to pay the utmost attention to road hazards
in order to be able to intervene on the commands promptly avoiding any kind of collision that could cause
damage to people and / or things.
DANGER
Every action and/or tampering of the display to change performance and KLICK’s security is strictly
prohibited. The sole and only actions possible are those specified in paragraph 13.2 of this User’s Manual.
NOTE: For further information on the display, see
www.klaxon-klick.com
or contact an authorised KLAXON dealer.

