8
Frequency Management
Operation
Manually Tuning the FPV Headset
In some situations, the headset may
not select the correct frequency.
You can use the ‘+’ and ‘-’ buttons
to select the correct frequency. The
tuned frequency is displayed in the
bottom right corner of the display
when powered on.
Finding the Camera Frequency
1. Using the included screwdriver,
remove the two screws securing
the canopy to the frame then
remove the canopy.
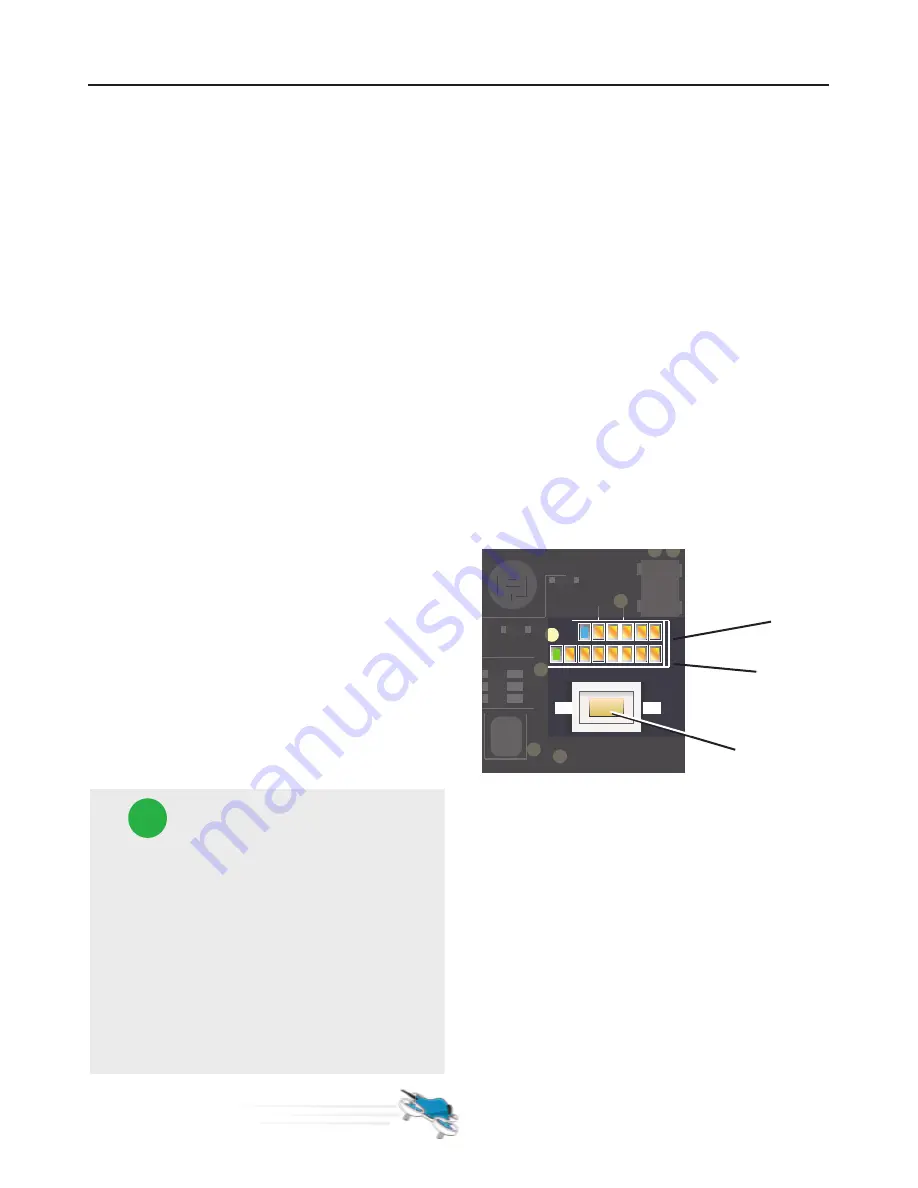
2. Observe the LED pattern on the
camera module. Take note of
which LED is lit in each row. The
top row represents the band A-F.
The bottom row represents the
channel 1-8.
3. Compare the band/channel with
the diagram on the previous
page.
Setting the FPV Camera
Frequency
To set the FPV camera frequency,
first remove the canopy as de-
scribed previously in ‘Finding the
Camera Frequency’.
Briefly press the yellow button on
the camera module to skip to the
next frequency channel. The bottom
row of LEDs will indicate an advance
to the next channel. To change
frequency bands, hold the yellow
button for 1 second. The top row of
LEDs will indicate an advance to the
next band.
Pro Tip
+
When flying with more than
one drone in close proximity to
others, space the frequencies
apart by at least 40(MHz) on
the frequency chart. Due to
the bandwidth of video signals,
this will give less interference
between video feeds.
Band indicator
Channel indicator
Button
Video Interference and Range
For best FPV results, fly in an open
area free of dense obstructions.
Walls, floors and windows may pres-
ent attenuation and result in break-
up of the video signal.
This camera module is operating on
frequency A-1 as indicated by the Blue
and Green LED.


