background image

5

INSTALLATION 

REQUIREMENTS

Tools and Parts

IMPORTANT: 

Installer: Leave Installation Instructions with the homeowner.

Homeowner: Keep Installation Instructions for future 
reference. Save these Installation Instructions for the local 
electrical inspector’s use.

TOOLS NEEDED: 

Gather the required tools and parts before starting installation. 
Read and follow the instructions provided with any tools listed 
here. 

PARTS NEEDED:

Six #8 x 3" (7.6 cm) wood screws (longer screws may be needed)

One or two 2" x 4" x 32" (5 cm x 10 cm x 81 cm) wood board(s)

Order factory panels, make custom panels or consult a 
qualified cabinetmaker or carpenter to make the panels. 

Classic Series: Order factory panels, make custom panels, or 
consult a qualified cabinetmaker or carpenter to make the 
panels. See “Installation Requirements” for more information. 

Overlay Series: Make custom panels, or consult a qualified 
cabinetmaker or carpenter to make the panels. See 
“Installation Requirements” for more information.

Architect

®

 Series is shipped complete. 

If you are connecting the water line directly to copper tubing 
and not to a shutoff valve, you need a ferrule, a union, and a 

¹⁄₄

" compression fitting. 

Location Requirements

The refrigerator can be recessed in an opening between cabinets 
or installed at the end of a cabinet run using a side panel to 
enclose the refrigerator.

IMPORTANT:

Observe all governing codes and ordinances. 

It is recommended that you do not install the refrigerator near 
an oven, radiator, or other heat source. 

Do not install in a location where the temperature will fall 
below 55°F (13°C).

Floor must support the refrigerator weight, more than 600 lbs 
(272 kg), door panels and contents of the refrigerator. 

Ceiling height must allow for side tipping radius. See “Tipping 
Radius.”

Location should permit door to open fully. See “Door Swing 
Dimensions.” 

Location must permit top grille removal. See “Opening 
Dimensions.”

Opening Dimensions

To avoid tipping during use, the solid soffit must be within 1" 
(2.5 cm) maximum above the refrigerator. If the solid soffit is 
higher than 1" (2.5 cm) or one is not available, then the 
refrigerator must be braced. 

If the anti-tip boards are needed, they must be attached to 
the rear wall studs 80" to 90" (203 to 229 cm) above the floor. 
See “Install Anti-Tip Boards” for more information.

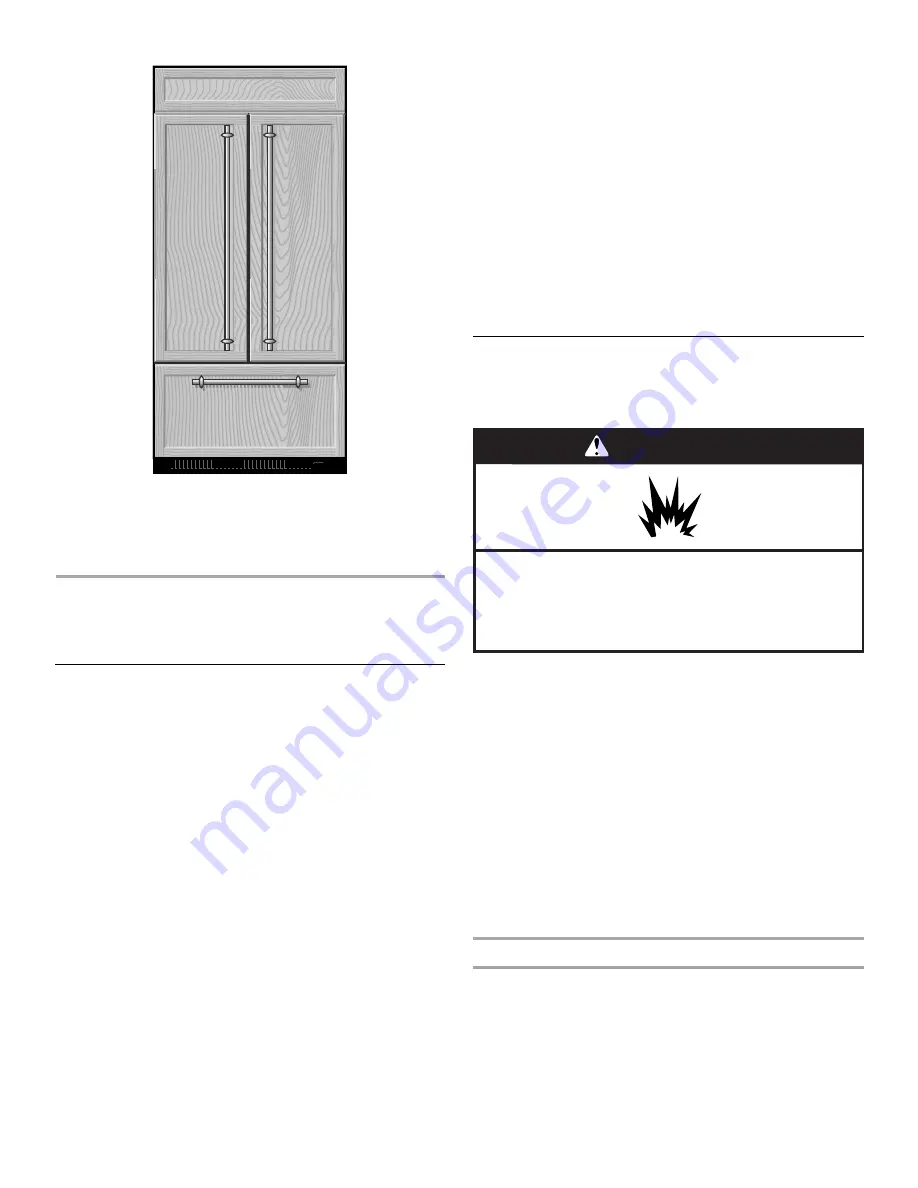
Overlay Series (42" [106.7 cm] Models)

Features factory-installed, overlay style trim, to provide a 
“frameless” look. This series requires the installation of custom 
panels, handles, and standoffs.

KBFO42FTX

Cordless drill

Torx

®†

 T15 and T27  screwdrivers

Drill bits

¹¹⁄₃₂

" nut driver

Two adjustable 
wrenches

³⁄₈

", 

¹⁄₄

", and 

¹⁄₂

" open-end 

wrenches

Phillips screwdriver

⁵⁄₃₂

" Allen wrench

Small level

¹⁄₄

" and 

⁵⁄₁₆

" socket drivers

Appliance dolly

Tape measure

Utility knife

†®TORX is a registered trademark of Textron Innovations Inc.

WARNING

Explosion Hazard

Keep flammable materials and vapors, such as 
gasoline, away from refrigerator.

Failure to do so can result in death, explosion, or fire.

www.dexpress.com

Page 4 of 18

3/24/2012

www.dexpress.com

Page 4 of 18

3/24/2012

KBRO36FTX

KBRO36FTX

Cond Inst

Cond Inst

Summary of Contents for KBFC42FT

Page 1: ... Roland says he is getting this fridge I already printed the page with teh door panel inforamtion KBRO36FTX REF Kitchen Aid Mfr Guide 2 KBRO36FTX REF Kitchen Aid Condensed 3 Thank you for using our NEW PDF Booklet Feature We hope this feature will save you time when working on your project Dimension Express is now offering FREE model listings for manufacturers All information listed with Dimension...

Page 2: ...ions are for planning purposes only For complete details see Installation Instructions packed with product Specifications subject to change without notice Ref 2320680A 05 17 07 KBFC42FT KBFO42FT KBLC36FT KBLO36FT KBLS36FT KBRC36FT KBRO36FT KBRS36FT 80 90 203 229 cm 4 6 83 212 1 cm min 84 215 cm max to bottom of solid soffit 24 60 96 cm min 1 2 54 cm 77 196 cm 6 15 2 cm 6 15 2 cm A Width see chart ...

Page 3: ...hat are not included KBRS36FTB KBRS36FTX KBLS36FTB KBLS36FTX Overlay Series 36 91 4 cm Models Features factory installed overlay style trim to provide a frameless look This series requires the installation of custom panels handles and standoffs KBRO36FTX KBLO36FTX Architect Series 42 106 7 cm Models Features wraparound styling that complements the contoured door handles This series provides a warm...

Page 4: ...t install the refrigerator near an oven radiator or other heat source Do not install in a location where the temperature will fall below 55 F 13 C Floor must support the refrigerator weight more than 600 lbs 272 kg door panels and contents of the refrigerator Ceiling height must allow for side tipping radius See Tipping Radius Location should permit door to open fully See Door Swing Dimensions Loc...

Page 5: ... switch Do not use an extension cord IMPORTANT If this product is connected to a GFCI Ground Fault Circuit Interrupter protected outlet nuisance tripping of the power supply may occur resulting in loss of cooling Food quality and flavor may be affected If nuisance tripping has occurred and if the condition of the food appears poor dispose of it NOTE Before performing any type of installation clean...

Page 6: ... kPa is required to operate the water dispenser and ice maker If you have questions about your water pressure call a licensed qualified plumber Reverse Osmosis Water Supply IMPORTANT The pressure of the water supply coming out of a reverse osmosis system going to the water inlet valve of the refrigerator needs to be between 30 and 120 psi 207 and 827 kPa If a reverse osmosis water filtration syste...

Page 7: ... cm to the height dimensions Top View 36 91 4 cm Models 42 106 7 cm Models Front View Width dimensions were measured from trim edge to trim edge Height dimensions are shown with leveling legs extended 3 mm below the rollers 36 91 4 cm Models When leveling legs are fully extended to 1 3 2 cm below rollers add 1 2 9 cm to the height dimensions A Tip this side only 93 236 2 cm A 25 64 5 cm 23 59 7 cm...

Page 8: ...e of the refrigerator and a corner wall NOTE More clearance may be required if you are using overlay panels or custom handles To adjust the door swing see Adjust Door Swing 36 91 4 cm Models 42 106 7 cm Models 42 107 3 cm 83 211 8 cm 110 90 23 58 cm 51 130 cm 59 150 cm 130 110 90 130 110 90 13 34 3 cm 40 102 7 cm 44 112 3 cm 130 www dexpress com Page 8 of 18 3 24 2012 www dexpress com Page 8 of 18...

Page 9: ...e side of the custom door panels to a radius that is equal to at least half the thickness of the panel if a 130 door swing is desired See Adjust Doors Spacer Panel 1 4 6 35 mm 3 4 1 9 cm 1 2 5 cm 1 2 1 3 cm 1 11 4 11 2 1 2 5 cm 1 3 2 cm 1 4 1 3 8 cm 1 2 1 2 Refrigerator Side Trim D o o r Hinge B a c k e r P a n e l O v e r l a y P a n e l Door Swing 110 Actual Size Refrigerator to Cabinetry Cleara...

Page 10: ...35 mm 3 4 1 9 cm 1 2 5 cm 1 2 1 3 cm 3 4 1 11 4 11 2 1 2 Refrigerator Side Trim Door Backer Panel Overlay Panel Hinge Door Swing 90 Actual Size Refrigerator to Cabinetry Clearance 1 9 cm 2 5 cm 3 8 cm 1 3 cm 3 2 cm Spacer Panel Cabinetry 1 2 3 4 1 1 3 cm 1 9 cm 2 5 cm 90 Door Stop Position www dexpress com Page 10 of 18 3 24 2012 www dexpress com Page 10 of 18 3 24 2012 KBRO36FTX KBRO36FTX Cond In...

Page 11: ...e side of the custom door panels to a radius that is equal to at least half the thickness of the panel if a 130 door swing is desired See Adjust Doors Spacer Panel 1 4 6 35 mm 3 4 1 9 cm 1 2 5 cm 1 2 1 3 cm 1 11 4 11 2 1 2 5 cm 1 3 2 cm 1 4 1 3 8 cm 1 2 1 2 Refrigerator Side Trim D o o r Hinge B a c k e r P a n e l O v e r l a y P a n e l Door Swing 110 Actual Size Refrigerator to Cabinetry Cleara...

Page 12: ...35 mm 3 4 1 9 cm 1 2 5 cm 1 2 1 3 cm 3 4 1 11 4 11 2 1 2 Refrigerator Side Trim Door Backer Panel Overlay Panel Hinge Door Swing 90 Actual Size Refrigerator to Cabinetry Clearance 1 9 cm 2 5 cm 3 8 cm 1 3 cm 3 2 cm Spacer Panel Cabinetry 1 2 3 4 1 1 3 cm 1 9 cm 2 5 cm 90 Door Stop Position www dexpress com Page 12 of 18 3 24 2012 www dexpress com Page 12 of 18 3 24 2012 KBRO36FTX KBRO36FTX Cond In...

Page 13: ...lbs 4 5 kg for both models To minimize panel weight you may use 2 5 08 cm spacer strips around the perimeter in place of full sheet solid spacer panels The spacer strips must be set in at least 1 2 54 cm from the top bottom and side edges of the backer panel If you use spacer strips it is also recommended that you use two 2 5 08 cm strips horizontally centered for added support CustomOverlayPanelD...

Page 14: ... 10 lbs 4 5 kg FREEZER DOOR PANEL Maximum Weight 25 lbs 11 4 kg REFRIGERATOR DOOR PANEL Maximum Weight 30 lbs 13 5 kg REFRIGERATOR DOOR PANEL Maximum Weight 30 lbs 13 5 kg 395 8 100 6 cm 61 4 15 9 cm Bottom Offset 1 2 1 27 cm 493 16 124 93 cm 197 8 50 48 cm 195 8 49 85 cm 40 101 6 cm Bottom Offset 1 2 1 27 cm 493 16 124 93 cm Bottom Offset 1 2 1 27 cm Offset all sides 3 16 4 7 mm Exterior Panel ex...

Page 15: ...create the panels yourself or consult a qualified cabinetmaker or carpenter See dimension drawings for panel specifications IMPORTANT Panels weighing more than recommended may cause damage to your refrigerator NOTE Dimensions shown have a 1 5 mm tolerance Panels that are more than 6 35 mm thick must be routed If panels are less than 6 35 mm thick install a filler panel between the door and the dec...

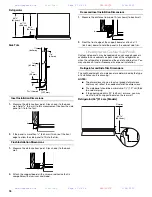
Page 16: ...ut the top and bottom edges of the refrigerator panel 1 27 cm Rout the bottom of the freezer panel 1 27 cm Door Panel Side View Extended Handle Top View ClassicandArchitect Series Custom Side Panels Custom side panels may be needed when not enough space is available to have cabinets on both sides of the refrigerator or when the refrigerator is placed and the end of a cabinet run You may choose an ...

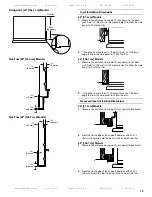
Page 17: ... Panels Custom side panels may be needed when not enough space is available to have cabinets on both sides of the refrigerator or when the refrigerator is placed and the end of a cabinet run You may choose an Inset or Recessed Inset panel installation Refrigerator and Side Trim Dimensions The width and height of a side panel are determined by the type of installation you are planning NOTES The dim...

Page 18: ...he trim 2 If the panel is more than 9 5 mm thick rout the front edge to allow the side panel to fit into the trim Recessed Inset Installation Dimensions 36 91 4 cm Models 1 Measure the distance from point A as shown to back wall 2 Rout the front edge of the support board or attach a 9 5 mm board to hold the panel in the cabinet side trim 42 106 7 cm Models 1 Measure the distance from point A as sh...

Reviews: