King Electrical Floor Heating Cable Installation Manual
14
5.1
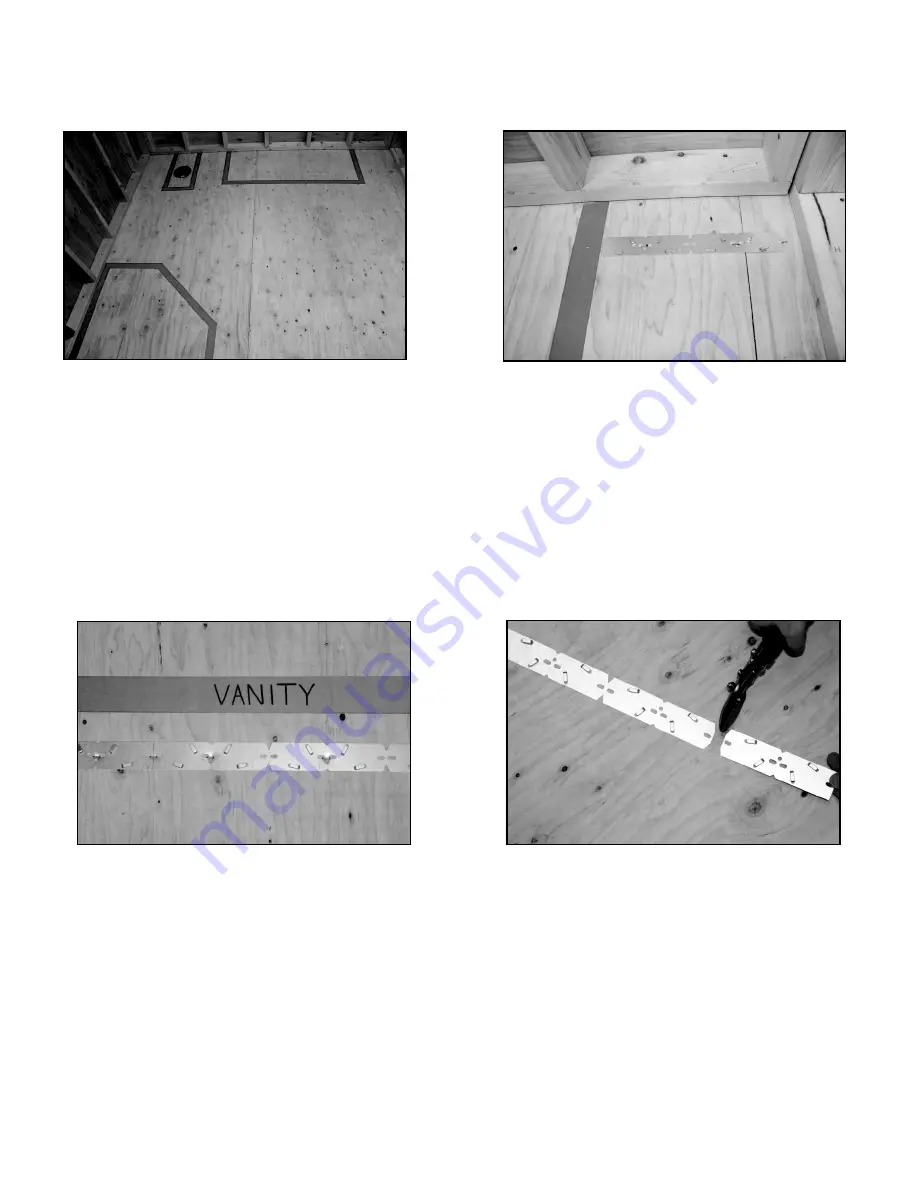
Use tape to mark the fixed objects in the room
the cable needs to avoid, such as a vanity,
shower or bathtub. These areas will remain
unheated.
STEP 5: Transfer layout to floor and plan cable routing
Plan routing of cable.
6.1
Each strapping kit includes a combination of end
and center strapping. End strapping is used around
the border while the narrow center strapping is used
to install between the end strapping when greater
than 4 feet apart.
6.3
Start mounting the end strapping at the predetermined
distance from the wall on one side of the room, then
offset the end strapping by 3” on the opposite side of
the wall.This will allow for proper alignment of the
cable spacing. Tip: use of a chalk line will assist in
proper alignment of the end and center strapping.
Cut strapping to fit
6.4
Strapping is designed to be cut into smaller sections
by using guides located every 6”. Cut the strapping
into smaller segments to fit the cable layout scheme.
6.2
Heating cable should be mounted 1-1/2” from a
kick space, shower or bathtub and between 1-6”
from walls.
Shower
Vanity
Toilet
1” to 6” from wall
5.2
Plan the cable routing around the fixed objects. It
is best to plan the cable runs parallel to the longest
wall in the room. Be sure to have a plan for the end
of the cable, including an overflow area to place any
excess cable. The cable MUST NOT be cut.
STEP 6: Installing the metal strapping
Note: The strapping and heating cable are designed
as a complete system. using any other strapping or
mounting system will void the warranty.
Install end strapping
6.5
On wood subfloors, the strapping should be fastened with
3/8” staples every 6” using the gap between the pre-
punched holes to center the staple gun. The strapping
can also be mounted using nails with .25” head or
#10 screws. Fasteners are required at the end of ends
of each individual piece of strapping to keep it secure.


