background image


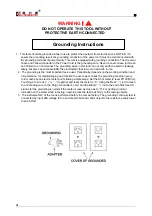
WARNING


DO NOT OPERATE THIS TOOL WITHOUT 

 PROTECTIVE EARTH CONNECTED 


1

This tool should be grounded while in use to protect the operator from electric shock. NOTICE ! To 

ensure the grounding result, the grounding conductor of the power cord must be well connected with 
the grounding terminal of power facility. This tool is equipped with grounding conductors. The Green(or 
Green and Yellow)conductor in the Power Cord is the grounding wire. Never connect Green (or Green 
and Yellow) to a live terminal. The grounding wires in this tool can not only earth the electric leakage 
safely, but also can eliminate ESD-the electrostatic that tool occurred while in use. 

2

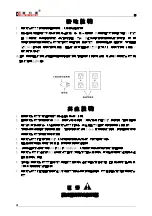
The grounding is the most important task a user. Periodically, depends on the working condition and 

circumstance, for maintaining a good function the user has to check the grounding condition every 
3~6 months by an electric meter and following simple steps; Set the Ohm meter to level R*100(Ohm). 
Touching 2 test rods (“

”) together and reset the meter to “0”. Using the Red(“

”) rod to touch 

the Grounding wire on the Plug of controller’s cord, and the Black(“

”) rod to the end of Bit Head. It 

stands for the grounding is normal if the meter is read as close as to “0”. For getting a normal 
indication on the meter while in testing, need to press the test rods firmly to the testing objects. 

3

The instrument QC of the tool is performed before the tool ex-factory. The grounding continuity test is 

conducted by input 26A voltage to the end of earth terminal, and subject to the resistance value lower 
than 0.3Ohm. 


Grounding Instructions 

Summary of Contents for SKD-8300L

Page 1: ...C TYPE 全自動手按 DC TYPE 全自動下壓 AC TYPE Automatic Trigger Start Series AC TYPE Automatic Push Start Series AC TYPE Semi Automatic Trigger Start Series DC TYPE Automatic Trigger Start Series DC TYPE Automatic Push Start Series 奇力速工業股份有限公司 KILEWS INDUSTRIAL CO LTD http www kilews com Y2F001 001 ...

Page 2: ...附頁 技術參數 附頁 標準配備 附頁 扭力調整 附頁 1 Important Safety Instructions 6 2 Grounding Instructions 7 3 Operations Cautions 9 4 Description Of Operation 10 5 Servicing 10 Parts List Appendix Specifications Appendix Accessories Appendix Torque Adjustment Operation Appendix ...
Page 3: ...電動螺絲起子之功能及安全性 使用時請勿強壓之 6 使用正確機型的電動螺絲起子 勿以小型電動螺絲起子或附件去操作須以重型電動螺絲起子完成的工作 勿使用此電動螺絲起子於非其設定之用途 如 鑽孔等 7 操作此電動螺絲起子時要穿著適宜 勿穿著太寬鬆之衣物或珠寶 以免遭工具勾扯而造成危險 8 小心使用電源線 不可使用電源線拉提電動螺絲起子 或將電源線從插座猛拉開 避免電源線接觸到熱源 油污或化學劑等物品 或磨擦到尖銳的物品邊緣 9 固定工作物 作業員應將工作物固定 安全操作電動螺絲起子 10 細心維護工具 定期檢查電動螺絲起子的電源線 遇有損壞應由指定之服務部門修理 機身需保持乾淨 避免油污 弄髒 11 拔掉電動螺絲起子的插頭 不使用電動螺絲起子時或更換零件時應拔掉電源線插頭 12 避免意外起動電動螺絲起子 注意使用電壓是否符合該機型使用 在插上電動螺絲起子的電源插頭時須先確認開關處於 OFF 的狀...

Page 4: ...量測及調整所需扭力 注意 請勿將扭力調整超過刻度 8 7 為壓板式起子時要進行鎖緊螺絲動作 請將正反開關切到 F 的位置 若螺絲為反牙規格 則須 將正反開關切換至 R 的位置 對準螺絲刀頭與螺絲的位置 手按開關壓板後電動螺絲起子即 可啟動運轉 當螺絲鎖緊達設定扭力時 離合器會自動跳脫 馬達會斷電並及時剎車 讓電動螺絲 起子停止運轉 為下壓式起子若要進行鎖緊螺絲動作 請將正反開關切到 F 的位置 若螺絲為反牙規格 則須 將正反開關切換至 R 的位置 對準螺絲刀頭與螺絲的位置 下壓電動螺絲起子即可啟動運轉 當螺絲鎖緊達設定扭力時 離合器會自動跳脫 馬達會斷電並及時剎車 讓電動螺絲起子停止運轉 8 若為壓板式起子 鬆脫拔起螺絲時則僅需將正反開關切換至 R 的位置 若螺絲為反牙規格 則須將正反開關切換至 F 的位置 按上述程式操作 於螺絲鬆開後 放開開關壓板即可 若為下壓式起子 松脫拔起螺絲時則僅...

Page 5: ...消除 其 他 說 明 1 此電動螺絲起子的最佳使用狀況是每日不超過 8 小時 2 當電動螺絲起子使用時數達 1000 小時或約半年時間 須進行機身內部清潔 換碳刷 加潤滑油等 等的保養或檢查動作 以維持電動螺絲起子的壽命 安全和扭力精確度 無碳刷馬達不在此限 3 定期檢查馬達兩端的碳刷損耗情形 如果碳刷長度不到 2 3mm 就要換新的碳刷 碳刷磨損的速率 與電動螺絲起子使用的頻率成正比 4 電動螺絲起子內部應定期清潔 以避免積碳破壞絕緣強度 引起漏電的危險 5 離合器應定期補充專用的潤滑油 使其傳動順暢減低磨損 6 不要超出額定運轉的頻率 0 8 秒 3 2 秒 ON OFF 以免造成馬達過熱所引發的嚴重損壞 7 電動螺絲起子的維修保養工作可就近交由本公司指定之售後服務中心或連絡原購買的經銷商送往 當地服務中心處理 8 客戶若將電動螺絲起子交由非本公司指定之服務中心維修或自行拆解修理 因此...

Page 6: ...on enclosed Read all these instructions before placing tool in service or operation this tool and save these instructions It is the responsibility of the employer to place the information in this manual into the hands of the operator Failure to observe the following warnings could result in injury When using electric tools Basic safety precautions should always be followed to reduce the risk of fi...

Page 7: ...for outdoor use Use of cord suitable for outdoor use reduces the risk of electric shock 3 Personal Safety a Stay alert watch what you are doing and use common sense when operating a power tool Do not use power tool while you are tired or under the influence of drugs alcohol or medication A moment of inattention while operating power tools may result in serious personal injury b Use safety equipmen...

Page 8: ...ace if damaged f Keep cutting tools sharp and clean Properly maintained cutting tools with sharp cutting edges are less likely to bind and are easier to control g Use the power tools accessories and tool bits ect in accordance with these instructions and in the manner intended for the particular type of power tool taking into account the working conditions and the work to be performed Use of the p...

Page 9: ... important task a user Periodically depends on the working condition and circumstance for maintaining a good function the user has to check the grounding condition every 3 6 months by an electric meter and following simple steps Set the Ohm meter to level R 100 Ohm Touching 2 test rods together and reset the meter to 0 Using the Red rod to touch the Grounding wire on the Plug of controller s cord ...

Page 10: ...nterval when cycles three seconds or longer This tool is intended for a duty cycle of 1 0 sec on 3 0 sec off 6 Do not use this screwdriver for tightening wood screws This is Metal Assembly Screw Driver 7 Do not operate the Forward Reverse Switch the motor is running 8 Whenever a tool is not being used move the Forward Reverse Switch to the OFF position and unplug the screwdriver 9 Don t touch For ...

Page 11: ... bit From the screw head To return the screw set the changeover switch to R position Maintenance and Inspection 1 The screw driver must be operated in top condition one day working hour must be not more than eight hours 2 Periodically check for wear of motor Carbon brush one day for eight hours use is normal replace it after every five to six months 3 Please note don t let the motor get over heate...

Page 12: ... center 3 KILEWS is not responsible for customer modification of tools for applications on which KILEWS was not consulted 4 Repairs should by made only by authorized trained personnel Consult your nearest KILEWS authorized service center 5 It is the responsibility of the employer to place the information in this manual into the hands of the operator DO NOT ATTEMPT TO REPAIR THIS ELECTRIC SCREW DRI...

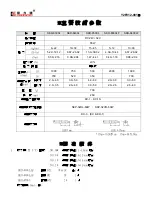
Page 13: ...0 1000 空轉速 n0 r min LO 700 520 350 700 機械牙 2 6 4 0 3 0 5 0 4 0 6 0 2 0 3 0 3 0 5 0 適用螺絲直 徑 mm 自攻牙 2 0 3 5 2 6 4 0 3 0 5 0 2 0 2 6 2 6 4 0 重 量 g 700 長 度 mm 269 適用扭力固定環 KC 1 KC 1S 適用電動起子控制器 SKP 32HL 60W SKP 32VR 60W 適用起子架 KH 3 KC KH 1 適用起子頭 HEX 5mm HEX 6 35mm 1N m 10 2Kgf cm 1N m 8 85Lbf in 標 准 配 件 1 起子頭 BIT 型號 NO 00 適用於直徑 1 3 1 8mm 螺絲 NO 0 適用於直徑 1 8 2 0mm 螺絲 NO 1 適用於直徑 2 0 2 6mm 螺絲 NO 2 適用於直徑 3 0 4...

Page 14: ......

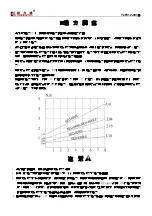
Page 15: ... 6 電動螺絲起子經調整好扭力後 將外殼前鎖環鬆開取下 換上扭力固定環 這樣可避免人為擅意旋轉扭力調 整環而讓原設定的扭力值遭到變動 7 在相同的扭力刻度下 反轉 R 的扭力會較大於正轉 F 的扭力 在不調整扭力調整環的情況下 有助於 螺絲的拆卸 但是當螺絲緊度大於反轉扭力 離合器已經跳脫而螺絲仍無法鬆開時 仍需調整電動螺絲起子 至較大扭力 方可鬆開螺絲 注 意 1 進行扭力調整時 應先停止電動螺絲起子運轉 2 機身上的扭力刻度僅供與扭力標示圖參考 不代表電動螺絲起子的扭力輸出值 3 電動螺絲起子的機械磨損狀況 依使用者之使用扭力 時間或頻率而有所差異 使用扭力越大 時間越長或 頻率越高則磨損越快 新品在刻度 4 使用一個月後 每日 8 時 操作頻率 12Pcs min 約有 3 5 的扭力衰減 刻 度 8 則有 5 7 的衰減 依使用時間的增長 其衰減程度會逐漸減少並趨於穩定 使用者可定...

Page 16: ......

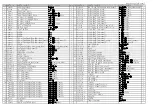
Page 17: ...17 EB33610 2 CERAMICS CAPACITOR 陶瓷電容 1 41 GP30361 STELL BALLS 5mm 跳脫鋼珠 5mm 2 18 MD91531 BRUSH CAP 碳刷蓋 2 42 GP30351 STELL BALLS 4mm 酒杯鋼珠 4mm 2 19 MC71411 CAPBON BRUSH 碳刷 2 43 GD91408 SHAFT FOR HEX 5 0mm 傳動軸A 頭用 1 20 ML80531 MOTOR TOP COVER 碳刷座半成品 1 GD91404 SHAFT FOR HEX 6 35mm 傳動軸B 頭用 1 21 ME21481 BALL BEARING 軸承 2 44 GP21291A BIT PILOT FOR HEX 5 0mm 3mm 起子頭帽鋼珠A頭用 3mm 2 22 MH81581 1 ARMATURE 8300L ...

Page 18: ......

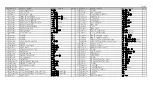
Page 19: ...X 5 0mm 3mm 起子頭帽鋼珠A頭用 3mm 2 13 HA91041 CHANGEOVER SWITCH 正反開關 1 GP21291B BIT PILOT FOR HEX 6 35mm 2 5mm 起子頭帽鋼珠B頭用 2 5mm 2 14 CH20102 SCREW 螺絲 3 44 GF90324 WARING PLATE 扭力推盤 1 15 MO80081 1 MOTOR ASSEMBLY 馬達整組 1 45 GE80351 7 WARING SPRING 扭力彈簧 1 16 MI31611 PILOT ROD 開關引導棒 1 46 GY21321 WARING SPRING BASE 止推盤 1 17 EB33610 2 CERAMICS CAPACITOR 陶瓷電容 1 47 GK20231B C RING 傳動軸固定C環 1 18 MD91531 BRUSH CAP 碳刷...

Page 20: ......

Reviews: