


Installation Note N5247-90116 35
Description of the Upgrade
Installation Procedure for the Upgrade
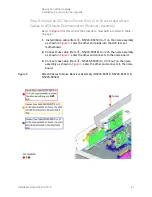
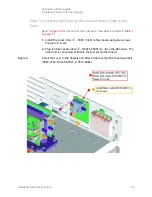
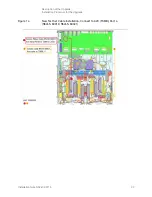
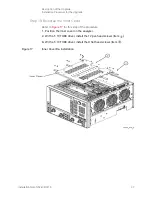
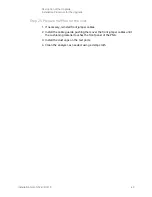
Step 16. Reinstall the Front Panel Assembly
Refer to
for this step of the procedure. New parts are listed in
1.
Reconnect the ribbon cable (item
③
) to the A1 front panel interface board.
2.
Slide the front panel over the front-panel connectors.
3.
With a T-10 TORX driver, reinstall the 12 screws (item
➁
) in the sides of
the frame.
Figure 16
Front Panel Assembly Re-installation
Before installing the front panel assembly onto the analyzer, lift and
support the front of the analyzer chassis.


