User Guide
INT40G2SR44 / INT40G2LR44
12/2022
Release Version: 4.22.1
1
Page 1: ...User Guide INT40G2SR44 INT40G2LR44 12 2022 Release Version 4 22 1 1 ...
Page 2: ... purchased products services and features are stipulated by the contract made between Garland Technology and the customer All or part of the products services and features described in this document may not be within the purchase scope or the usage scope Unless otherwise specified in the contract all statements information and recommendations in this document are provided AS IS without warranties ...
Page 3: ...cal Authentication Enable 11 TACACS Test 11 TACACS Ping Test 11 TACACS Secondary Authentication 12 TACACS Test 12 TACACS Ping Test 12 Network Settings 12 IPv4 Disable 13 IPv4 Enable 13 IPv6 Enable 13 IPv6 Disable 14 Add SSL Certificate 14 Disable Using Uploaded SSL Certificate 14 Date Time 15 Timezone 15 UTC 15 Manually Set Date Time 15 NTP No Authentication Symmetric 15 NTP Authentication Symmetr...
Page 4: ...29 Load Balancing Policy 29 Config Map 30 Ingress 31 Filter 31 Egress 32 Egress Filter 33 Config Map Save 34 Modify a Config Map 35 Config Map Statistics 35 Delete Config Map 36 Config Map Priority 36 Method 1 37 Enable Disable Config Map 37 Disable Config Map 38 Enable Config Map 38 5 Port Info 39 Port Configuration 40 Port Description 40 Set Speed 40 Mode 40 Port Statistics 40 VLAN Tag 41 VLAN S...
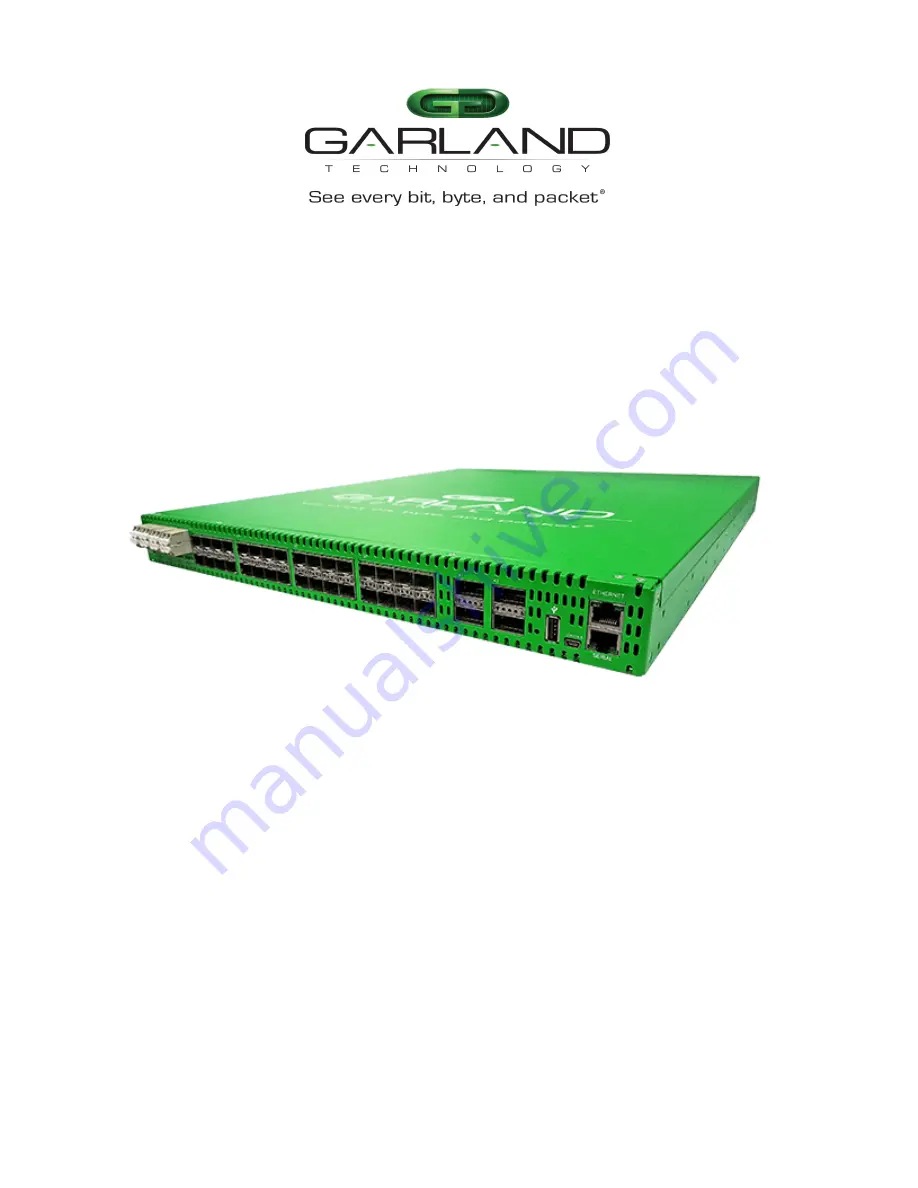
Page 5: ...s Taps Packet Broker Port Info and System configuration options by selecting the desired option in the top menu bar These options are covered in detail per their specific sections Basic LED Indications The basic LED indications are consistent regardless of configuration changes The Ethernet and Serial interfaces always indicate GREEN However on the faceplate the Ethernet Interface has LEDs to indi...
Page 6: ...ED Port 14 Left Down Arrow Link LED Port 15 Left Up Arrow Link LED Port 16 Left Down Arrow Link LED Port 17 Left Up Arrow Link LED Port 18 Left Down Arrow Link LED Port 19 Left Up Arrow Link LED Port 20 Left Down Arrow Link LED Port 21 Left Up Arrow Link LED Port 22 Left Down Arrow Link LED Port 23 Left Up Arrow Link LED Port 24 Left Down Arrow Link LED Port 25 Left Up Arrow Link LED Port 26 Left ...
Page 7: ...ry Inline Appliance Link LED Port 39 Right Up Arrow Tap 1 Secondary Inline Appliance Link LED Port 40 Left Down Arrow Tap 1 Secondary Inline Appliance Link LED Tap 2 L A3 Tap 2 Network Port 3 Link Activity LED L A4 Tap 2 Network Port 4 Link Activity LED BP Tap 2 Bypass LED Port 41 Right Up Arrow Tap 2 Primary Inline Appliance Link LED Port 42 Left Down Arrow Tap 2 Primary Inline Appliance Link LED...
Page 8: ...disabled under the System panel System Info SNMP General Export Configuration Admin Import Configuration Network Settings Software Upgrade Date Time Reboot Syslog 1 Select System on the Dashboard Menu bar Garland Technology 716 242 8500 www garlandtechnology com Copyright 2022 Garland Technology LLC All rights reserved 8 ...
Page 9: ...neral The following configuration options may be displayed or modified Chassis Name Key Press Timeout 1 Select General The General System Settings panel will be displayed 2 Select Edit Configuration 3 Enter the desired Chassis Name 4 Enter the desired Key Press Timeout 5 Select Save to save updates 6 Select Cancel to return to the General System Settings panel Admin The following configuration opt...
Page 10: ... 6 Select Cancel to return to the Admin Settings panel 7 Edit the username password or assigned group by selecting the pencil 8 Delete the user by selecting the Red X Groups The group defines the authorization for a user or group of users A group may be used for local or TACACS authorization In Use true means that there is at least one local user assigned to the group If a group is used by TACACS ...
Page 11: ...ust be enabled The TACACS primary or secondary function supports IPv4 only IPv6 is not supported 1 Select Authentication Settings The Authentication Settings panel will be displayed Local authentication is enabled by default Local Authentication Disable 1 Deselect Local Authentication Local authentication may only be disabled provided that TACACS authentication primary or secondary has previously ...
Page 12: ...o the TACACS server The TACACS Ping option will be active only if TACACS authentication has been previously enabled 1 Select TACACS 1 Ping The GUI will display the results of the ping TACACS 1 Ping Successful TACACS Secondary Authentication 1 Select Enable Secondary The TACACS Secondary panel will be displayed 2 Enter the IP Address IPv4 or IPv6 3 Enter the Secret Word optional 4 Select Save to sa...
Page 13: ...anagement interfaces may be enabled or disabled independently as well as both enabled or disabled simultaneously If the IPv4 and IPv6 management interfaces are disabled simultaneously access is only allowed via the serial interface Any modifications made to any setting option will cause GUI disruption for about 60 seconds Also note that modifying the management interfaces may cause network disrupt...
Page 14: ...he desired Address 3 Enter the desired Gateway 4 Select Save IPv6 Disable 1 Deselect Enable IPv6 2 Select Save If the IPv4 management interface has not been enabled the GUI will display a message Disabling IPv4 and IPv6 GUI will disconnect Are you sure 3 Select OK Add SSL Certificate Uploading a custom SSL certificate involves two files The cert pem file and key pem file The unit will validate the...
Page 15: ...ploaded SSL Certificate 1 Select Edit Settings 2 Deselect Using Uploaded SSL Certificate 3 Select Save The GUI message will be displayed Saved Settings Changes will cause network connectivity disruption for about 60 seconds 4 Refresh Browser 5 Verify SSL Certificate Loaded true 6 Verify Using Uploaded SSL Certificate false Date Time The following configuration options may be displayed modified ena...
Page 16: ...elect Cancel to return to the Date Time Settings panel NTP No Authentication Symmetric The system supports an IPv4 or IPv6 address for NTP timing If IPv4 is desired then an IPv4 management interface must be assigned If IPv6 is desired then an IPv6 management interface must be assigned The system allows for an IPv4 and IPv6 management interface to be assigned simultaneously 1 Select Edit Settings 2...
Page 17: ...display Synced This can take several minutes 9 Select Cancel to return to the Date Time Settings panel Syslog The system supports an IPv4 or IPv6 address for Syslog If IPv4 is desired then an IPv4 management interface must be assigned If IPv6 is desired then an IPv6 management interface must be assigned The system allows for an IPv4 and IPv6 management interface to be assigned simultaneously 1 Sel...
Page 18: ...nly V3 Auth Type MD5 SHA V3 Priv ProtocolDES AES 1 Select SNMP The SNMP Configuration panel will be displayed 2 Select Edit Configuration 3 Select Enable SNMP Config 4 Enter the desired Access Port number or use the default 161 5 Enter the desired Trap Port number or use the default 162 6 Enter the IPv4 or IPv6 Address 7 Select the desired Protocol V2 Read Write or V2 read Only 8 Enter the desired...
Page 19: ...file exportCfg json to be uploaded to the unit The Chassis Model is the only option that is considered and must match otherwise the unit will reject the exportCfg json file 1 Select Import Configuration The Import Configuration panel will be displayed 2 Select Choose File 3 Select the desired exportCfg json file 4 Select Open 5 Select Upload The unit will automatically verify the selected exportCf...
Page 20: ...ce panel will be displayed 2 Select Reboot The unit will present an Are you sure message 3 Select OK The GUI will display a rebooting as well as a Session timed out Go to Login screen message 4 Select Go The Login panel will be displayed 3 Bypass Taps Garland Technology 716 242 8500 www garlandtechnology com Copyright 2022 Garland Technology LLC All rights reserved 20 ...
Page 21: ... under the Bypass Taps panel Tap Settings Bypass Tap Name Heartbeat Settings 1 Select Bypass Taps on the Dashboard Menu bar The Bypass Taps panel will be displayed The taps may be configured individually Garland Technology 716 242 8500 www garlandtechnology com Copyright 2022 Garland Technology LLC All rights reserved 21 ...
Page 22: ...ry inline appliance ports on the tap through the primary inline appliance or tool to monitor the health of the device Likewise heartbeat packets are transmitted bidirectionally from the secondary inline appliance ports on the tap through the secondary inline appliance or tool to monitor the health of the device Ports 5 through 36 may be configured as packet broker ports Tap 1 Tap 2 Port 1 Network ...
Page 23: ...lect Cancel to return the Bypass Taps panel Heartbeat Settings The following configuration options may be displayed or modified No Of Lost HB Packets Heartbeats per Second 1 Select Settings on the Bypass Taps panel The Configure Heartbeat Settings panel will be displayed with the current configuration 2 Enter the No Of Lost HB Packets Default is 10 This is the number of heartbeats that must be los...
Page 24: ...iance port s loss of link or heartbeats The default switching action from inline to bypass is defined by the system as from the primary inline appliance to the secondary inline appliance to bypass The default switching action from bypass to inline is defined by the system as from bypass to the secondary inline appliance Switching from the secondary inline appliance to the primary inline appliance ...
Page 25: ...l switch the traffic between the network ports with no regard for the primary inline appliance or the secondary inline appliance port s link or heartbeats Typically used during maintenance activities Figure 5 Primary Secondary Tap Force Bypass Garland Technology 716 242 8500 www garlandtechnology com Copyright 2022 Garland Technology LLC All rights reserved 25 ...
Page 26: ...RX for both network ports remain on Figure 7 Primary Secondary Tap Reverse Bypass 7 Revertive If enabled and the primary inline appliance port s fail loss of link or heartbeats the system will switch to the secondary inline appliance When the issue with the primary inline appliance is resolved has link and heartbeats The traffic will automatically revert back to the primary inline appliance This o...
Page 27: ...en the other tap options will become active 9 Select Accept to save updates Save must additionally be selected on the Tap panel 10 Select Cancel to return the Tap panel 11 Select Back to Primary to manually switch the traffic from the secondary inline appliance to the primary inline appliance This function is independent for each tap unless they are coupled Then selecting Back to Primary on either...
Page 28: ...d modified enabled or disabled under the Packet Broker panel Configuration Maps Load Balancing Policy Filter Templates Load Balancing Groups 1 Select Packet Broker on the Dashboard menu bar The Packet Broker Configurations panel will be displayed Garland Technology 716 242 8500 www garlandtechnology com Copyright 2022 Garland Technology LLC All rights reserved 28 ...
Page 29: ...s The Filter Templates panel will be displayed 2 Select Create Template The Create New Filter Template panel will be displayed 3 Enter the template name If no name is entered the system will automatically apply a name as follows tmplt tmplt 2 tmplt 3 etc 4 Enter the description optional 5 Select the Template Type Pass All Pass By or Deny By 6 If pass by or deny by was selected in Step 5 the option...
Page 30: ...ll be displayed 2 Select Create Group The Create New Load Balance Group panel will be displayed 3 Enter the name If no name is entered the system will automatically apply a name as follows lbg lbg 2 lbg 3 etc 4 Enter the description optional 5 Add ports by placing the cursor on the desired port Select with the left mouse button Drag the port to the New L B Group panel and release Repeat for all de...
Page 31: ...ired load balancing policy options 3 Select Save to save updates 4 Select Cancel to disregard changes Config Map Config maps are unidirectional connections between ingress port s to egress port s and or a load balancing group 1 Select Create Config Map on the Packet Broker Configurations panel 2 Select Create Config Map The Create Config Map panel will be displayed Any previously created load bala...
Page 32: ...iple ports are added then the traffic from all ingress ports will be aggregated Figure 8 Ingress 2 Remove a port by selecting the Red X Filter 1 Add filters by placing the cursor on the desired filter template A previously created filter template or the new filter template option may be selected Select with the left mouse button Drag the filter template to the Filter panel and release The filter t...
Page 33: ...Egress 1 Add an egress port by placing the cursor on the desired port Select with the left mouse button Drag the port to the Egress panel and release Repeat for all desired ports If multiple ports are added then 100 of the traffic will be sent to each port Figure 11 Egress Port s 2 Add a load balancing group by placing the cursor on a previously created load balancing group or new load balancing g...
Page 34: ...Balancing Group and Port s 4 Remove a port or load balancing group by selecting the Red X Egress Filter 1 Select the gray filter icon on the desired egress port Figure 14 Egress Filter The Port XX Egress Filters panel will be displayed 2 Add filters by placing the cursor on the desired filter template A previously created filter template or the new filter template option may be selected Select wit...
Page 35: ...Egress Filter System Considerations 3 If new is selected the Edit Filter panel will displayed 4 Enter the filter name optional If no name is entered the system will automatically apply a name to the egress filter as follows eFltPXX eFltPXX 2 eFltPXX 3 etc 5 Select Accept 6 Select Cancel to disregard 7 Remove a filter template by selecting the Red X Config Map Save 1 Select Save to save the current...
Page 36: ...ch config map The number displayed represents all packets that have passed through the config map 1 Select Refresh to refresh the config map statistics 2 Select Clear Counters to clear and refresh the config map statistics 3 Select the View Counts icon to display individual statistics for ingress ports filters egress ports and load balancing group ports Garland Technology 716 242 8500 www garlandt...
Page 37: ...n may be selected to delete all config maps 3 Select Delete Selected Config Map Priority The config map priority needs to be considered when the same ingress port s is used in multiple config maps to send traffic to multiple egress options different port s or load balancing groups In this case the config map with the highest priority will be considered first In the following example there are thre...
Page 38: ...ig Map System Considerations Method 1 1 Select the up or down arrow for the config map 2 Select Save to save updates Method 2 1 Select Set The Set Priority panel will be displayed 2 Enter the priority in the Set New Priority panel 3 Select Set to accept the priority value 4 Select Cancel to disregard Garland Technology 716 242 8500 www garlandtechnology com Copyright 2022 Garland Technology LLC Al...
Page 39: ...If the config map has a green check then it is enabled If the config map has a red dash then it is disabled Disable Config Map 1 Select the green check for the config map in the Enable column The green check will change to a red dash 2 Select Save Enable Config Map 1 Select the red dash for the config map in the Enable column The red dash will change to a green check 2 Select Save Garland Technolo...
Page 40: ...ration options may be displayed or modified under the Port Info panel Port Number Mode Port Description SFP Data Link Split Set Speed Port Statistics Speed Garland Technology 716 242 8500 www garlandtechnology com Copyright 2022 Garland Technology LLC All rights reserved 40 ...
Page 41: ...ription by placing the cursor on Port Description for the desired port and press the left mouse button The Edit Description panel will be displayed 2 Place the cursor in the description field and enter the new description 3 Select Set to save updates 4 Select Cancel to return to the Port Configuration panel Set Speed 1 Modify the port speed by selecting the pull down panel for the desired port 2 S...
Page 42: ...selecting Clear VLAN Tag VLAN tag applies a VLAN ID to the packets when the port is configured as an ingress port on a config map This option is only available for packet brokers ports The packet broker section consists of ports 5 through 36 1 Select the VLAN Tag enable option for the desired port 2 Enter the desired VLAN ID 1 4094 3 Select Save 4 Disable by deselecting the VLAN Tag option for the...
Page 43: ...2XX44 4 22 1 2 Select Save 3 Disable by deselecting the VLAN Strip option for the desired port 4 Select Save Garland Technology 716 242 8500 www garlandtechnology com Copyright 2022 Garland Technology LLC All rights reserved 43 ...