521 East 3
rd
Street Mt. Vernon, NY 10553 • www.keydigital.com
Rev 1.0
– Nov, 2022
11
Connections, Buttons, and LEDs
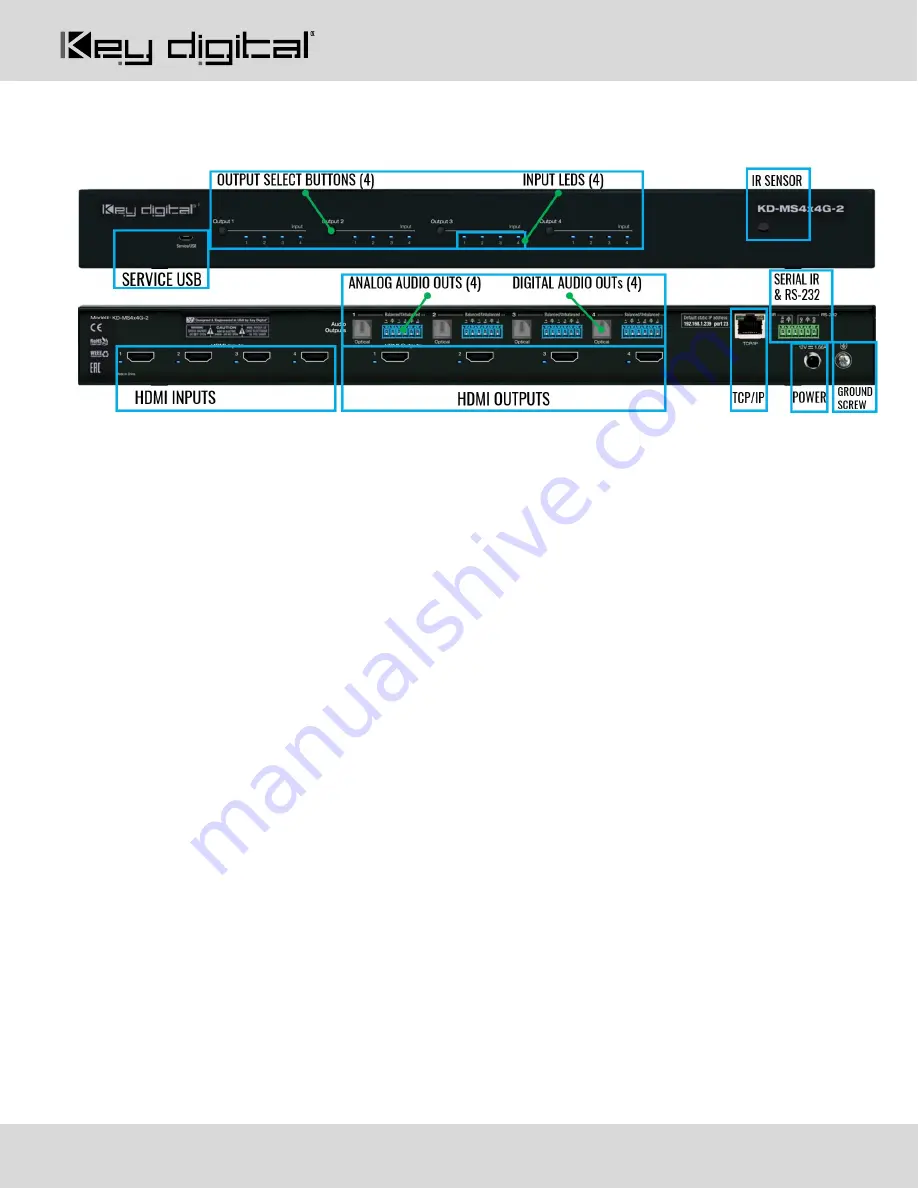
Front Buttons and LEDs (4):
Using an HDMI cable, connect your HDMI sources.
•
Press an output button to select the next HDMI input.
o
A blue LED indicates which Input has been selected for each Output.
•
Front button control can be disabled/enabled via serial control if desired.
•
Press and hold Output 1 + Output 4 buttons simultaneously for 10 seconds to reset the unit to factory
default. The front LEDs will scroll during boot up
IR Sensor:
Mount IR an IR emitter from control system or IR connection block. Refer to IR Remote Control
section for correct button press sequence
HDMI Inputs and LEDs (4):
Using an HDMI cable, connect your HDMI sources.
•
LED (
Blue
) illuminates solid to indicate an active incoming HDMI signal.
HDMI Outputs and LEDs (4):
Using an HDMI cable, connect your HDMI displays.
•
LED (
Blue
) with active Hot Plug Detection voltage from the connected display/sync device.
HDMI Input & Outputs Port Specifications
•
Supports up to UHD/4K @ 50/60 fps [4:4:4], 18Gbps signals
o
See Supported standard 4K Video Formats table
•
Supports HDR10
•
Compliant with HDCP 2.2 and previous
•
Supports lossless compressed audio formats including Dolby® TrueHD, Dolby® Digital Plus, Dolby
Atmos®, and DTS-HD Master Audio
™
•
Does not support CEC
•
For DVI-D/DVI-I sources or monitors, use appropriate adapters. For Display Port, use active
converters


