


521 East 3
rd
Street Mt. Vernon, NY 10553 • www.keydigital.com
Rev 0
– May 2020
5
Quick Setup Guide
Begin with KD-BYOD4K, the connected display / touch screen monitor, and all USB or HDMI extension devices
turned off with power cables removed. Ensure that all desired functionality is achieved before installing.
Cabling
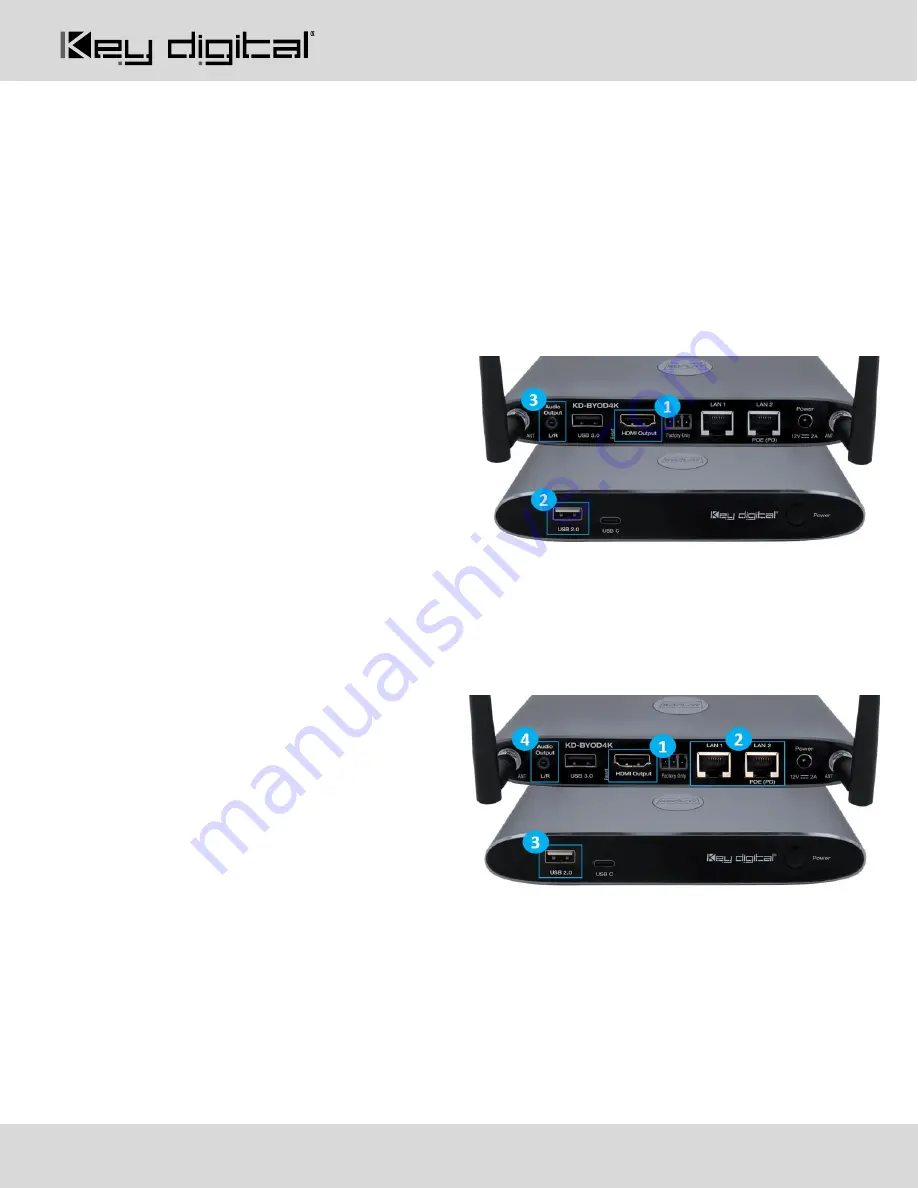
Cabling for WiFi Direct Mode
1. Connect KD-BYOD4K to an HDMI display.
2. (Optional) Connect mouse or touch screen
monitor to USB 2.0 port if using content
preview dock, annotation, or chalkboard tools.
USB 3.0 and USB-C connections are available
as well.
3. (Optional) Connect audio from L/R output to
audio amplifier.
4. Connect power to KD-BYOD4K unit
Cabling for LAN Connection Mode
1. Connect KD-BYOD4K to an HDMI display.
2. Connect network cable from WiFi Router /
Network Switch.
a. (Optional) Connect to KD-
BYOD4K’s
LAN 2 port to power the unit via PoE
from a supported network switch
b. (Optional) You may connect KD-
BYOD4K to two networks for concurrent access to KD-BYOD4K from devices on each network.
3. (Optional) Connect mouse or touch screen monitor to USB 2.0 port if using content preview dock,
annotation, or chalkboard tools. USB 3.0 and USB-C connections are available as well.
4. (Optional) Connect audio from L/R output to audio amplifier.
5. Connect Power to KD-BYOD4K unit (if not using PoE as described in step 2a).


