10
10
Follow these easy steps:
Open the carton so the sides fall down. You can use
the base of the cardboard to assemble the cross
trainer on to avoid damaging your floor surface.
Please tighten all bolts loosely until final stage.
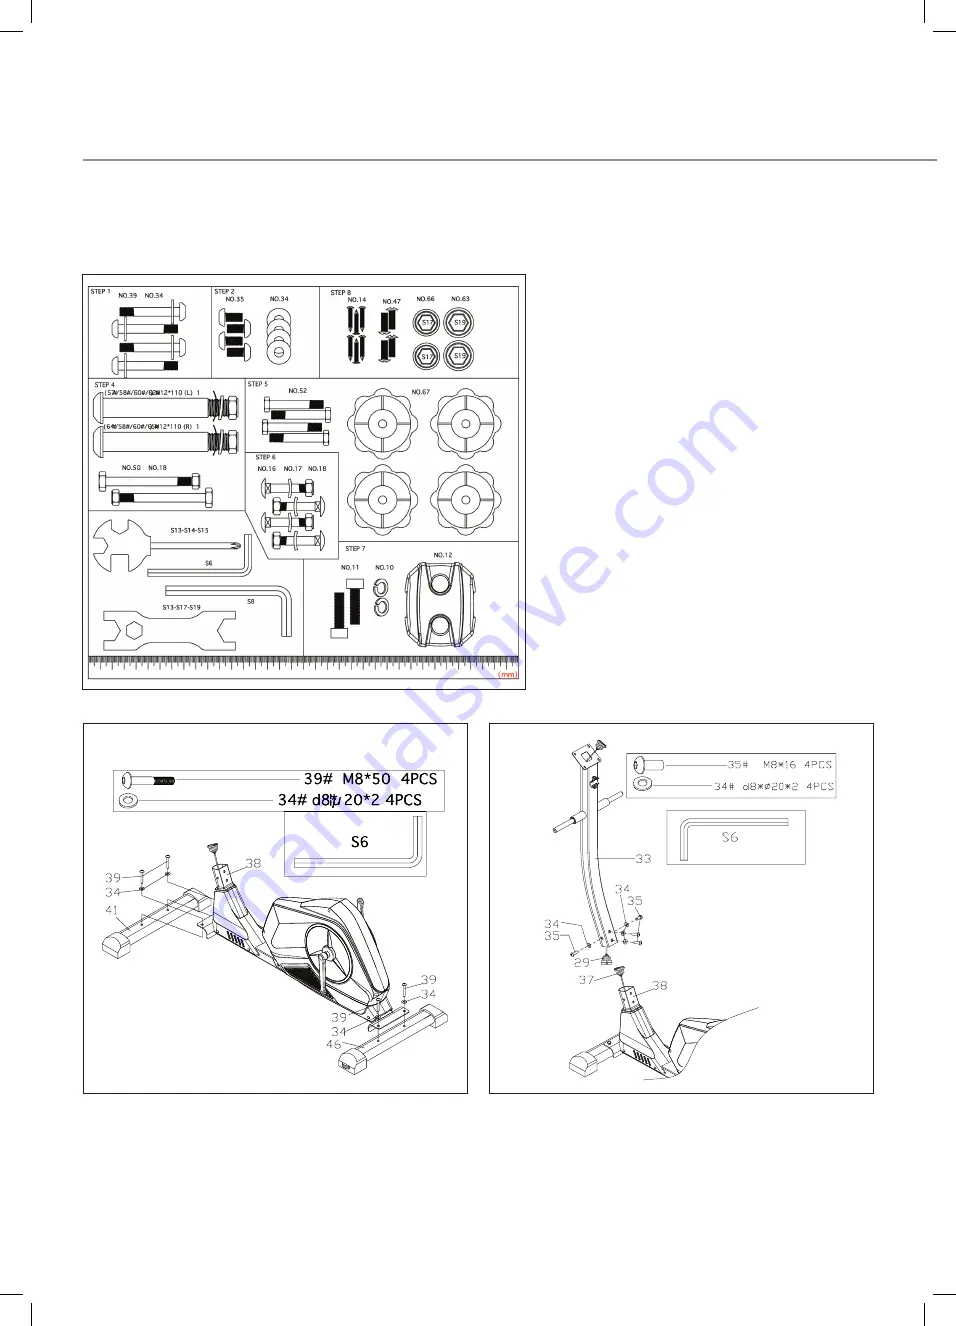
Hardware tools for installation.
Assembly
1.
2.
1.
Attach the front stabiliser (41) and the rear stabiliser (46)
to the main frame (38) with carriage bolt (39), and arc washer
(34). The washers are already connected to the bolt inside the
installation tool pack. The rear stabiliser has no wheels, the
front has wheels attached.
2. a)
Connect the sensor cables (29) and (37) as shown
in FIG.2. Please ensure that all the pins are straight when
connecting 29 and 37. Failure to do so will result in computer
malfunction.
b)
Fix the upright post (33) with the main frame (38) with bolt
(35) and washer (34).
Note:
Tighten the bolt (35) and washer (34) after the STEP 3.
Periodically check these fixings to ensure they are tight.
Summary of Contents for ALPINE8964-500
Page 6: ...6 6 Parts List...
Page 8: ...8 8 Parts List...


