2
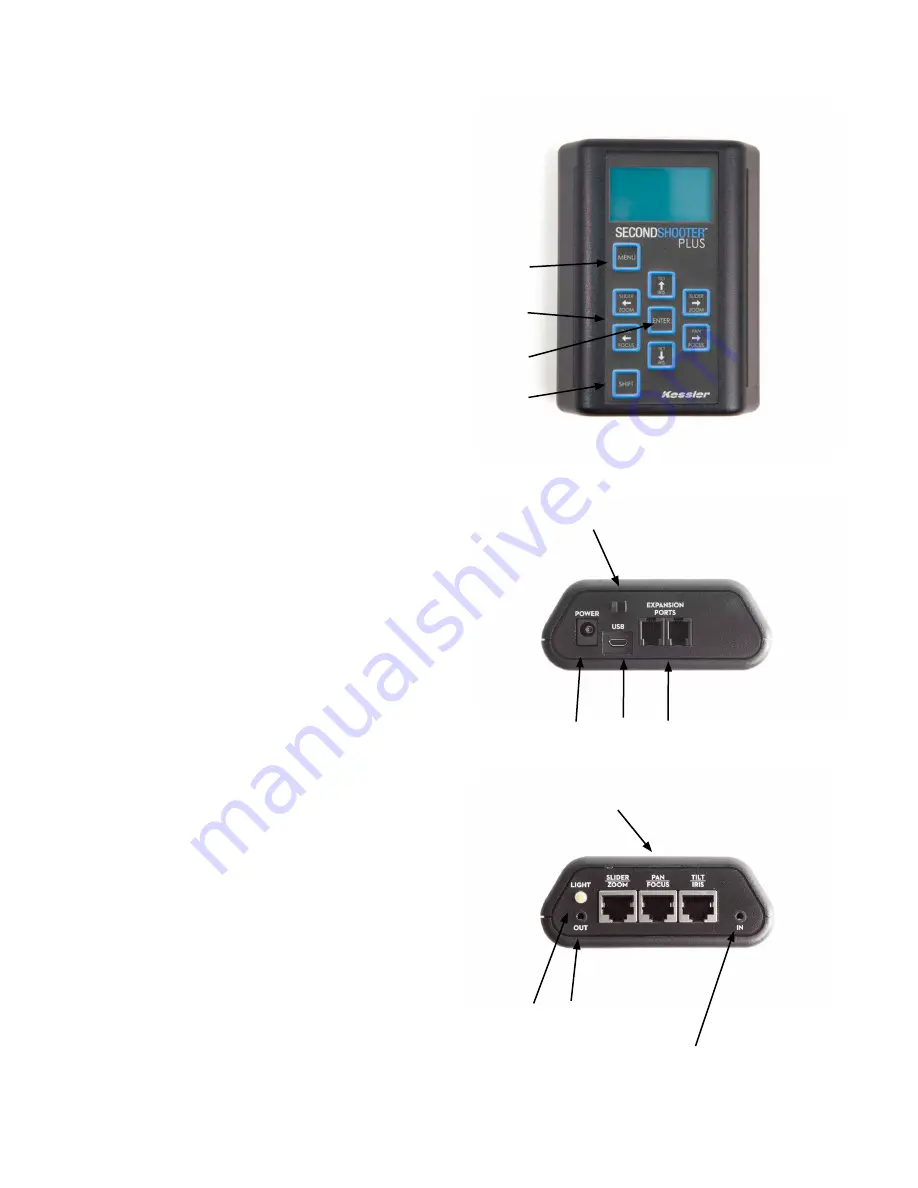
THE CONTROLLER
a) Menu Button
Navigate backwards to the previous menu with this
button.
b) Directional Arrows
The directional arrows can be used to navigate
through the menu and also control the Left/Right
movement of the Slider motor, Left/Right move-
ment of the pan motor, and the Up/Down move-
ment of the tilt axis. Press and hold (for 3 seconds)
Left/Right or Up/Down to swap move orientations.
c) Enter Button
Use this button to select options through the menu.
d) Shift Button
This button in conjunction with other buttons allows
for secondary controls.
Shift + Directional arrows increases speed during
set up to allow moves to be programmed faster
Shift + Enter turns the LED Light on/off
Shift toggles backlight on/off during
timelapse move
e) Power Port
Connect the supplied AC wall power cord or a 12V
DC cable for battery power.
f) USB Port
Connect the Controller to a computer via the sup-
plied USB cable to update firmware.
g) Two Expansion Ports
Connect to various external accessories such as
the Digital Control Center, while at the same time
connecting two controllers together in Bridge Mode.
h) Wire Clip
Connect the power cord through this clip to prevent
unwanted disconnection.
i) LED Light
Press Shift + Enter to turn off/on.
j) IN Port
Used to connect external intervalometer or bulb
ramper
k) OUT Port
Used to connect a camera via the Camera Control
Cable for intervalometer control of the camera by
the Second Shooter Plus, or to connect to a bulb
ramping device that supports receiving an external
trigger signal.
l) Cat5 Ports (Slider, Pan, Tilt)
Connect each axis to corresponding port via provid-
ed CAT5 cable.
a)
b)
c)
d)
e) f) g)
h)
i) k)
j)
l)


