background image

YKG-01-BA-e-1910 


15 

5.5  Connecting the cable 

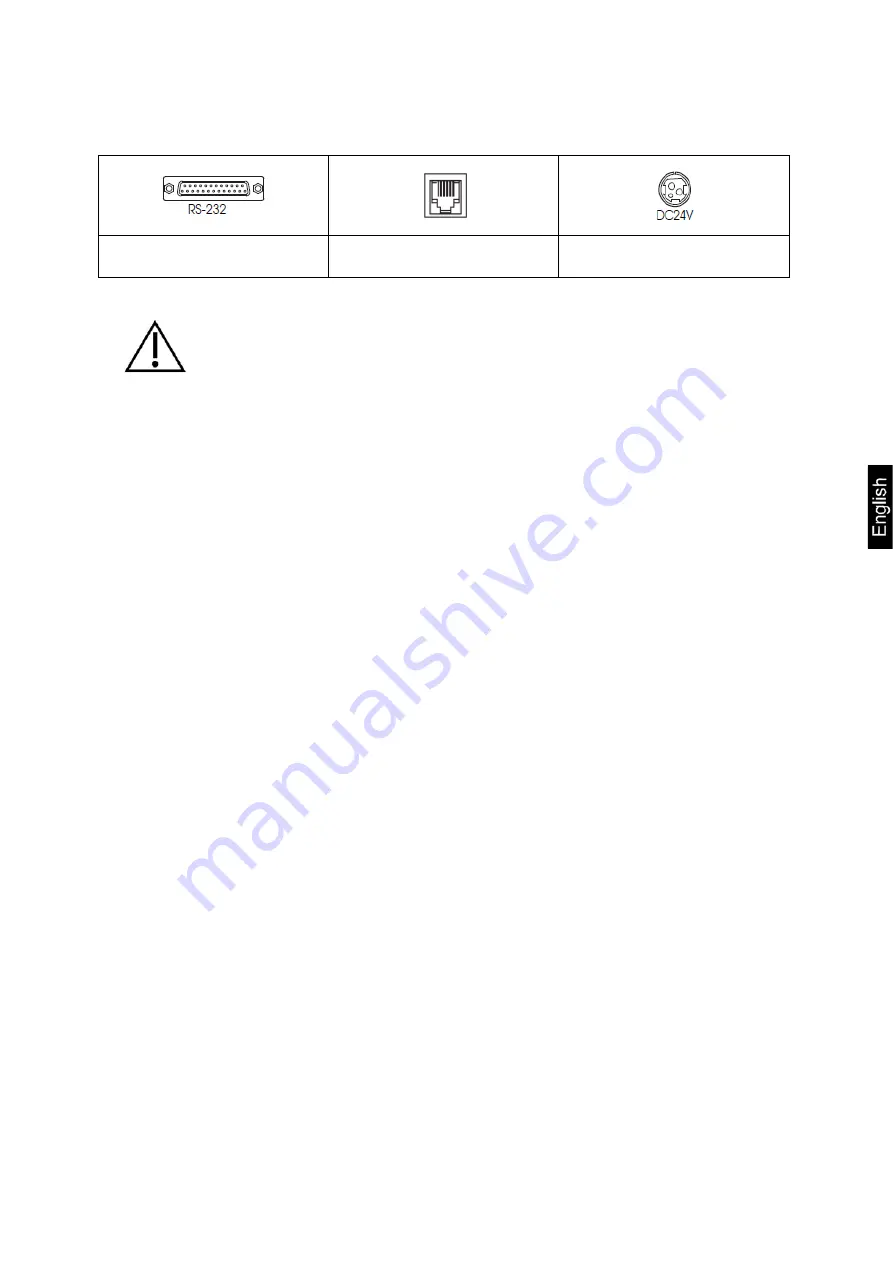
Connections: 


RS-232  

Connection  

Cash box drawer 

Mains cable 


CAUTION


  When using a serial interface, error-free operation is only ensured 

with the enclosed interface cable and the corresponding KERN 
interface cable (option). 
If necessary, use the zero modem supplied and a gender changer. 

  Never attempt to stretch the cable or over-extend the cable to 

establish a connection. The mains cable must not be taut during use. 


1.  Make sure that the printer is switched off. 

2.  Connect the interface cable to the printer. 

3.  Connecting the Interface cable to the scales 

4.  Connecting the AC cable to the AC adapter 

5.  Plug in the mains cable for the mains adapter and connect it to the power supply.  


6  Configuring the printer 

The following conditions must be met to provide successful communication between 
the weighing balance and the printer. 

Disconnect balance from the power supply and connect to the printer interface 
with a suitable cable. Error-free operation is only guaranteed with the enclosed 
interface cable and the corresponding KERN interface cable. 

Communications parameters (e.g. baud rate, bits and parity) for the scales and 
printer interface must match. The communication parameters for the printer are 
set with the DIP switches as described below. 


Summary of Contents for TYKG-01-A

Page 1: ...iegelei 1 D 72336 Balingen E Mail info kern sohn com Phone 49 0 7433 9933 0 Fax 49 0 7433 9933 149 Internet www kern sohn com Operating Instructions Dot Matrix Printer KERN YKG 01 Version 1 0 2019 08...

Page 2: ...ns warning signs 6 4 2 User Instructions 7 4 3 Warranty 7 4 4 Mains connection 8 5 Commissioning 8 5 1 On Off switch and switch cover 8 5 2 Inserting and changing the ink ribbon cartridge 9 5 3 Insert...

Page 3: ...numeric 48 international 128 x 12 graphics Print speed 4 70 rows sec 40 columns 16 cpi Supported paper width 58mm 70 mm 76 mm Power pack Input voltage 100 240 V Weighing scales Input voltage 24 V DC 1...

Page 4: ...gnation 1 Printer 2 Operating manual 3 Ink ribbon cartridge 4 Power switch cover 5 Software CD not documented 6 Paper roll 7 Mains cable 8 Mains adapter RS232 interface cable not shown Zero modem not...

Page 5: ...lay Lights up when the printer is turned on Error LED Error display Lights up when the printer is offline when the paper roll is finished or the printer cover is open Does not light up when the printe...

Page 6: ...Make sure that you use the specified AC adapter Connecting the device to an unsuitable power source may result in a fire Never plug or unplug the mains cable with wet hands This may result in a severe...

Page 7: ...such as inserting the paper roll CAUTION Do not touch the print head as this may be very hot after printing 4 2 User Instructions Do not install the printer in a dusty location Protect the printer fr...

Page 8: ...h and switch cover The on off switch is located on the front of the printer Press the On Off switch to turn on the printer Switch cover You can use the on off switch cover provided to ensure that the...

Page 9: ...ribbon cartridge tension knob against the direction indicated by the arrow on the cartridge as this risks damaging the ink ribbon cartridge Note Use the following ink ribbon cartridge in your printer...

Page 10: ...5 Turn the ink ribbon cartridge knob another two or three times in the direction of the arrow and close the ink ribbon cartridge cover CAUTION Make sure that you do not accidentally touch the print h...

Page 11: ...use paper rolls that meet the specifications Be careful not to touch the manual paper cutter to avoid injuries 1 Cut the front end of the paper roll as described in Figure G shown using scissors 2 Tu...

Page 12: ...paper is unwound from the roll When using 2 ply roll paper make sure that the top and bottom sheets are aligned with the paper output See figure G a 4 If you are not using a paper take up reel pull o...

Page 13: ...it as shown in Figure L Note DO NOT open the paper roll cover during printing or while paper is being fed through When using the printer do not forget to tear off the paper using the manual cutter aft...

Page 14: ...hat meet the specifications Be careful not to touch the manual paper cutter to avoid injuries 1 Open the paper roll cover using the tab as shown in Figure H 2 Remove what is left of the paper roll 3 I...

Page 15: ...inter 3 Connecting the Interface cable to the scales 4 Connecting the AC cable to the AC adapter 5 Plug in the mains cable for the mains adapter and connect it to the power supply 6 Configuring the pr...

Page 16: ...e communications parameters with the DIP switches DSW1 DSW2 DSW1 SW Function On Off 1 Data receive error Ignored Prints 2 Receive buffer capacity 40 bytes 4 KB 3 Handshaking XON XOFF DTR DSR 4 Word le...

Page 17: ...l use only flash memory rewriting Enabled Disabled 7 Pin 6 reset signal Used Not used 8 Pin 25 reset signal Used Not used Reattach the cover to the base plate 7 Cleaning the printer housing Make sure...

Page 18: ...es operation Make sure the paper roll cover is firmly closed A paper jam has occurred To remove the paper jam refer to the instructions below If there is a problem turn off the printer wait a few seco...

Reviews: