background image

2

 EN

Maintenance of the unit

When the front panel or case becomes dirty, wipe with a soft, dry
cloth. Do not use thinner, benzine, alcohol, etc. for these agents may
cause discoloration.

In regard to contact cleaner

Do not use contact cleaner because it could cause a malfunction. Be
specially careful not to use contact cleaners containing oil, for they
may deform the plastic component.

Before applying the power

Caution : Read this page carefully to ensure safe

operation.

Safety precautions

WARNING :

TO PREVENT FIRE OR ELECTRIC SHOCK,
DO NOT EXPOSE THIS APPLIANCE TO
RAIN OR MOISTURE.

CAUTION

RISK OF ELECTRIC SHOCK

DO NOT OPEN

CAUTION: TO REDUCE THE RISK OF ELECTRIC SHOCK, DO NOT
REMOVE COVER (OR BACK). NO USER-SERVICEABLE PARTS
INSIDE. REFER SERVICING TO QUALIFIED SERVICE PERSONNEL.

THE LIGHTNING FLASH WITH ARROWHEAD SYMBOL,
WITHIN AN EQUILATERAL TRIANGLE, IS INTENDED TO
ALERT THE USER TO THE PRESENCE OF UNINSULATED
“DANGEROUS VOLTAGE” WITHIN THE PRODUCT’S
ENCLOSURE THAT MAY BE OF SUFFICIENT MAGNITUDE
TO CONSTITUTE A RISK OF ELECTRIC SHOCK TO
PERSONS.

THE EXCLAMATION POINT WITHIN AN EQUILATERAL
TRIANGLE IS INTENDED TO ALERT THE USER TO THE
PRESENCE OF IMPORTANT OPERATING AND
MAINTENANCE (SERVICING) INSTRUCTIONS IN THE
LITERATURE ACCOMPANYING THE APPLIANCE.

Units are designed for operation as follows.

U.S.A. ................................................................ AC 120 V only

How to use this manual

This manual is divided into four sections, Preparations, Operations,
Remote Control, and Additional Information.

Preparations

Shows you how to connect your audio and video components to this
model and prepare the surround processor.
Since this model works with all of your audio and video components, we
will guide you in setting up your system to be as easy as possible.

Operations

Shows you how to operate the various functions available on this model.

Remote Control

Shows you how to operate other components using the remote control,
as well as a detailed explanation of all remote control operations. Once
you have setup the remote control, you’ll be able to operate both this
model and your KENWOOD DVD player using the remote control
supplied with this model.

Additional Information

Shows you additional information such as “In case of difficulty”
(troubleshooting) and “Specifications”.

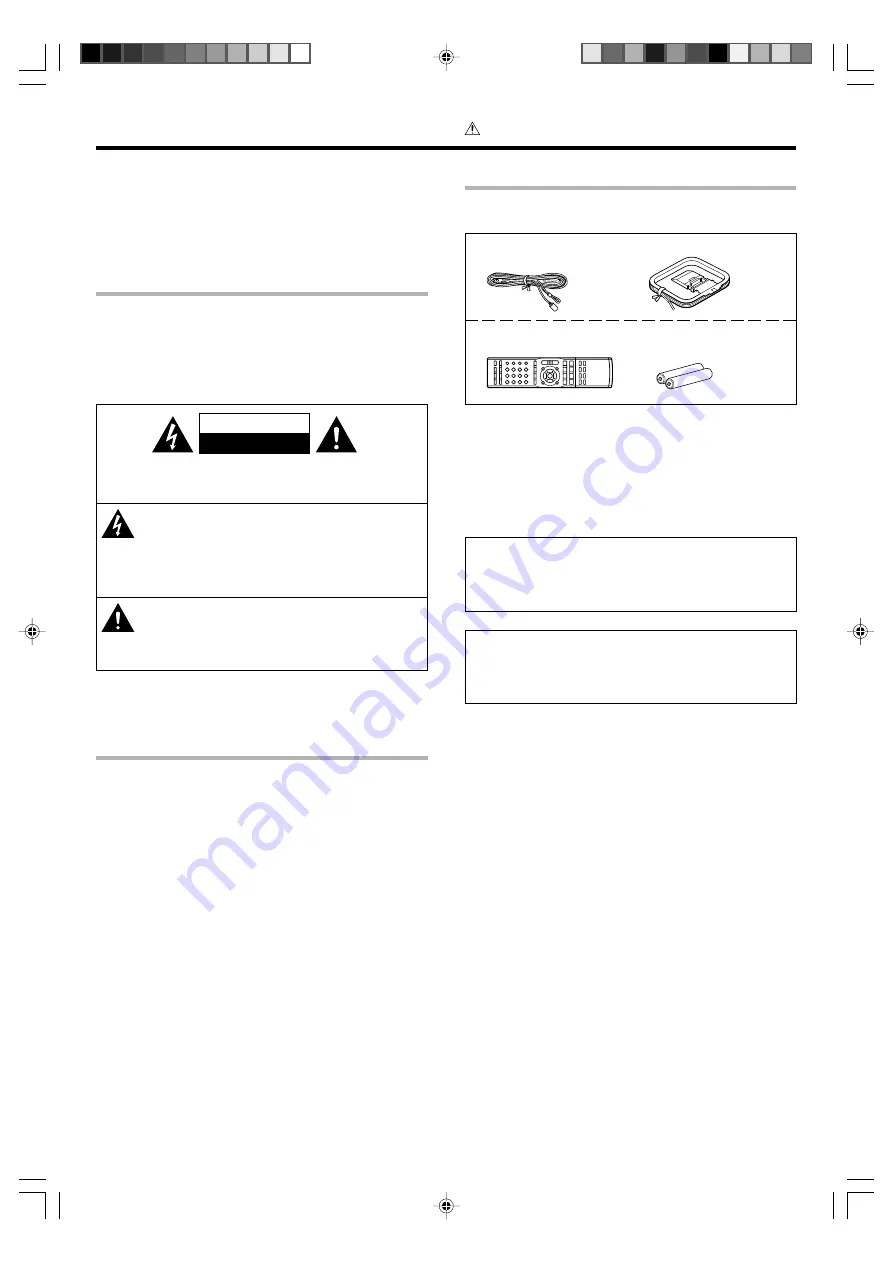
Unpacking

Unpack the unit carefully and make sure that all accessories are
present.

FM indoor antenna (1)

AM loop antenna (1)

Remote control unit (1)

Batteries (R03/AAA) (2)

RC-R0630

If any accessories are missing, or if the unit is damaged or fails to operate,
notify your dealer immediately. If your unit was shipped to you directly,
notify your shipper immediately. Kenwood recommend that you retain
the original carton and packing materials in case you need to move or ship
the unit in the future.

Keep this manual handy for future reference.

*5573/01-07/EN

05.2.10, 10:11 AM

2

Summary of Contents for VR-50RS

Page 1: ...s the remote control supplied with this model has several operation modes These modes enable the remote control to control other KENWOOD DVD players In order to effectively use the remote control it is important to read the operating instructions and obtain a proper understanding of the remote control and how to switch its operation modes etc Using the remote control without completely understandi...

Page 2: ...s U S A AC 120 V only How to use this manual This manual is divided into four sections Preparations Operations Remote Control and Additional Information Preparations Shows you how to connect your audio and video components to this model and prepare the surround processor Since this model works with all of your audio and video components we will guide you in setting up your system to be as easy as ...

Page 3: ... stations manually 22 Receiving preset stations 22 Receiving preset stations in order P CALL 22 Ambience effects 23 Surround modes 23 Surround play 25 Convenient functions 27 BasicremotecontroloperationsforKENWOOD DVD players 29 DVD player operation keys 29 In case of difficulty 30 Specifications 32 Contents Caution Read the pages marked carefully to ensure safe operation Before applying the power...

Page 4: ...re of the following measures Reorient or relocate the receiving antenna Increase the separation between the equipment and this model Connect the equipment into an outlet on a circuit different from that to which this model is connected Consult the dealer or an experienced radio TV technician for help For the U S A As an ENERGY STAR Partner Kenwood Corporation has determined that this product meets...

Page 5: ...om Surround Back speakers DTS and DTS ES DTS Digital Theater System is a 5 1 channel digital audio format that provides five full spectrum channels and one low frequency subwoofer channel for unprecedented clarity optimum channel separation and a wide dynamic range DTS ES Extended Surround presents 6 1 channels surround system with additional Surround back channel which evolved from the conven tio...

Page 6: ... 4 Surround LED light emitting diode indicators ACTIVE EQ mode LED indicator Lights when this model is in the ACTIVE EQ mode DTS mode LED indicator Lights when this model is in the DTS mode DOLBY DIGITAL mode LED indicator Lights when this model is in the Dolby Digital mode 5 SOUND key Use to adjust the sound quality and the ambience effects 6 MULTI CONTROL knob Use to control a variety of setting...

Page 7: ...e DVD player 7 P CALL 4 keys Use to call preset channel Use to operate the DVD player ª 8 BASS BOOST key Use to select the maximum adjustment setting for the low frequency range LOUDNESS key Use to switch the status of LOUDNESS 9 RECEIVER key Use to turn this model on and off 0 DVD key ª Use to turn the DVD player on and off SETUP key Use to select the speakers settings etc Use to operate the DVD ...

Page 8: ...O2 and DVD inputs each include jacks for digital audio input and analog audio input After completing connections and turning on this model follow the steps below 1 Use the INPUT SELECTOR knob to select CD DVD VIDEO2 DVD 2 Press the INPUT MODE key Each press switches the setting as follows In DTS play mode 1 F AUTO digital input analog input 2 D MANUAL digital input In CD DVD VIDEO2 DVD play mode 1...

Page 9: ...d the Input mode settings section carefully 8 VIDEO 1 OUT VIDEO 1 IN VIDEO 2 IN DVD IN MONITOR OUT VIDEO 2 DVD CD DVD COAXIAL OPTICAL AUDIO VIDEO DIGITAL IN DVD IN PLAY IN VIDEO 2 DVD player VIDEO OUT Yellow RCA pin cord AUDIO OUT L R COAXIAL DIGITAL OUT AUDIO For COMPONENT VIDEO con nection VR 60RS only 5573 08 15 EN 05 2 10 10 11 AM 9 ...

Page 10: ...o component Other component CAUTION Be sure to adhere to the following or proper ventilation will be blocked causing damage or fire hazard Do not place any object impairing heat radiation onto the top of the unit Leave a space around the unit from the largest outside dimension including projection equal or greater than shown below Top panel 50 cm Side panel 10 cm Back panel 10 cm 5573 08 15 EN 05 ...

Page 11: ...IN Setting up the system Connecting video components A video component with digital audio outputs should be connected to the VIDEO 2 jacks OUT OUT Monitor TV Video IN IN Video OUT DVD player or LD player Audio OUT Video Audio DVD IN input jack is used for either CD DVD input or DVD input 5573 08 15 EN 05 2 10 10 11 AM 11 ...

Page 12: ...dio OUT Video OUT Connecting video components COMPONENT VIDEO VR 60RS only If you have connected this model to a video component with COMPONENT jacks you can get a better picture quality than by connecting to the S VIDEO jacks When connecting the TV to the COMPONENT jacks be sure to connect all the other components to the COMPONENT jacks DVD IN input jack is used for either CD DVD input or DVD inp...

Page 13: ...DIGITAL OUT AUDIO DOLBY DIGITAL RF OUT AUDIO LD player PCM OUT RF digital demodulator Commercially available CD or DVD player OPTICAL DIGITAL OUT AUDIO Optical fiber cable COAXIAL DIGITAL OUT AUDIO To connect an LD player with a DIGITAL RF OUT connect the LD player to the RF digital demodulator Commercially available Next connect the DIGITAL OUT jacks of the demodulator to the DIGITAL IN jacks of ...

Page 14: ...t Surround Speakers Surround Back Speakers Right Left Surround Back Speaker When connecting a single Surround Back speaker through a power amplifier to PRE OUT jack connect it as above and select SPEAKER at speaker settings When connecting a Surround Back speaker to this terminal select SPEAKER at speaker settings To make sure that each speaker has been connected properly pay attention to the test...

Page 15: ...sounds Surround Back speaker s Place the speaker s directly at the rear of the listening position The optimum position depends mainly on the room condition Although the ideal surround system consists of all the speakers listed above if you don t have a center speaker or a subwoofer you can divide those signals between the available speakers in the speaker settings steps to obtain the best possible...

Page 16: ...FULL RANGE 2WAY 2SPKR or 2WAY 3SPKR should only be used with 6 channels speaker system setting When the setting FULL RANGE 2WAY 2SPKR or 2WAY 3SPKR is selected the procedure skips to step 4 3 For general speaker setting use the MULTI CONTROL knob or MULTI CONTROL fi keys to select CUSTOM and press the SETUP key again The Subwoofer setting indication SUBW ON appears 4 Use the MULTI CONTROL knob or M...

Page 17: ...ULTI CONTROL fi keys to select the appropriate Subwoofer re mix setting 1 RMX ON Subwoofer re mix set mode to this model is ON 2 RMX OFF Subwoofer re mix set mode to this model is OFF Press the SETUP key to accept the setting 4 Adjust the speaker volume level From your usual listening position adjust the volume levels The volume levels from each speaker should be the same In step 4 and 5 indication...

Page 18: ...ept the settings 5 Repeat steps 3 and 4 to input the distance for each of the speakers 6Adjust the LFE Low Frequency Effects level 1 Select the LFE LEVEL from the set up displays and press the SETUP key again 2 Use the MULTI CONTROL knob or MULTI CONTROL fi keys to adjust the LFE LEVEL The LFE LEVEL can be adjusted from 0dB to 10dB in 1dB step decrements 3 Press the SETUP key to accept the setting ...

Page 19: ...hen in TONE ON selection press the TONE key for the following displays BASS Select this to adjust the low frequency range TREB Select this to adjust the high frequency range 4 Use the MULTI CONTROL knob or MULTI CONTROL fi keys to adjust the sound quality The bass and treble levels are adjustable from 10 to 10 in 2 step increments One touch low frequency emphasis Bass Boost remote control only You ...

Page 20: ...o mode Press the LOUDNESS key to turn the Loudness setting ON To cancel PresstheLOUDNESSkeyagainsothatthe LOUDNESS indicator goes off Muting the sound The MUTE key lets you mute the sound of the speakers Press the MUTE key To cancel Press the MUTE key again so that the MUTE indicator goes off MUTE ON can also be deactivated by turning the volume control knob ACTIVE EQ mode You can enjoy a more imp...

Page 21: ...yback then start recording If the audio reproduction stops in the middle due to change in the input signals etc press the DIMMER key Listening to radio broadcasts This model can store up to 40 stations in the memory and recall them by one touch operation Tuning radio stations AM or FM indicator appears in the display AUTO indicator lights up in the display 1Use the INPUT SELECTOR knob or TUNER key...

Page 22: ...meric keys in the following order For 15 press 0 5 For 20 press 0 0 If you make a mistake entering a two digit number press the 10 key repeatedly to return to the original display and start again Receiving preset stations in order P CALL 1Press the TUNER key to select tuner as the source 2Use the P CALL 4 keys to select the desired station Each time you press the key another preset station is rece...

Page 23: ... license from Dolby Laboratories Dolby Pro Logic Surround EX and the double D symbol are trademarks of Dolby Laboratories DTS DTS ES Extended Surround and Neo 6 are trademarks of Digital Theater Systems Inc The below speaker placements are for 5 1 channel surround sound system which are Dolby Digital Dolby Pro Logic II DTS DSP Note LFE Low Frequency Effects This channel delivers separate non direc...

Page 24: ...s the user to gradually adjust the soundfield either towards the front or towards the rear the Center Width control allows various adjustmentoftheleft center rightspeakers balance the Panorama modeextendsthefrontstereoimagetoincludethesurroundspeakers for an exciting wraparound effect with side wall imaging The GAME mode provides surrounded and exciting sound when you enjoy game or TV Especially i...

Page 25: ... EX DOLBY DIGITAL EX surround The DOLBY DIGITAL EX indicator lights up 3 PL IIx MOVIE PRO LOGIC IIx surround MOVIE mode The PRO LOGIC indicator lights up 4 PL IIx MUSIC PRO LOGIC IIx surround MUSIC mode The PRO LOGIC indicator lights up 5 PL IIx GAME PRO LOGIC IIx surround GAME mode The PRO LOGIC indicator lights up 6 PL II MOVIE PRO LOGIC II surround MOVIE mode The PRO LOGIC indicator lights up 7...

Page 26: ...nput downmixing is performed to match the number of available channels 3Adjust the volume Notes Depending on the type of the signal or speaker setting some listening modes cannot be selected When playback is started the sound may be cut or interrupted before the input source is confirmed as Dolby Digital To enjoy Dolby Digital surround as well as all the other listening modes from a single compone...

Page 27: ...r MULTI CONTROL fi keys to adjust the setting as desired Ambience effects Midnight mode Dolby Digital and DTS mode only When watching movies at night you might not be able to raise the volume as loud as normal Midnight mode compresses the dynamic range of previously specified heavy sound passage of the Dolby Digital and DTS sound track like scenes with sudden increases in volume to minimize the dif...

Page 28: ...ULTI CONTROL knob or MULTI CONTROL fi keys to adjust the left center right output Center image will be heard from center speaker only Center image will be heard from left and right speakers only When in other positions center image from center speaker left and right speakers can be heard simultaneously with various combinations Display dimmer adjustment The dimmer function lets you select the brigh...

Page 29: ...h key for DVD player operation Refer to the instruction manual of the DVD players for the detailed operating instructions To return to the receiver operation mode press other Input Selector key DVD player operation keys You can perform these basic operations using the keys described below when connected to KENWOOD DVD player Basic remote control operations for KENWOOD DVD players TUNER CD DVD MD T...

Page 30: ...s set to the minimum position MUTE is ON The SPEAKERS switches are set to OFF Speaker cords are short circuited The speaker cord is disconnected The speaker is not set up correctly The surround speaker cords and or the center speaker cord is disconnected The speaker is not set up correctly A surround mode has not been activated The surround and or center volume controls are set to the minimum leve...

Page 31: ...obstacle between the receiver and the remote The remote control has not been changed to the operation mode for the KENWOOD DVD player you wish to control Remedy Press the any of the Input Selector keys to select the appropriate operation mode Replace with new batteries Operate the remote control unit within the controllable range Press the CD DVD key or DVD key to activate the operation mode for t...

Page 32: ...evel impedance wave length Optical 15 dBm 21 dBm 660 nm 30 nm Coaxial 0 5 Vp p 75 Ω VIDEO section VIDEO inputs outputs VIDEO composite 1 Vp p 75 Ω COMPONENT VIDEO inputs outputs VR 60RS COMPONENT VIDEO luminance signal 1 Vp p 75 Ω COMPONENT VIDEO CB CR signal 0 64 Vp p 75 Ω FM tuner section Tuning frequency range 87 5 MHz 108 0 MHz Usable sensitivity MONO 1 3 µV 75 Ω 13 2 dBf 75 kHz DEV SINAD 30 d...

Reviews: