background image

English

To prevent injury and/or fire, take the
following precautions:

• Insert the unit all the way until it is fully

locked in place. Otherwise it  may fly out of
place during collisions and other jolts.

• To prevent short circuits, never put or leave

any metallic objects (e.g., coins or metal
tools) inside the unit.

• If the unit starts to emit smoke or strange

smells, turn off the power immediately and
consult your Kenwood dealer.

• Be careful not to drop the unit or subject it to

strong shock.

To prevent damage to the machine,
take the following precautions:

• Do not open the top or bottom covers of the

unit.

• Do not install the unit in a spot exposed to

direct sunlight or excessive heat or humidity.
Also avoid places with too much dust or the
possibility of water splashing.

• During installation, do not use any screws

except for the ones provided. The use of
improper screws might result in damage to
the main unit.

• When drilling a hole in the car to fix the

brackets, make sure not to damage the fuel
tank, brake tube, wiring harnesses, etc. on
the other side.

2

CAUTION

2

WARNING

• If you experience problems during

installation, consult your Kenwood dealer.

• If the unit does not seem to be working

right, try pressing the reset button on the
control unit first. If that does not solve the
problem, consult your Kenwood dealer.

• When the reset button is pressed, the Sirius

satellite radio becomes ready to receive after
approximately 15 seconds. 

Cleaning the Unit

If the faceplate of this unit is stained, wipe it
with a dry soft cloth such as a silicon cloth.
If the faceplate is stained badly, wipe the stain
off with a cloth moistened with neutral
cleaner, then wipe neutral detergent off.

Applying spray cleaner directly to the unit may
affect its mechanical parts. Wiping the
faceplate with a hard cloth or using a volatile
liquid such as thinner or alcohol may scratch
the surface or erases characters.

NOTE

Safety precautions

— 4 —

IMPORTANT INFORMATION

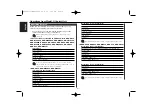
About CD players/disc changers
connected to this unit:

KENWOOD disc changers/ CD players
released in 1998 or later can be connected to
this unit.
Note that any KENWOOD disc changers/ CD
players released in 1997 or earlier and disc
changers made by other makers cannot be
connected to this unit.
Unsupported connection may result in
damage.
Setting the "O-N" Switch to the "N" position for
the applicable KENWOOD disc changers/ CD
players.

KTC-SR903(K)English  04.4.20  6:02 PM  Page 4

Summary of Contents for KTC-SR903

Page 1: ...rformance from your new sirius satellite radio tuner For your records Record the serial number found on the back of the unit in the spaces designated on the warranty card and in the space provided below Refer to the model and serial numbers whenever you call upon your KENWOOD dealer for information or service on the product Model KTC SR903 Serial number INSTRUCTION MANUAL KTC SR903 K English 04 4 ...

Page 2: ... Select Sirius Satellite Radio Mode Selecting the Preset Band Tuning Category Select Channel Preset Memory Preset Tuning Switching Seek Mode Switching Display Operations from Model D Control Unit 12 Sirius ID ESN display Select Sirius Satellite Radio Mode Selecting the Preset Band Tuning Preset Tuning Channel Preset Memory Channel Scan Switching Seek Mode Category and Channel Search Switching Disp...

Page 3: ...f the art digital broadcasting facility in Rockefeller Center New York City Sirius will deliver the broadest deepest mix of radio entertainment from coast to coast Sirius will bring you music and entertainment programming that is simply not available on traditional radio in any market across the country It s radio like you ve never heard before So Get Sirius and Listen Up For more information visi...

Page 4: ...nstallation consult your Kenwood dealer If the unit does not seem to be working right try pressing the reset button on the control unit first If that does not solve the problem consult your Kenwood dealer When the reset button is pressed the Sirius satellite radio becomes ready to receive after approximately 15 seconds Cleaning the Unit If the faceplate of this unit is stained wipe it with a dry s...

Page 5: ...n 2004 and later KDC X959 KDC X679 KDC X659 KDC X579 KDC X569 KDC X559 KDC X469 KDC MPV7019 KDC MPV622 KDC MPV619 KDC MPV6022 KDC MPV525 KDC MPV5025 KDC MP819 KDC MP625 KDC MP6025 KDC MP522 KDC MP425 KDC MP225 KDC MP222 KDC 719 KDC 422 KDC 4022 KDC 325 KDC 322 KDC 3025 KDC 3022 KDC 225MR KDC 225 KDC 2025 Go to Operations from Model A Control Unit page 6 B models KDC X917 KDC X817 KDC X717 KDC X459...

Page 6: ...receiving after you selected the SIRIUS source If the signal receiving fails Acquiring Signal ACQUIRING SIGNAL appears Select Sirius Satellite Radio Mode When you have the model A control unit categorized by the Which is your control unit page 5 follow the operation instructions given below Press the FM button Each time the button is pressed the preset band switches between the SR1 SR2 SR3 and SR4...

Page 7: ...You cannot operate this unit until all the Category information is acquired Category and Channel Search Every receivable Channel is checked for 10 seconds 1 Start Channel Scan Press the AUTO button for at least 2 seconds The channel scan will start 2 Release it when the channel you want to listen to is received Press the AUTO button for at least 2 seconds Channel Scan Calling up the channels in th...

Page 8: ...ich does not have text including Channel name etc is played band channel number is displayed KDC X679 KDC MP6025 KDC MP625 Information Upper Part Display Channel Name Song Title Artist Name Composer name Category Name Label Name Comment Band Channel Number Switching Display Information Lower Part Display Channel Name Song Title Artist Name Composer name Category Name Label Name Comment You cannot ...

Page 9: ...u have the model B or C control unit categorized by the Which is your control unit page 5 follow the operation instructions given below Entering the channel and tuning 1 Enter Direct Access Tuning mode Press the DIRECT button on the remote 2 Enter the channel Press the number buttons 3 Do Channel Search Press the 4 or button Canceling Direct Access Tuning Press the DIRECT button on the remote If y...

Page 10: ... the next Press the AM button Category Select Selecting the channel Press the 4 or button Tuning Calling up the channels in the memory 1 Select the preset band Press the FM button 2 Call up the channel Press the 1 6 button Preset Tuning Putting the channel in the memory 1 Select the preset band Press the FM button 2 Select the channel to put in the memory Press the 4 or button 3 Put the channel in...

Page 11: ...e Menu System page of the Instruction Manual of your control unit and select the seek mode menu item The seek mode is switched each time the 4 or button is pressed Display Operation AUTO1 Search in order of the channels in the Preset memory MANUAL Normal manual seeking control Switching Seek Mode Information Lower Part Display Channel Number Channel Name Song Title Artist Name You cannot apply the...

Page 12: ...the service by Sirius Satellite Radio Consult SIRIUS if CALL 888 539 SIRIUS TO SUBSCRIBE appears It may take a little time to start receiving after you selected the SIRIUS source If the signal receiving fails Acquiring Signal appears Select Sirius Satellite Radio Mode Press the FM button Each time the button is pressed the preset band switches between the SR1 SR2 SR3 and SR4 Selecting the Preset B...

Page 13: ...ory and channel search mode Switching Seek Mode Putting the channel in the memory 1 Select the preset band Press the FM button 2 Enter Memory mode Press the P M button for at least 1 second Preset Memory is displayed 3 Select the channel to put in the memory Press the 4 or button 4 Select the preset number Press the FM or AM button 5 Put the channel in the memory Press the P M button for at least ...

Page 14: ...ode Press the 2 6 button for at least 1 second 2 Select the category Press the FM or AM button 3 Select the channel Press the 4 or button Canceling category and channel search mode Press the 2 6 button You cannot operate this unit until all the Category information is acquired Entering and canceling the category and channel search mode with remote Press the 38 button on the remote Category and Cha...

Page 15: ...ntil they lock completely Do not let unconnected wires or terminals touch metal on the car or anything else conducting electricity To prevent short circuits also do not remove the caps on the ends of the unconnected wires or the terminals Insulate unconnected wires with vinyl tape or other similar material Take care so that the antenna wire and other connection wires are not caught by mobile parts...

Page 16: ...uct To connect the Disc changer consult your Disc changer manual Front side Rear side If you want to connect the Control unit Sirius connection wire Accessory1 When you use Controller unit optional accessory refer to If you want to connect the Controller of the next page and connect Controller unit When the control unit is connected you cannot use this TO CONTROLLER input terminal KTC SR903 K Engl...

Page 17: ...tellite Radio tuner Controller unit optional accessory input Sirius antenna Separated sale product When the controller unit is connected you cannot use this TO SLAVE UNIT input terminal Front side Rear side Car Audio unit Audio output Left White Right Red KCA S210A Power cable input optional accessory Audio input Please keep the total extension of the control cable from the control unit to the dis...

Page 18: ...ly the supplied mounting screws Accessory3 M4 x 8 mm Use of screws other than those supplied may result in internal damage or insecure mounting and is very dangerous 2CAUTION Installation using the self tapping screws Carpet Board etc thickness 20 mm or more Carpet Accessory4 Ø5 20 mm Accessory2 Accessory3 M4 8 mm Installation using the velcro tapes Accessory5 Please do not install the unit near t...

Page 19: ...r chip in the unit is not functioning normally Press the reset button on the Control Controller unit No sound can be heard or the volume is low The input output wires or wiring harness are connected incorrectly Reconnect the input output wires and or the wiring harness correctly See the section on Connecting Wires to Terminals No broadcast can be received The Sirius antenna is not connected Connec...

Page 20: ... 2330 207 MHz Usable sensitivity TDM Channel 83 dBm 55 dBm Usable sensitivity COFDM Channel 80 dBm 4 dBm General Audio Sampling 48kHz Operating voltage 14 4 V 11 16 V allowable Current consumption 500 mA Operating Environment 20 C 70 C Installation size W H D 188 0 29 0 145 0 mm 7 3 8 1 1 8 5 11 16 in Weight 1 543 lbs 700 g Specifications subject to change without notice KTC SR903 K English 04 4 2...

Reviews: