background image

22

Oven Controls

To turn off the Sabbath feature:

Press and hold both Cook Time and Delay Start simultaneously 
for at least 3 seconds to turn the Sabbath feature off. The 
control will provide an acceptance tone and SAb will disappear 
from the display. The oven is no longer programmed for the 
Sabbath feature.

What to do during a power failure or power interruption after 
the Sabbath feature was activated:

Should you experience a power failure or interruption, the oven 
will shut-off. When power is restored the oven will not turn back 
on automatically. The oven will remember that it is set for the 
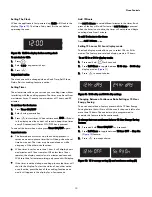
Sabbath and the oven display will show the message SF for 
Sabbath failure (

Figure 24

).

The food may be safely removed from the oven while still in the 
Sabbath feature, however the oven cannot be turned back on 
until after the Sabbath/Holidays. After the Sabbath observance 
turn off the Sabbath feature. Press and hold both Cook Time 
and Delay Start keys for at least 3 seconds simultaneously to 
turn the Sabbath feature off. SF will disappear from the display 
and the oven may be used with all normal functions.

Restoring Factory Default Settings

Your appliance was set with predetermined (default) oven 
control settings. Over time, users may have made changes to 
these settings. The following options may have been modified 
since the appliance was new:

12 or 24 hr display mode

Continuous bake or 12 Hour Energy Savings mode

Silent or audible control

Oven temperature display (Fahrenheit or Celsius)

Oven temperature adjustments (UPO)

To restore oven control to factory default settings:


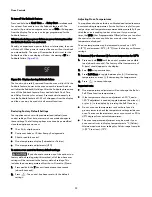
If 

you choose to restore any of the options to a 

factory default setting using this method, all of the above user 
settings will be restored to the factory default settings. This 
includes the oven temperature offset that will reset to (0) zero.

1.

Press and hold the 7 key until acceptance tone sounds 
(about 6 seconds).

2. Press 

. The control has been reset with the default 

settings.

Adjusting Oven Temperatures

Your appliance has been factory calibrated and tested to ensure 
accurate baking temperatures. For the first few uses, follow your 
recipe times and temperature recommendations carefully. If you 
think the oven is cooking too hot or too cool for your recipe 
times, the UPO (User Programmable Offset) allows you to adjust 
the control so the oven cooks hotter or cooler than the oven 
temperature displayed. 

The oven temperature may be increased as much as +35°F 
(+19°C) or decreased -35°F (-19°C) from the factory calibrated 
settings.

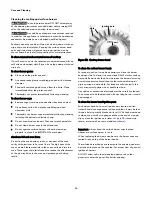
To increase (+) or decrease (-) the oven temperature by 20°F:

1.

Press and hold Bake until the control produces an audible 
tone (about 6 seconds). The factory offset temperature of 
0 (zero) should appear in the display.

2. Enter 2 0 using numeric keys.

3. Press Self Clean to toggle between plus (+) if increasing 

temperature or minus (-) if decreasing the temperature.

4. Press 

 to accept change.

Important note: 

Oven temperature adjustments will not change the Broil or 
Self Clean function temperatures.

If the temperature shows an adjustment of -20°F, and a 
+20°F adjustment is needed, toggle between the minus (-) 
or plus (+) in the display by pressing the Self Clean key. 

Do not use oven thermometers such as those found in 
grocery stores to check the temperature settings inside your 
oven. These oven thermometers may vary as much as 20 to 
40°F


degrees from actual temperatures.

The oven temperature adjustment may be made if your 
oven control is set to display temperatures in °C (Celsius). 
Minimum and maximum settings for Celsius range from plus 
(+)19°C to minus (-) 19°C.

Figure 24:  Display showing Sabbath failure

Summary of Contents for 790.3261 Series

Page 1: ...e color Use Care Guide Manual de Uso y Cuidado English Español Model Modelo 790 3261 P N 139901306 Rev A Sears Brands Management Corporation Hoffman Estates IL 60179 U S A www kenmore com www sears com Sears Canada Inc Toronto Ontario Canada M5B 2C3 www sears ca ...

Page 2: ...e product 7 Damage to or failure of this product resulting from accident abuse misuse or use for other than its intended purpose 8 Damage to or failure of this product caused by the use of detergents cleaners chemicals or utensils other than those recommended in all instructions supplied with the product 9 Damage to or failure of parts or systems resulting from unauthorized modifications made to t...

Page 3: ...y should never be allowed to sit or stand on any part of the appliance including the storage drawer lower broiler drawer warmer drawer or lower double oven Do not store items of interest to children in the cabinets above a range or on the backguard of the range Children climbing on the range to reach items could be seriously injured Storage In or On Appliance Flammable materials should not be stor...

Page 4: ...re using the oven Destroy the carton and plastic bags after unpacking the oven Never allow children to play with packaging material Proper Installation Be sure your appliance is properly installed and grounded by a qualified technician in accordance with the National Electrical Code ANSI NFPA No 70 latest edition and local electrical code requirements In Canada install in accordance with CSA Stand...

Page 5: ...ich operate by blowing a downward air flow on to a range shall not be used in conjunction with gas ranges other than when the hood and range have been designed tested and listed by an independent test laboratory for use in combination with each other IMPORTANT INSTRUCTIONS FOR USING YOUR OVEN Never use your appliance for warming or heating the room Use care when opening oven door lower oven door o...

Page 6: ...endations for cook top use When you are flaming foods under a ventilating hood turn the fan on IMPORTANT INSTRUCTIONS FOR CLEANING YOUR OVEN Before manually cleaning any part of the oven be sure all controls are turned off and the oven is cool Cleaning a hot oven can cause burns Clean the oven regularly to keep all parts free of grease that could catch fire Do not allow grease to accumulate Always...

Page 7: ...his appliance allows for conversion to Liquefied Petroleum L P Gas Conversion to L P Gas Personal injury or death from electrical shock may occur if the conversion to L P gas is not made by a qualified installer or electrician Any additions changes or conver sions required in order for this appliance to satisfactorily meet the application needs must be made by a qualified technician If L P convers...

Page 8: ...and in the correct locations BEFORE operating the cooktop burners Remember Always keep surface burner caps in place whenever using a surface burner When placing the burner caps be sure that all burner caps are seated firmly and rest level on top of burner heads For proper flow of gas and ignition of burners DO NOT allow spills food cleaning agents or any other material to enter the gas orifice por...

Page 9: ...ristics will vary depending on base material Glass Slow heat conductor Setting Proper Burner Flame Size Never extend the flame beyond the outer edge of the cooking utensil A higher flame wastes energy and increases your risk of being burned by the flame These settings are based for medium weight metal or aluminum pans with lids Settings may vary when using other types of pans The color of the flam...

Page 10: ...face cooking areas at the same time This can cause uneven heating results In the event of an electrical power outage the surface burners can be lit manually Use caution when lighting surface burners manually To light a surface burner hold a lit match to the burner head then slowly turn the surface control knob to LITE After burner lights push in and turn knob to desired setting When operating the ...

Page 11: ...he oven rack straight forward until it reaches the stop position Lift up front of oven rack slightly and slide out To replace Place the oven rack on the rack guides on both sides of oven walls Tilt the front of oven rack upward slightly and slide the oven rack back into place Be sure oven racks are level before using Types of Oven Racks Oven Rack Descriptions Flat oven racks or the flat handle ove...

Page 12: ...8 Oven Lock Uses STOP key to activate oven lock STOP key must be pressed and held for at least 3 seconds to activate the lockout function Minimum maximum control settings All of the cooking features listed have minimum and maximum time and temperature settings that may be entered into the control An entry acceptance beep will sound each time a key is pressed An entry error tone 3 short beeps will ...

Page 13: ...ill display If the timer is active during a cooking process the timer will show in the display To view the status of any other active oven function press the key of the cooking function once and it will appear in the display for a few seconds Add 1 Minute Use Add 1 Minute to set additional minutes to the timer Each press of the key will add 1 minute If Add 1 Minute is pressed when the timer is not...

Page 14: ...tically Do not open the oven door Allow about 15 seconds for the oven door to completely lock Once door is locked Loc will appear in the display To cancel the oven lockout feature 1 Press and hold for 3 seconds The motor door latch will begin unlocking the oven door automatically Do not open the oven door Allow about 15 seconds for the oven door to completely unlock 2 When the Loc message no longe...

Page 15: ...verbrowning of foods It may be necessary to reduce the oven temperature or cook time to prevent overbrowning of some foods Dark pans are recom mended for pies Shiny pans are recommended for cakes cookies and muffins For batter and dough based baked goods such as cakes pastries and breads use the regular bake function for best results Setting Convec Bake Benefits of the convection bake feature Food...

Page 16: ... Meats cooked using the Convec Roast function will be juicier and poultry will be crisp on the outside while staying tender and moist on the inside Convec Roast may be set for any oven temperature between 300 F 148 C to 550 F 288 C Suggestions for Convec Roast Preheating is not necessary when roasting foods using Convec Roast Since Convec Roast cooks food faster reduce the cook time by 25 from the...

Page 17: ... accept 3 Press Cook Time 4 Enter 3 0 using numeric keys 5 Press to accept 6 Press Convec Convert To cancel Convec Convert at any time press To program oven for Convec Convert with recipe temperature of 425 F 218 C and to shut off after 30 minutes 1 Press Convec Bake 2 Enter 4 2 5 2 1 8 using numeric keys 3 Press to accept 4 Press Cook Time 5 Enter 3 0 using numeric keys 6 Press to accept 7 Press ...

Page 18: ...ctly Food poisoning hazard Do not let food sit for more than one hour before or after cooking Doing so can result in food poisoning or sickness Foods that can easily spoil such as milk eggs fish meat or poultry should be chilled in the refriger ator first Even when chilled they should not stand in the oven for more than 1 hour before cooking begins and should be removed promptly when finished cook...

Page 19: ...er When broiling always pull the oven rack out to the stop position before turning or removing food To set the Broil with the default temperature of 550 F 288 C 1 Arrange the oven racks when cool For optimum browning results preheat oven for 5 minutes before adding food 2 Position bakeware in oven to the preferred rack position Figure 22 Be sure to close oven door before broiling 3 Press Broil 4 P...

Page 20: ...dditional settings of Cook Time and Delay Start The maximum cook time for Slow Cook function is 11 hours and 59 minutes unless the control has been changed to the continuous bake mode To set Slow Cook 1 Position bakeware in oven and close oven door 2 Press Slow Cook HI will appear in the display indicating the default temperature setting is for high 3 If a low setting is needed press Slow Cook aga...

Page 21: ...o not let food sit for more than one hour before or after cooking Doing so can result in food poisoning or sickness Foods that can easily spoil such as milk eggs fish meat or poultry should be chilled in the refriger ator first Even when chilled they should not stand in the oven for more than 1 hour before cooking begins and should be removed promptly when finished cooking To program oven to Bake ...

Page 22: ...e user settings will be restored to the factory default settings This includes the oven temperature offset that will reset to 0 zero 1 Press and hold the 7 key until acceptance tone sounds about 6 seconds 2 Press The control has been reset with the default settings Adjusting Oven Temperatures Your appliance has been factory calibrated and tested to ensure accurate baking temperatures For the first...

Page 23: ... and the small area at the front center of the oven bottom Figure 25 These areas heat sufficiently to burn soil on Clean using soap and water prior to starting Self Clean Do not clean the oven door gasket Figure 25 The woven material of the oven door gasket is essential for a good seal Care should be taken not to rub damage or remove the gasket Do not use any cleaning materials on the oven door ga...

Page 24: ...of day the oven is empty and ALL oven racks are removed Be sure oven door is completely closed 2 Press Delay Start 3 Using numeric keys enter 9 0 0 for time to start 4 Press to accept 5 Press Self Clean 6 Press If it becomes necessary to stop Self Clean when active 1 Press 2 If Self Clean has heated the oven to a high temperature allow enough time for the oven to cool and the door Opn message to a...

Page 25: ...ution of water and vinegar Porcelain enamel broiler pan and insert available by mail order Porcelain enamel parts Door liner and body parts Gentle scouring with a soapy scouring pad will remove most spots Rinse with a 1 1 solution of clear water and ammonia If necessary cover difficult spots with an ammonia soaked paper towel for 30 to 40 minutes Rinse with clean water and a damp cloth and then sc...

Page 26: ... liners Do not line the oven bottom racks or any part of the oven cavity with aluminum foil or oven liners The high heat of the oven can melt these materials to the oven cavity and ruin the oven These types of materials can also reduce the effectiveness of the air circulation in the oven and produce poor baking results To clean the surface burner heads For proper gas flow it may be necessary to cl...

Page 27: ...re 31 2 Holding the oven door at the same angle as the removal position See Figure 31 seat the hook of the hinge arm over the roller pins located on each side of the oven door frame SeeFigure 32 The hook of the hinge arms must be fully seated onto the roller pins 3 Fully open the oven door horizontal with floor See Figure 29 4 Push the door hinge locks up toward and into the oven frame on both lef...

Page 28: ...portant note Do not allow your fingers to touch the new bulb when replacing This will shorten the life of the bulb Use a paper towel or cotton glove while handling the new bulb when installing 1 Turn electrical power off at the main source 1 Remove interior oven light shield by turning counter clock wise 2 Replace bulb with a new Halogen bulb 3 Replace glass oven light shield by rotating clockwise...

Page 29: ... temperature before placing food in the oven Use proper rack position for baking needs Set oven temperature 25 F 13 C lower than recommended Cakes not done in center Oven too hot Incorrect pan size Pan not centered in oven Set oven temperature 25 F 13 C lower than recommended Use pan size suggested in recipe Use proper rack position and place pan so there is 5 1 cm to 10 2 cm 2 to 4 of space on al...

Page 30: ...re starting a self clean cycle Clean using a mild abrasive cleaner following manufacturer s instructions Rinse with clean water dry and replace in oven Oven smokes excessively when broiling Incorrect setting Follow broiling instructions in Setting Broil on page 19 Be sure oven door is opened to broil stop position when broiling Meat too close to the broil element Reposition broil rack to provide p...

Page 31: ...tage Check house lights to be sure Call your local electric company for service outage information Service wiring is not complete Call 1 800 4 MY HOME for assistance See back cover Surface burners do not light Surface control knob has not been completely turned to LITE Push in and turn the surface control knob to LITE until burner ignites and then turn control knob to desired flame size Burner por...

Page 32: ......

Page 33: ......

Page 34: ......

Reviews: