Kenko Sky Memo Instructions
Hutech Corporation
©
2000
2
Setting Up the Sky Memo Compact Tripod
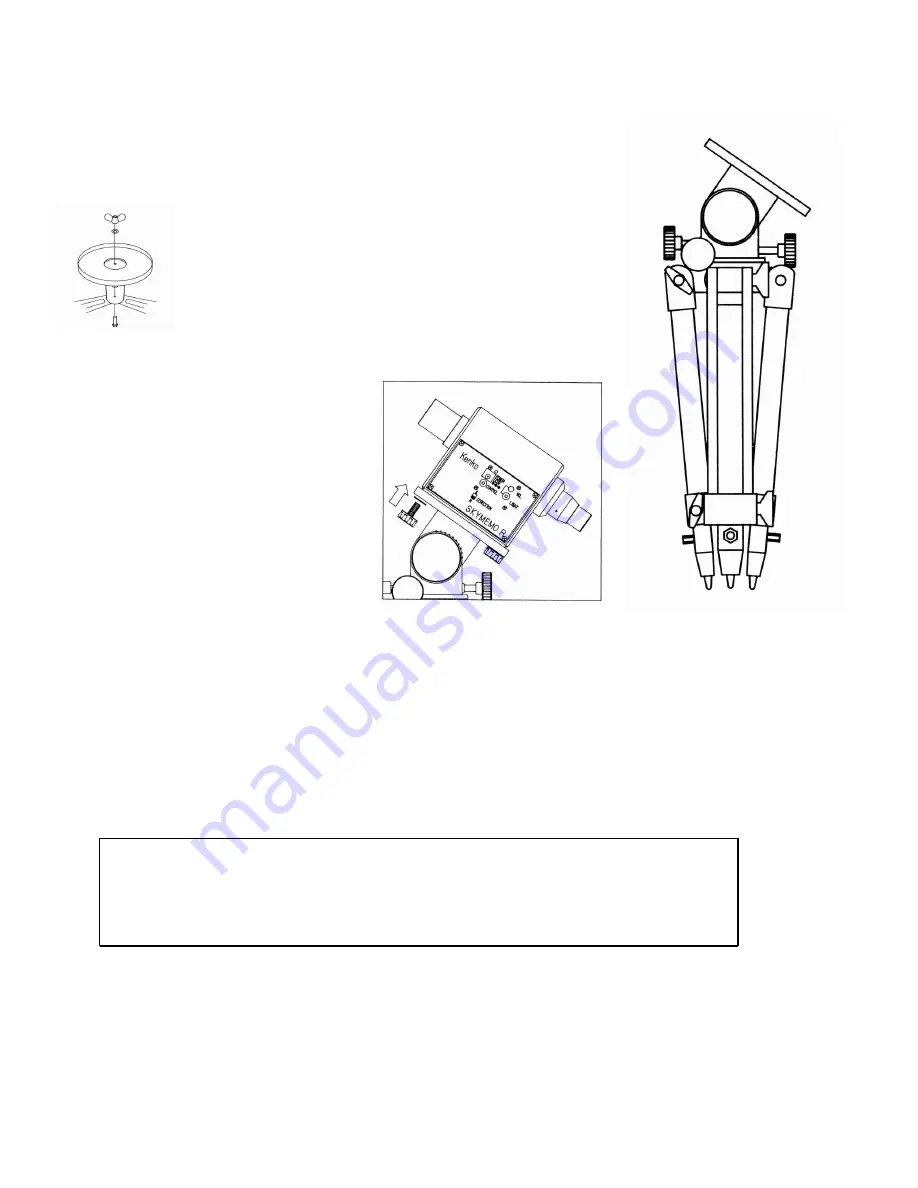
The compact tripod is first assembled by spreading the legs
apart and setting the tripod in the standing position. Loosen
the joint screws at the top of each leg first, if necessary. The
leg stabilization struts can then be brought together in the
center where they should be held together by adding the
accessory tray as shown in figure at left.
Next, attach the head of the tripod, with its flat plate, to the
legs. A large black knob at the bottom of the head screws into the head through a
hole in the top of the tripod. Make sure the azimuth adjustment tab mates with the
gap between the two azimuth adjustment
screws. It may be necessary to loosen these
knobs to widen the gap enough to allow the
tab to fit in easily.
The Sky Memo tracker may then be placed on
top of the compact tripod plate and screwed
on using the provided thumbscrews. Secure
the tracker on the mount tightly enough so that
there is no play between the tripod and
tracker.
Next, extend the mount legs and lock them in
place. Tighten all joint screws to eliminate
any play in the tripod joints.
The tracker is now ready to be placed in approximate tracking position. Find a level location with firm ground and a
clear view of the polar region of your sky, and place the mount so that the polar finder is approximately lined up with
the pole. Use a compass or geographical landmarks and knowledge of your latitude to do the initial setup if
necessary. The purpose of this step is to line up well enough to place the necessary reference stars in the field of
view of the polar finder.
After setting the tripod down in approximate position, fine adjustment of the altitude or azimuth is via a pair of
adjustment knobs for each axis. These are located at the base of the head (near the top of the tripod). To adjust an
axis, unscrew the knob in the direction opposite to the desired direction, then turn the other knob to move to the
desired point. Once the desired point is reached, tighten the opposing knob to lock the mount in place.
Caution
: Do not overtighten opposing knobs. The knobs are held onto the threaded
adjustment rods with a setscrew and by threading onto the rod with a thread of opposing twist
(left-handed screw). Overtightening a knob will likely cause the knob to be unscrewed from
the adjustment knob. If this happens, loosen the knob’s setscrew, screw the knob back onto
the threaded rod until the end is reached, and tighten the setscrew to prevent it from moving
further.
Continue setup in the “Camera Setup” section below.


