25
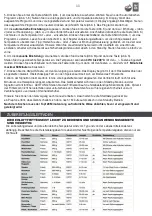
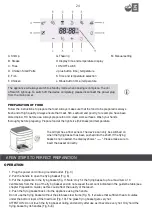
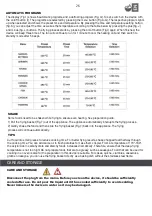
5. Press the ON/OFF button (Fig. I) once to switch on the device. Choose one of the six automatic programs (Fig.
1-6). Use the preset time and temperature setting. The selected program flashes in the display and the preset time
and temperature are shown in the display. Now confirm the selected program by pressing the ON/OFF button again
(Fig. I). The program will now start.
To adjust the
automatic setting
, press the button once (Fig. K) and then to in (Fig. J) or to decrease - (Fig.
L) to set the required time. Then press the button (Fig. K) again to set the temperature with + or -. Then press the
ON/OFF button (Fig. I) to start the program.
Read the section in the Preparation Guide chapter to determine the correct cooking time and temperature. Tip:
Press and hold the + or - button to increase/decrease to set the time or temperature faster.
Note: If you do not set the required cooking time within one minute, the appliance will automatically switch to
standby for safety reasons. Then just start over.
6. To perform the
manual adjustment
, press the button (fig. M) and then the button (fig. K). Set the desired
temperature. The temperature can be adjusted
from 40°C to 200°C
with the + / - buttons. Then press the button
again (Fig. K) and use the +/- buttons to set the time
from 1 minute to a maximum of 60 minutes.
7. Press the ON/OFF button to start cooking. The display starts counting down the set cooking time. Excess fat
from the food collects at the bottom of the frying basket.
8. When the beep sounds 3 times, the preset cooking time has expired.
And after the fan continues to run for
1mins, it will beep 5 times and the machine will turn off
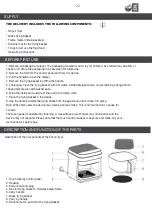
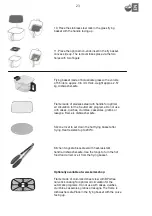
. CAUTION: Place the frying basket on the heat-resistant
silicone mat (Fig. 9).
To prevent the frying basket from falling or shifting. For your own safety and to avoid scalding, use oven mitts!
After
cooking, the pot must be allowed to cool naturally for 20 minutes before soaking and cleaning.
Note: You can also stop the cooking process manually. To do this, hold down the start button until you hear a beep,
the device then automatically switches to standby mode after 1 minute.
PREPARATION GUIDE
THE HOT AIR FRYER IS EASY TO USE AND ITS APPLICATIONS ARE VERSATILE:
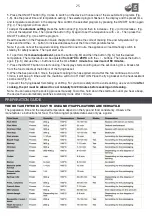
The preparation time and the required temperature depend on the type and food consistency. Observe the
manufacturer's instructions for food. The following temperature data serve only as a guide:

