background image

Kelly KLS-8080N/NPS Sinusoidal BLDC/PMSM Controller User’s Manual 

           V1.24.1


27


Factory set is 0 


(3)Accel Time: Accel Time, the time of TPS Torque from 0 to max, accuracy 0.1s, 5 is equal to 

0.5s. Range: 1~250 

Factory set is 10 


(4)Accel Rls Time: Accel Release Time, the time of TPS Torque from max to 0, accuracy 0.1s. 

Range: 1~250 

Factory set is 1 


(5)Brake Time: Brake Time, the time of Brake Torque from 0 to max, accuracy 0.1s. Range: 

1~250 

Factory set is 15 


(6)Brake Rls Time: Brake Release Time, the time of Brake Torque from max to 0, accuracy 0.1s. 

Range: 1~250 

Factory set is 1 


(7)BRK_SW Brk %: BRK_SW Braking Percent, the percent of BRK_SW in max braking. Range: 

0~50 

The brake switch regen mode. You have to turn on the brake switch after the throttle is released 

for the regen to occur. 

Factory set is 10 


(8)BRK_AD Brk%:It is used to adjust the max regen percentage of brake variable regen mode. 

This regen mode doesn't need brake switch to support any more for KLS controller. 


(9)Torque Speed KP: Speed Percent Kp in Torque Mode. Range: 0~10000    Factory set is 3000 

Torque Speed KI: Speed Integral Ki in Torque Mode. Range: 0~500      Factory set is 80 

Speed Err Limit: Speed Error Limit in Torque Mode. Range: 50~4000 Factory set is 1000 

These three parameters are used for PID adjustment. 

If you think the acceleration performance is very very strong,  please adjust them to a lower 

value respectively. 


(10)Change Dir brake: Value range: Enable and Disable 

It is only useful when you Enable the joystick function. 

If you want to get swift direction changing by using joystick function, you may enable Change 

Dir brake item in user program. 

It will help the motor change the direction of motor quickly after you shift throttle from 0V to 5V,or 

from 5V to 0V. 

Suggestion: factory default is Disable. 


Summary of Contents for KLS12501-8080N

Page 1: ...8080N NPS KLS84501 8080N NPS KLS12901 8080N NPS KLS84601 8080N NPS KLS12111 8080N NPS KLS84701 8080N NPS KLS14351 8080N NPS KLS84801 8080N NPS KLS14401 8080N NPS KLS84101 8080N NPS KLS14451 8080N NPS...

Page 2: ...Wiring and Installation 8 3 1 Mounting the Controller 8 3 2 Connections 13 3 3 Installation Check List 18 Chapter 4 Programmable Parameters 19 4 1 Step 1 20 4 2 Step 2 25 4 3 Step 3 26 4 4 How to use...

Page 3: ...d SVPWM and FOC to achieve efficiencies of up to 99 in most cases A powerful microprocessor brings in comprehensive and precise control to the controllers It also allows users to adjust parameters con...

Page 4: ...ltage during regen braking 7 Maximum reverse speed and forward speed can be configured between 20 and 100 respectively and separately 8 A 4pin connector to RS232 port and a Z TEK USB to RS232 cable al...

Page 5: ...e stationary vehicle moving in the opposite direction After the function enabled when the controller detects that the motor turns from standstill to the opposite direction it will drive the motor to p...

Page 6: ...d Electric RPM mechanical RPM motor pole pairs Motor pole pairs Motor poles 2 2 3 Specifications Frequency of Operation 10KHz or 20kHz Standby Battery Current 0 5mA 5V or 12V Sensor Supply Current 40m...

Page 7: ...100 A KLS84601 8080N NPS 600 360 24 84 100 B KLS84701 8080N NPS 700 280 24 84 100 A KLS84701 8080N NPS 700 420 24 84 100 B KLS84801 8080N NPS 800 320 24 84 100 A KLS84801 8080N NPS 800 480 24 84 100 B...

Page 8: ...0N NPS 400 160 24 144 173 A KLS14401 8080N NPS 400 240 24 144 173 B KLS14451 8080N NPS 450 180 24 144 173 A KLS14451 8080N NPS 450 270 24 144 173 B KLS14551 8080N NPS 550 220 24 144 173 A KLS14551 808...

Page 9: ...ded with a cover to protect it from water and contaminants To ensure full rated output power the controller should be fastened to a clean flat metal surface with four screws Applying silicon grease or...

Page 10: ...Kelly KLS 8080N NPS Sinusoidal BLDC PMSM Controller User s Manual V1 24 1 9 Figure 1 With Aluminum Heatsink at the bottom mounting holes dimensions dimensions in millimeters B B U V W M8...

Page 11: ...elly KLS 8080N NPS Sinusoidal BLDC PMSM Controller User s Manual V1 24 1 10 Figure 2 With Aluminum Liquid Cooling Heatsink at the bottom mounting holes dimensions dimensions in millimeters B B U V W M...

Page 12: ...Kelly KLS 8080N NPS Sinusoidal BLDC PMSM Controller User s Manual V1 24 1 11 Figure3 With Sealed Aluminium Housing mounting holes dimensions dimensions in millimeters B B U V W M8...

Page 13: ...NPS Sinusoidal BLDC PMSM Controller User s Manual V1 24 1 12 Figure4 With Sealed Aluminium Housing And Aluminum Liquid Cooling Heatsink at the bottom mounting holes dimensions dimensions in millimete...

Page 14: ...w This 12V only can be used for LED or switch signals with a total current not exceeding 20mA 3 Boost and Brake analog regeneration mode used the same pin as pin2 When Boost is disabled in the user pr...

Page 15: ...1 Temp Motor temperature sensor input Raddle 5 5V 5V supply output 40mA Purple 18 Hall A Hall phase A Yellow This is Sine signal input on KLS 8080NPS 17 Hall B Hall phase B Dark Green This is Cosine...

Page 16: ...Kelly KLS 8080N NPS Sinusoidal BLDC PMSM Controller User s Manual V1 24 1 15 3 2 2 Standard Wiring Figure 5 KLS 8080N controller standard wiring...

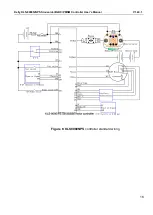
Page 17: ...Kelly KLS 8080N NPS Sinusoidal BLDC PMSM Controller User s Manual V1 24 1 16 Figure 6 KLS8080NPS controller standard wiring...

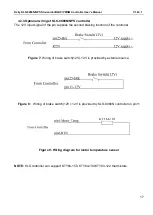
Page 18: ...of the pin supplies the second braking function of the controller Figure 7 Wiring of brake switch 12V 12V is provided by external source Figure 8 Wiring of brake switch 12V 12V is provided by KLS 8080...

Page 19: ...3 Installation Check List Before operating the vehicle complete the following checkout procedure Use LED code as a reference as listed in Table 1 Caution Put the vehicle up on blocks to get the drive...

Page 20: ...ble Parameters KLS Configuration program allow users to set parameters according to the vehicle actual working environment so as to be at its best The default parameters of the controller are not reco...

Page 21: ...173 Figure 4 1 3 Current Percent Phase Current Percent Range 20 100 Functional description The max motor current is The Value Peak Current of the Controller Suggestion Factory default is 100 4 Battery...

Page 22: ...all throttle Because there are many different hall throttle suppliers in the world The initial output can not be always in the range of 0 5V to 4 5V But it doesn t make any differences if you choose 0...

Page 23: ...et at 100 17 Max Rev Speed The reverse speed of the percentage of maximum speed Range 20 100 By default it is set at 100 Midspeed Forw speed Midspeed Rev speed Lowspeed Forw speed and Lowspeed Rev spe...

Page 24: ...controller can drive the motor on two directions without using any reversing switch Just one single throttle can drive the motor on forward and reversing direction The stick shift throttle firmware ca...

Page 25: ...perated at all The boost function is still based on limiting of the motor current and battery current settings in user program If disabled the controller can provide brake sensor regen mode on the sam...

Page 26: ...a current requirement for identification operation If the motor rated power is very high please increase this parameter to a higher value Otherwise please keep it at 80 by default If the motor power...

Page 27: ...sensors is from 1 9V to 4 1V 3 1 1 1 9V 3 1 1V 4 1V Value Range 0 1023 maps 0 5V 8 Line Hall High Err It is only useful when the speed sensor is at 4 If the signal output of Sine Cosine speed sensor i...

Page 28: ...et is 10 8 BRK_AD Brk It is used to adjust the max regen percentage of brake variable regen mode This regen mode doesn t need brake switch to support any more for KLS controller 9 Torque Speed KP Spee...

Page 29: ...s Note Thermistor is optional Default to KTY84 130 150 or KTY83 122 When controller temp item shows 246 in monitor screen of user program it is normal This item is only useful for internal calculation...

Page 30: ...Kelly KLS 8080N NPS Sinusoidal BLDC PMSM Controller User s Manual V1 24 1 29 2 Please connect the controller to user program by using an USB to RS232 cable and SM 4A DB9 RS232 Converter...

Page 31: ...9 RS232 converter any more when you use Bluetooth converter for programming the controller 3 Please download the controller user program from our website for free www kellycontroller com support php P...

Page 32: ...run on directions randomly It is normal because the controller is doing Identification angle operation 7 Please wait about 2 3 minutes 8 If the identification angle operation is finished the motor wil...

Page 33: ...ou can not write it back to 85 by manual Please wait longer time until the error codes occur Please don t keep 170 in the identification angle item when you want to turn off the power supply Otherwise...

Page 34: ...default the speed sensor type is set at 4 from factory setting for KLS 8080NPS controller 1 Please hook up the controller for identification angle operation according to the wiring diagram below Plea...

Page 35: ...K USB to RS232 cable and SM 4A DB9 RS232 Converter to connect the controller to an Android Tablet The third option is customers can buy our Bluetooth converter to connect the controller to Android Pho...

Page 36: ...evices Then you may try to click Read button in user program or App You will see the first picture of user program Please check whether the Identification Angle item is at 85 or not It is correct if i...

Page 37: ...click Motor button in the user program Line hall zero The line hall zero point is at 3Vdd 5 3 5V 5 3 0V So we need to fill 3 1023 5 613 8 614 for Line hall zero parameter instead of 508 in the user p...

Page 38: ...s And we need to do identification angle operation each time after you changed the settings We need to reset the power supply each time when we change the settings and do the identification angle oper...

Page 39: ...uit from user program Please try again from step 6 14 Please don t keep 170 in identification angle item before power supply is turned on after the identification operation is successful 15 If the dir...

Page 40: ...connections to the bus bars if fitted are tight To avoid physically stressing the bus bars use two well insulated wrenches 5 2 Configuration You can configure the controller with a host computer throu...

Page 41: ...n the user program Table 1 ERROR CODES Buzzer Error Codes Code Explanation Solution 1 1 Automatic error identification 1 Wrong wiring of motor phase line or hall Please suspend the motor when enable A...

Page 42: ...tery voltage This can happen during normal operation 3 3 Hall throttle is open or short circuit When the throttle is repaired a restart will clear the fault 3 4 Angle sensor error 1 Speed sensor type...

Page 43: ...Controller User s Manual V1 24 1 42 Contact Us Kelly Controls Home Page http www KellyController com Download user manual instructions and user program www kellycontroller com support php E mail Sales...

Reviews: