background image

PRACTICING WITH PATTERNS

SELLECTING A PATTERN AND PRACTICING WITH IT

There are three types of patterns in 

LEARNING

 mode.

Beat:


Snare Practice

Rhythm:

  Drum Practice

Pattern:

  Drum Practice with accompaniment

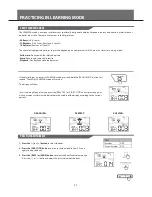
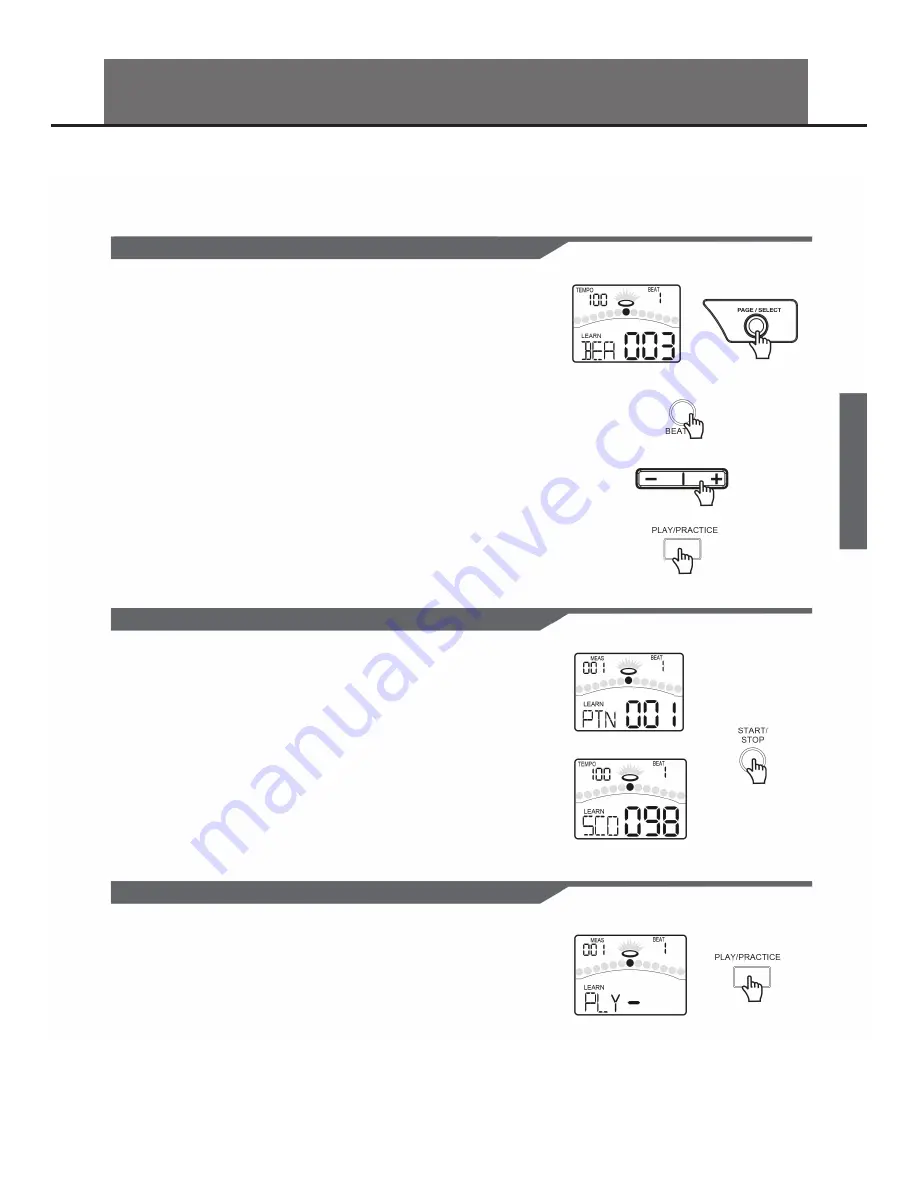
When you are in NORMAL mode, please press and hold the [PAGE/SELECT] but-

ton for 1 second. The LED of LEARNING mode will turn on. The display will show:

1.  Press the [BEAT] button.


Select the Beat Choosing page.

2.  Press the [ - ] or [ + ] button.


Select the beat which you want to practice.

3.  Press the [PRACTICE] button.


Start or stop playing the pattern with your practice. The PAD indicators will 

display which pads are being played by drum track.

If you want to select the Rhythm or Pattern, please follow the steps described 

above.

SCORING YOUR PRACTICE

PLAYING BACK YOUR RECORD PRACTICE

If you want to check your progress, please press the [START/STOP] button. The 

display will show:

A measure count-in will be inserted before playing back the pattern so that you 

can practice in good time. Your practice will be recorded automatically. When 

finished playing back the pattern, the digital drum will score your practice auto-

matically.

The display will show the score.

If you are not satisfied with your score, please press the [START/STOP] button and 

try again.

1.  Press and hold the [PLAY/PRACTICE] button for 2 seconds.


The display will show:


You can listen to your recorded practice.

2.  Press the [PLAY/PRACTICE] button again.


Stop playing back the recorded practice.

13

Summary of Contents for KT3

Page 1: ...Digital Drum Set Owner s Manual PERCUSSION Bedienungshandbuch Manual de Utilizador Mode d emploi Manual de instrucciones...

Page 2: ...Interference If so simply reset the product to resume normal operation by following the owner s manual In case the function could not resume please use the product in other location PRECAUTIONS PLEAS...

Page 3: ...he Pad to Edit 14 About the Drum Instruments 15 Selecting the Instruments 15 Drum Instrument Setting 15 Settings For Other Functions 15 Saving to a User Drum Kit 15 MAKING THE SETTINGS FOR PADS About...

Page 4: ...tton Scroll through the menu pages Press and hold it for 1 second to switch modes between NORMAL and LEARN ING 10 CLICK Button Turn the metronome on or off and enter the Click menu in NORMAL mode 11 D...

Page 5: ...Input connection for Tom 4 23 MIDI Connectors IN OUT These ports allow communication with other products equipped with a MIDI interface 24 USB Connector This port is used to connect to a computer MIDI...

Page 6: ...le harness connect with kick snare tom1 tom3 ride crash hi hat hi hat control triggers Snare tom crash1 crash2 and ride pads are stereo input and support double triggering crash 1 crash2 ride cymbal H...

Page 7: ...This receives MIDI messages transmitted from an external MIDI device or a computer MIDI OUT Connector Pad performance data is transmitted from this connector to connected computer or MIDI device If yo...

Page 8: ...igital drum pad detects head and rim shots rim shots trigger the rim voice CYMBAL TRIGGER AREAS The digital drum crash cymbals detect Bow and Edge triggering Both crash cymbals detect cymbal edge chok...

Page 9: ...mic range 1 Press the UTILITY button The UTILITY indicator appears 2 Strike a pad or press a pad select button to select the one whose sensi tivity is to be adjusted The PAD indicator shows the curren...

Page 10: ...Select the drum instrument of the selected pad Please refer to Drum Instru ment List 1 Press the VOICE or PAGE button Select the Pad Volume Pad Pan and Pad Pitch pages 2 Press the or button Adjust the...

Page 11: ...n Select the ACC Volume or Drum Volume page 2 Press the or button Adjust the corresponding volume If you want to mute the drum track of the song please press the DRUM OFF button The DRUM OFF LED will...

Page 12: ...N RECORD MENU YOU CAN RECORD PAD PERFORMANCES AND THE SONG AS ACCOMPANIMENT 1 Press the PLAY button Play back your recording The display will show 2 Press the PLAY button again Stop playing back your...

Page 13: ...drum track If you want to select the Rhythm or Pattern please follow the steps described above SCORING YOUR PRACTICE PLAYING BACK YOUR RECORD PRACTICE If you want to check your progress please press t...

Page 14: ...on to enter it The KIT indicator will light up and the LCD will display the current kit number Press the or buttons to select a kit When holding down values increase rapidly When holding down values d...

Page 15: ...he pad 3 Press the PAGE or VOICE button select Pad Pitch page The parameter adjusts the pitch of the pad 4 Press the PAGE or VOICE button select Pad Reverb page The parame ter adjusts the reverb level...

Page 16: ...st the sensitivity of the splash in SPLASH SENSITIVITY Threshold This setting allows a trigger signal to be received only when the pad is struck harder than a specified force This can be used to preve...

Page 17: ...ou don t intend to generate sounds Setting a low threshold means even light touches will produce sound Adjust according to environment and playing style Press the PAGE or UTILITY button select Pad Cro...

Page 18: ...will display 030 and 060 If there aren t any operations for about 30 or 60 minutes except during playing song metronome record or MIDI in via USB port from computer and strike pads the module will tu...

Page 19: ...tor will turn off Press the TEMPO button and use the and buttons to adjust the current click tempo The current tempo always displays in the top left corner of the LCD Press the PAGE button select Cli...

Page 20: ...e current playing beat Press the START STOP button again stop the song during playback During song playback in SONG menu the PAD indicators will show which pads of the drum track is triggering This fu...

Page 21: ...RT STOP button again or press the RECORD button Stop recording the RECORD LED will turn off If you want to record your performance accompanied with a song first set the parameters Song Number and Drum...

Page 22: ...core Record and score your practice Playback Play back your recorded practice If the digital drum is not yet in LEARNING mode press and hold the PAGE SELECT button for 1 second The LED of LEARNING mod...

Page 23: ...the drum volume of the rhythm PRACTICING WITH PATTERNS If the digital drum is not yet in Pattern menu press the PATTERN button to enter it You can adjust the parameters as shown to the right 1 Press t...

Page 24: ...en finished playback the digital Drum will score your practice automatically The display will show the score for 3 seconds 2 Press the START STOP button again to stop playing back The pattern and reco...

Page 25: ...NOTE This device is USB 2 0 compatable and may not be properly recognized in PC s using USB 3 0 In that case use the Midi Out Port to the Midi In Port of the audio interface device to transmit the Mi...

Page 26: ...you ll never need to change them but if you want to change please follow these step 1 Press the VOICE button in NORMAL mode enter the VOICE menu 2 Press the PAGE or VOICE button select Pad MIDI Note p...

Page 27: ...song please restart recording and replace it Please press the START STOP button to score your practice and then play back your practice TROUBLE SHOOTING PROBLEM POSSIBLE CAUSE AND SOLUTION 1 Rotate t...

Page 28: ...In Jack 1 8 stereo 2 External Trigger Input Jack 1 4 Tom4 Crash2 Output 1 4 L Mono R USB 2 0 MIDI IN MIDI OUT Control Buttons Power on off switch Volume Start Stop Save Song Kit Voice Page Select INC...

Page 29: ...Latin Rock 29 Arena Rock 30 Banda 31 Ballad Rock 32 Disco 33 Prog Rock 34 Mambo 35 Songo 36 Beat Box 1 37 Hip Hop 1 38 Electro House 39 Break Beat 40 DubStep 1 41 Rap 1 42 Old Skool 43 Beat Box 2 44...

Page 30: ...98 Jazz Latin Snare 99 Big Band Snare NAME 100 Cameo Snare 101 Cameo Snare Rim 102 Brush Snare 1 103 Brush Snare 1 104 Brush Snare Rim 105 Funk Snare 106 Funk Stick 107 Funk Band Snare 108 Funk Band...

Page 31: ...andard 21 Ride 313 Standard 22 Ride 314 Standard Ride Bell 315 Standard 22 Ride Rim 316 Junkyard Break 317 Junkyard Metal 318 Dry Ride Bell 319 Light Flat Ride 320 Classic Ride 321 Classic Ride Rim 32...

Page 32: ...606 Hi hat Close 484 Cowbell 534 RockB 436 Hi hat Pedal 485 Timbale High 535 Classic 437 Standard Hi hat Pedal 1 486 Timbale Low 536 JazzA 438 Standard Hi hat Pedal 2 487 Timpani High 537 JazzB 439 C...

Page 33: ...ale Low Timbale High Agogo Low Agogo Cabasa Maracas Short Whistle Long Whistle Short Guiro Long Guiro Claves Hi Wood Block Low Wood Block Mute Cuica Open Cuica Mute Triangle Open Triangle Shaker Jingl...

Page 34: ...i hat Open Funk Tom 3 Funk Tom 2 Funk Crash 1 Funk Tom 1 Funk Ride Funk Crash 2 Electronic Bass Drum 1 Electronic Bass Drum 2 Electronic Snare Electronic Snare Rim Electronic Tom 6 Electronic Hi hat C...

Page 35: ...z Bass Drum 2 Jazz Snare Jazz Snare Rim Jazz Tom 6 Jazz Hi hat Close Jazz Tom 5 Jazz Hi hat Pedal Jazz Tom 4 Jazz Hi hat Open Jazz Tom 3 Jazz Tom 2 Jazz Tom 1 Jazz Ride Chinese Cymbal 2 Brush Bass Dru...

Page 36: ...estra Hit BRASS 57 Trumpet 58 Trombone 59 Tuba 60 Muted Trumpet 61 French Horn 62 Brass Section 63 Synth Brass 1 64 Synth Brass 2 REED 65 Soprano Sax 66 Alto Sax 67 Tenor Sax 68 Baritone Sax 69 Oboe 7...

Page 37: ...ium Mambo Loop 72 Latin Loop 23 Cumbia Loop 73 Bossa Loop 24 Ranchero Style Loop 74 Samba 2 Loop 25 Tropical Loop 75 3 4 Pop Loop 26 Latin Jazz Loop 76 Pop Loop 27 Calm Tumbao Loop 77 Jazz 2 Loop 28 U...

Page 38: ...0 4 4 100 4 19 Beat 19 0 4 4 100 4 20 Beat 20 0 4 4 100 4 RHYTHM NO NAME KIT BANK BEAT TEMPO MEASURE 1 Funk 1 0 4 4 110 4 2 Funk 2 0 4 4 90 4 3 HipHop 1 0 4 4 90 4 4 HipHop 2 0 4 4 113 4 5 Jazz 1 0 4...

Page 39: ...0 Drum Volume DRM 0 32 RHYTHM Parameter Abbreviation Value Rhythm Type RHM 1 12 Level LEV 1 6 Drum Volume VOL 0 32 VOICE Parameter Abbreviation Value Voice Number NUM H C 1 527 1 23 Voice Volume VOL 0...

Page 40: ...66 X O SostenutoPedal 67 X O SoftPedal 80 X O ReverbProgram 81 X O ChorusProgram 91 X O ReverbLevel 93 X O ChorusLevel 120 X O AllSoundsOff 121 X O ResetAllControllers 123 X O AllNotesOff Program X O...

Reviews: