ENGLISH
K 150
5
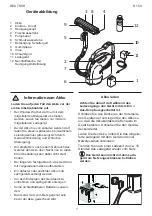
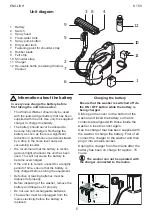
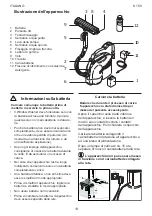
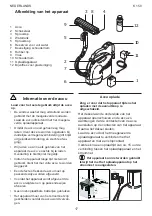
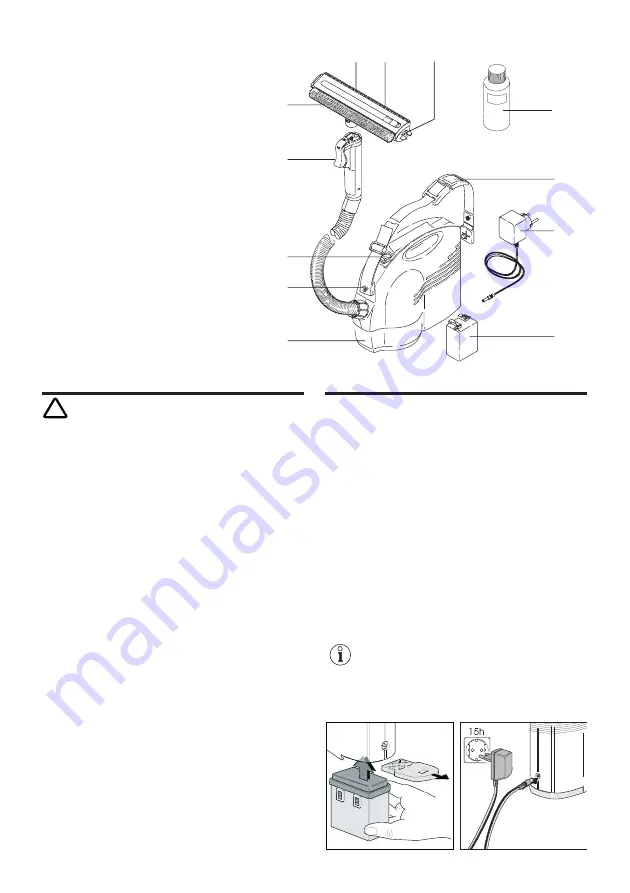
Unit diagram
1
9
5
2
7
6
3
8
4
10
11
12
1
Battery
2
Switch
3
Spray head
4
Fresh-water tank
5
Spray pump button
6
Dirty-water tank
7
Fastening point for shoulder strap
8
Rubber blade
9
Felt strip
10 Shoulder strap
11 Charger
12 Re-usable bottle containing Window
Cleaner
Information about the battery
In every case charge the battery before
first taking the unit into service.
•
The Window Washer should only be used
with the lead-acid gel battery that has been
supplied with the unit. Use only the supplied
charger to charge this battery.
•
The battery should never be allowed to
become fully discharged. Recharge the
battery as soon as there is a significant
reduction in performance (as demonstrated
by a drop in the noise level and poor
vacuuming results).
•
We recommend that the battery is rechar-
ged overnight whenever the unit has been
used. This will not cause the battery to
become overcharged.
•
If the unit is to remain unused for a lengthy
period of time, ensure that the battery is
fully charged before storing the equipment.
•
Defective or leaking batteries must be
disposed of properly.
•
Before disposing of the washer, remove the
battery and dispose of it properly.
•
Do not use non-rechargeable batteries.
•
The washer must be unplugged from the
mains electricity before the battery is
replaced.
!
Charging the battery
Ensure that the washer is switched off via
the ON / OFF button while the battery is
being charged.
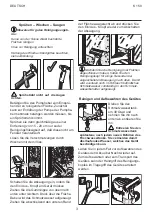
Slide open the cover on the bottom of the
washer and insert the battery so that its
contacts are aligned with those inside the
washer. Close the cover again.
Use the charger that has been supplied with
the washer to charge the battery. First of all
connect the charger to the washer and then
plug it into a mains socket.
Unplug the charger from the mains after the
battery has been on charge for approx. 15
hours.
The washer can not be operated with
the charger connected to the mains.
Summary of Contents for 1.084 Series
Page 1: ...5 956 425 04 99 A 11877 ...


