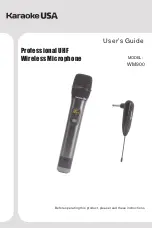
A. Microphone - Loading Batteries
Hold microphone body and turn the lower part of the microphone body
counter-clockwise. Insert 2 x AA batteries (not included) into battery
compartment. Make sure battery positions match polarity signs for
proper installation.
B. Receiver - Charging and Use
1. This Receiver has a built-in Rechargeable Lithium-ion Battery. Make
sure battery is fully charged for about 1 hours with the provided USB
charging cable. A fully charged receiver allows for up to 6 hours of
normal use.
2. Insert the 6.3 mm (1/4 inch) male end into your microphone jack on your
karaoke machine, amplifier or electrical component.
3. Slide the On/Off Switch at the side of the Receiver to on. The blue
indicator will light up.
When singing, adjust your equipment's microphone volume level to a
comfortable level. If you experience feedback from your equipment, lower
microphone volume or move microphone away from speaker(s).
Quick Start Guide:
2
DC
IN
5V


