10
OPERATING INSTRUCTIONS
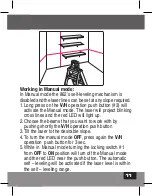
Working in Automatic mode (self-leveling):
In automatic mode the laser level will level itself in the
range of ± 3° and will project horizontally or vertically or
both lines simultaneously.
1. Remove the laser from the case and place it on a solid
flat Vibration free surface or on a tripod.
2. Push the locking switch #1 forward to the
ON
position.
The laser level will generate the crossed horizontal and
vertical lines and the green LED will light up.
3. Choose the beams that you want to work with by
pushing the
V/H
operation push button
4. If the initial slope of the laser is beyond ± 3° the laser
lines will flash. In this case reposition the laser on a
more leveled surface.
5. Before moving the laser level switch the locking switch
#1 backward to the
OFF
position, this will lock the
pendulum and protect your laser.
Summary of Contents for Prolaser 862
Page 21: ...21...
Page 41: ...41...
Page 61: ...61...
Page 62: ...62 Kapro 862 Prolaser Cross 862 Prolaser 2AA 20m 65 RU...
Page 63: ...63 64 65 66 67 68 69 70 71 72 73 78 79 80...
Page 64: ...64 20 65ft 1 4...
Page 65: ...65 II EN 60825 1 25249 6 65...
Page 66: ...66 10 C 45 C...
Page 67: ...67 AA x 2 1 5 10 2 2 3...
Page 68: ...68 1 2 3 4 5 6 7...
Page 69: ...69 1 2 3 a b 4 5 6 7 8 9 10...
Page 70: ...70 3 1 2 1 ON 3 4 3 5 1 OFF...
Page 71: ...71 1 3 4 2 3 3 4 3 5 1 ON 4...
Page 72: ...72...
Page 73: ...73 Kapro 1 5 2 0 5 3 4 a1 1 5 0 5 1...
Page 76: ...76 3 a1 5 4 a1 2 6 a1 approximately 5m 1 5m Figure 5 X 1 5 5 5 x a1 x a2 Figure 6 6...
Page 77: ...77 6 5 a1 a2 1 1 4 2 a1 7 3 2 4 5 approximately 4m Figure 7 a1X 7 4...
Page 78: ...78 6 2 a1 8 7 a1 a2 1 a1 X 2m X a2 X Figure 8 2 8...
Page 80: ...80 862...
Page 81: ...81...

